Category: "R:WM Dev Blog"

Multiplayer Continues to Mature!
Nov 15th
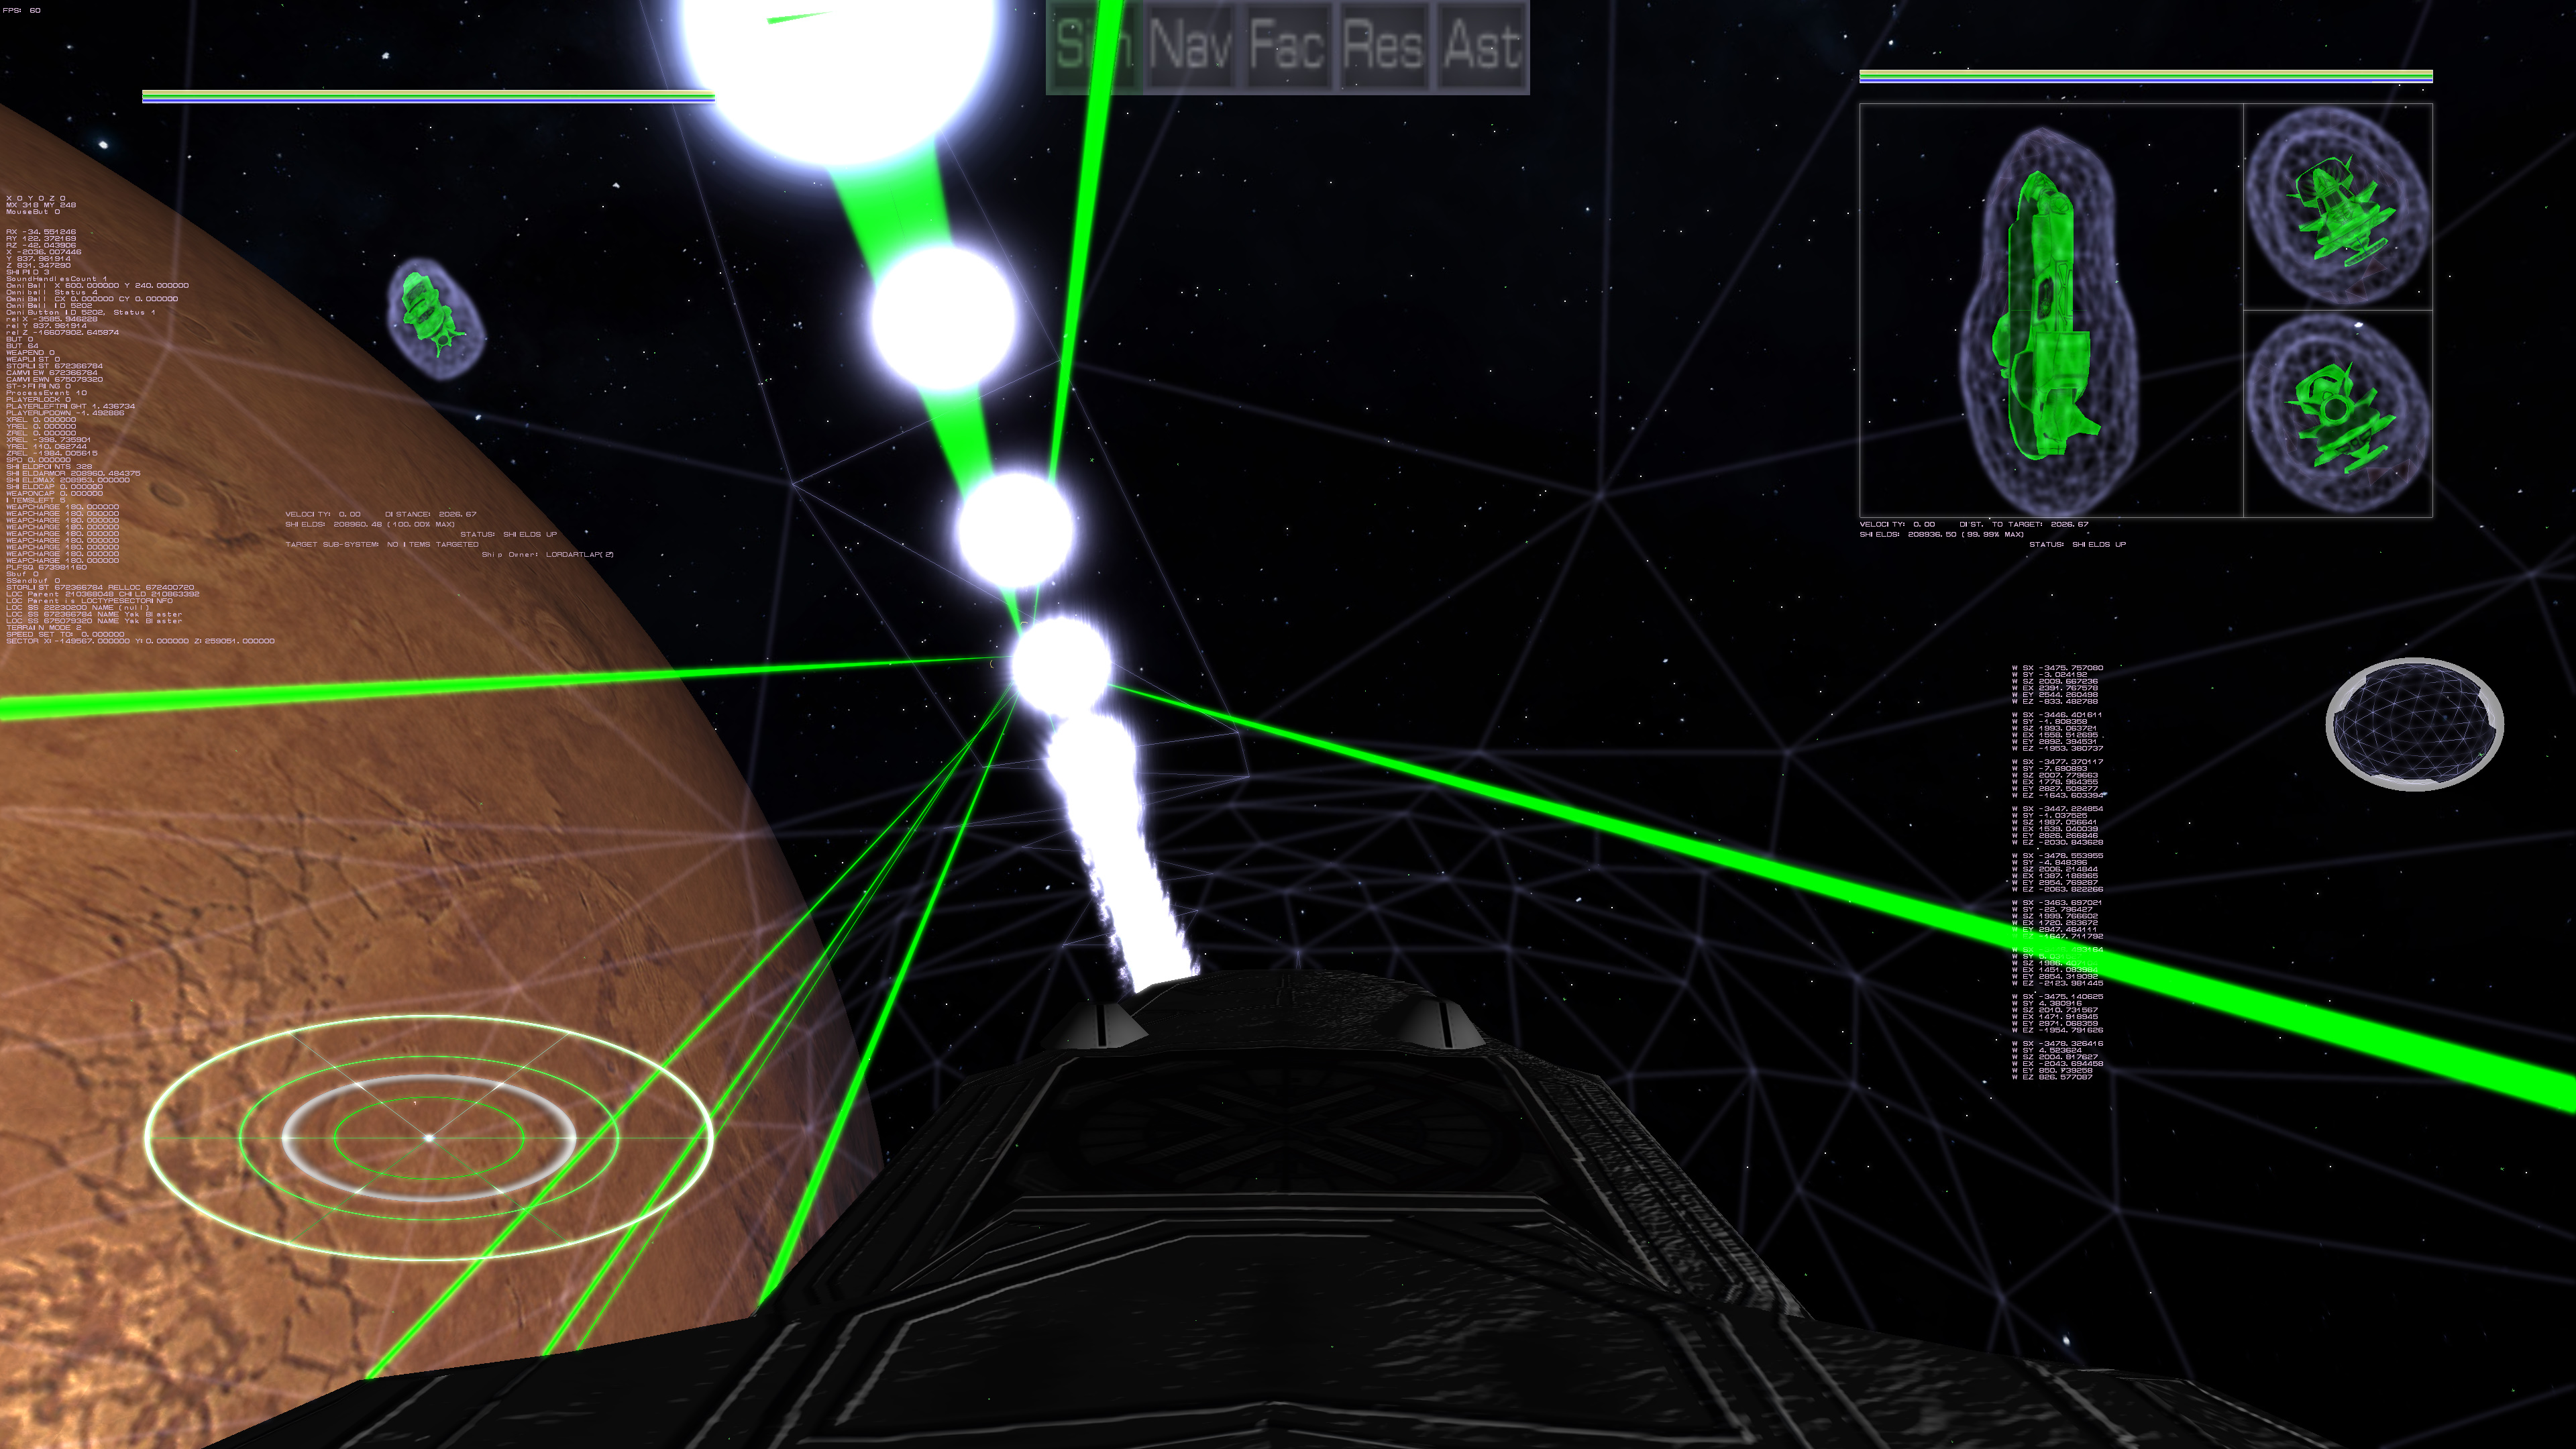

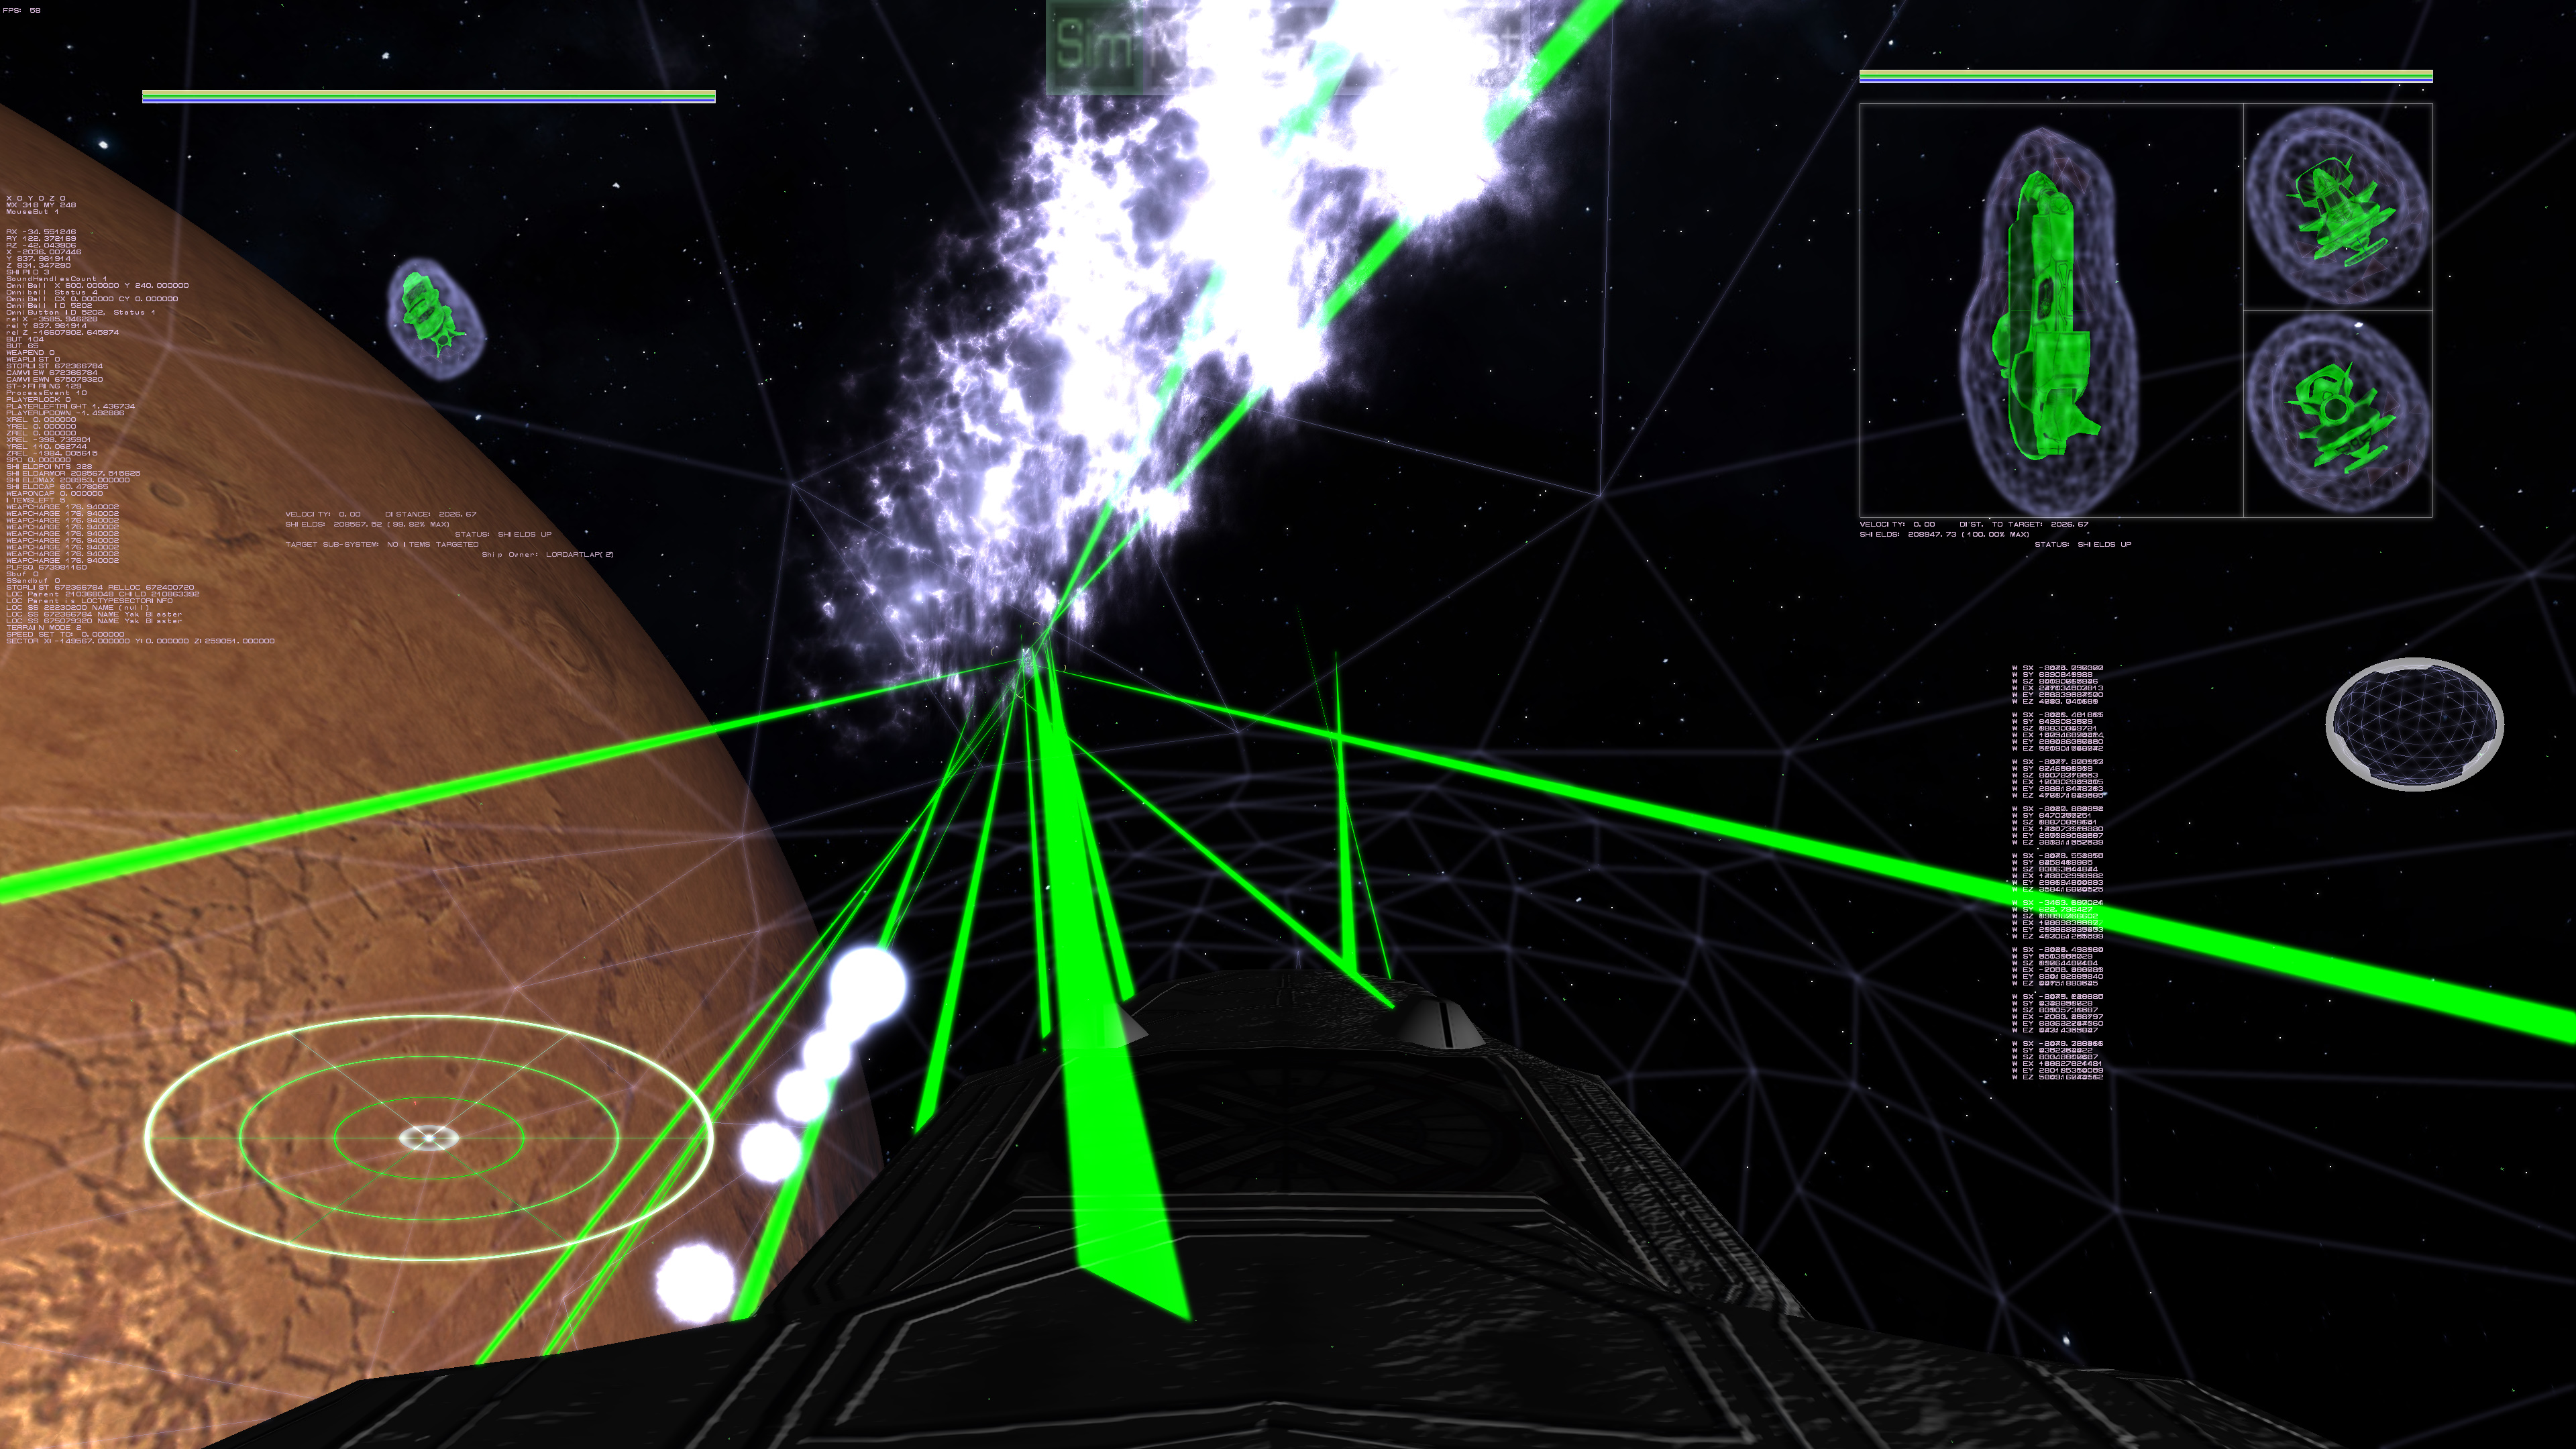

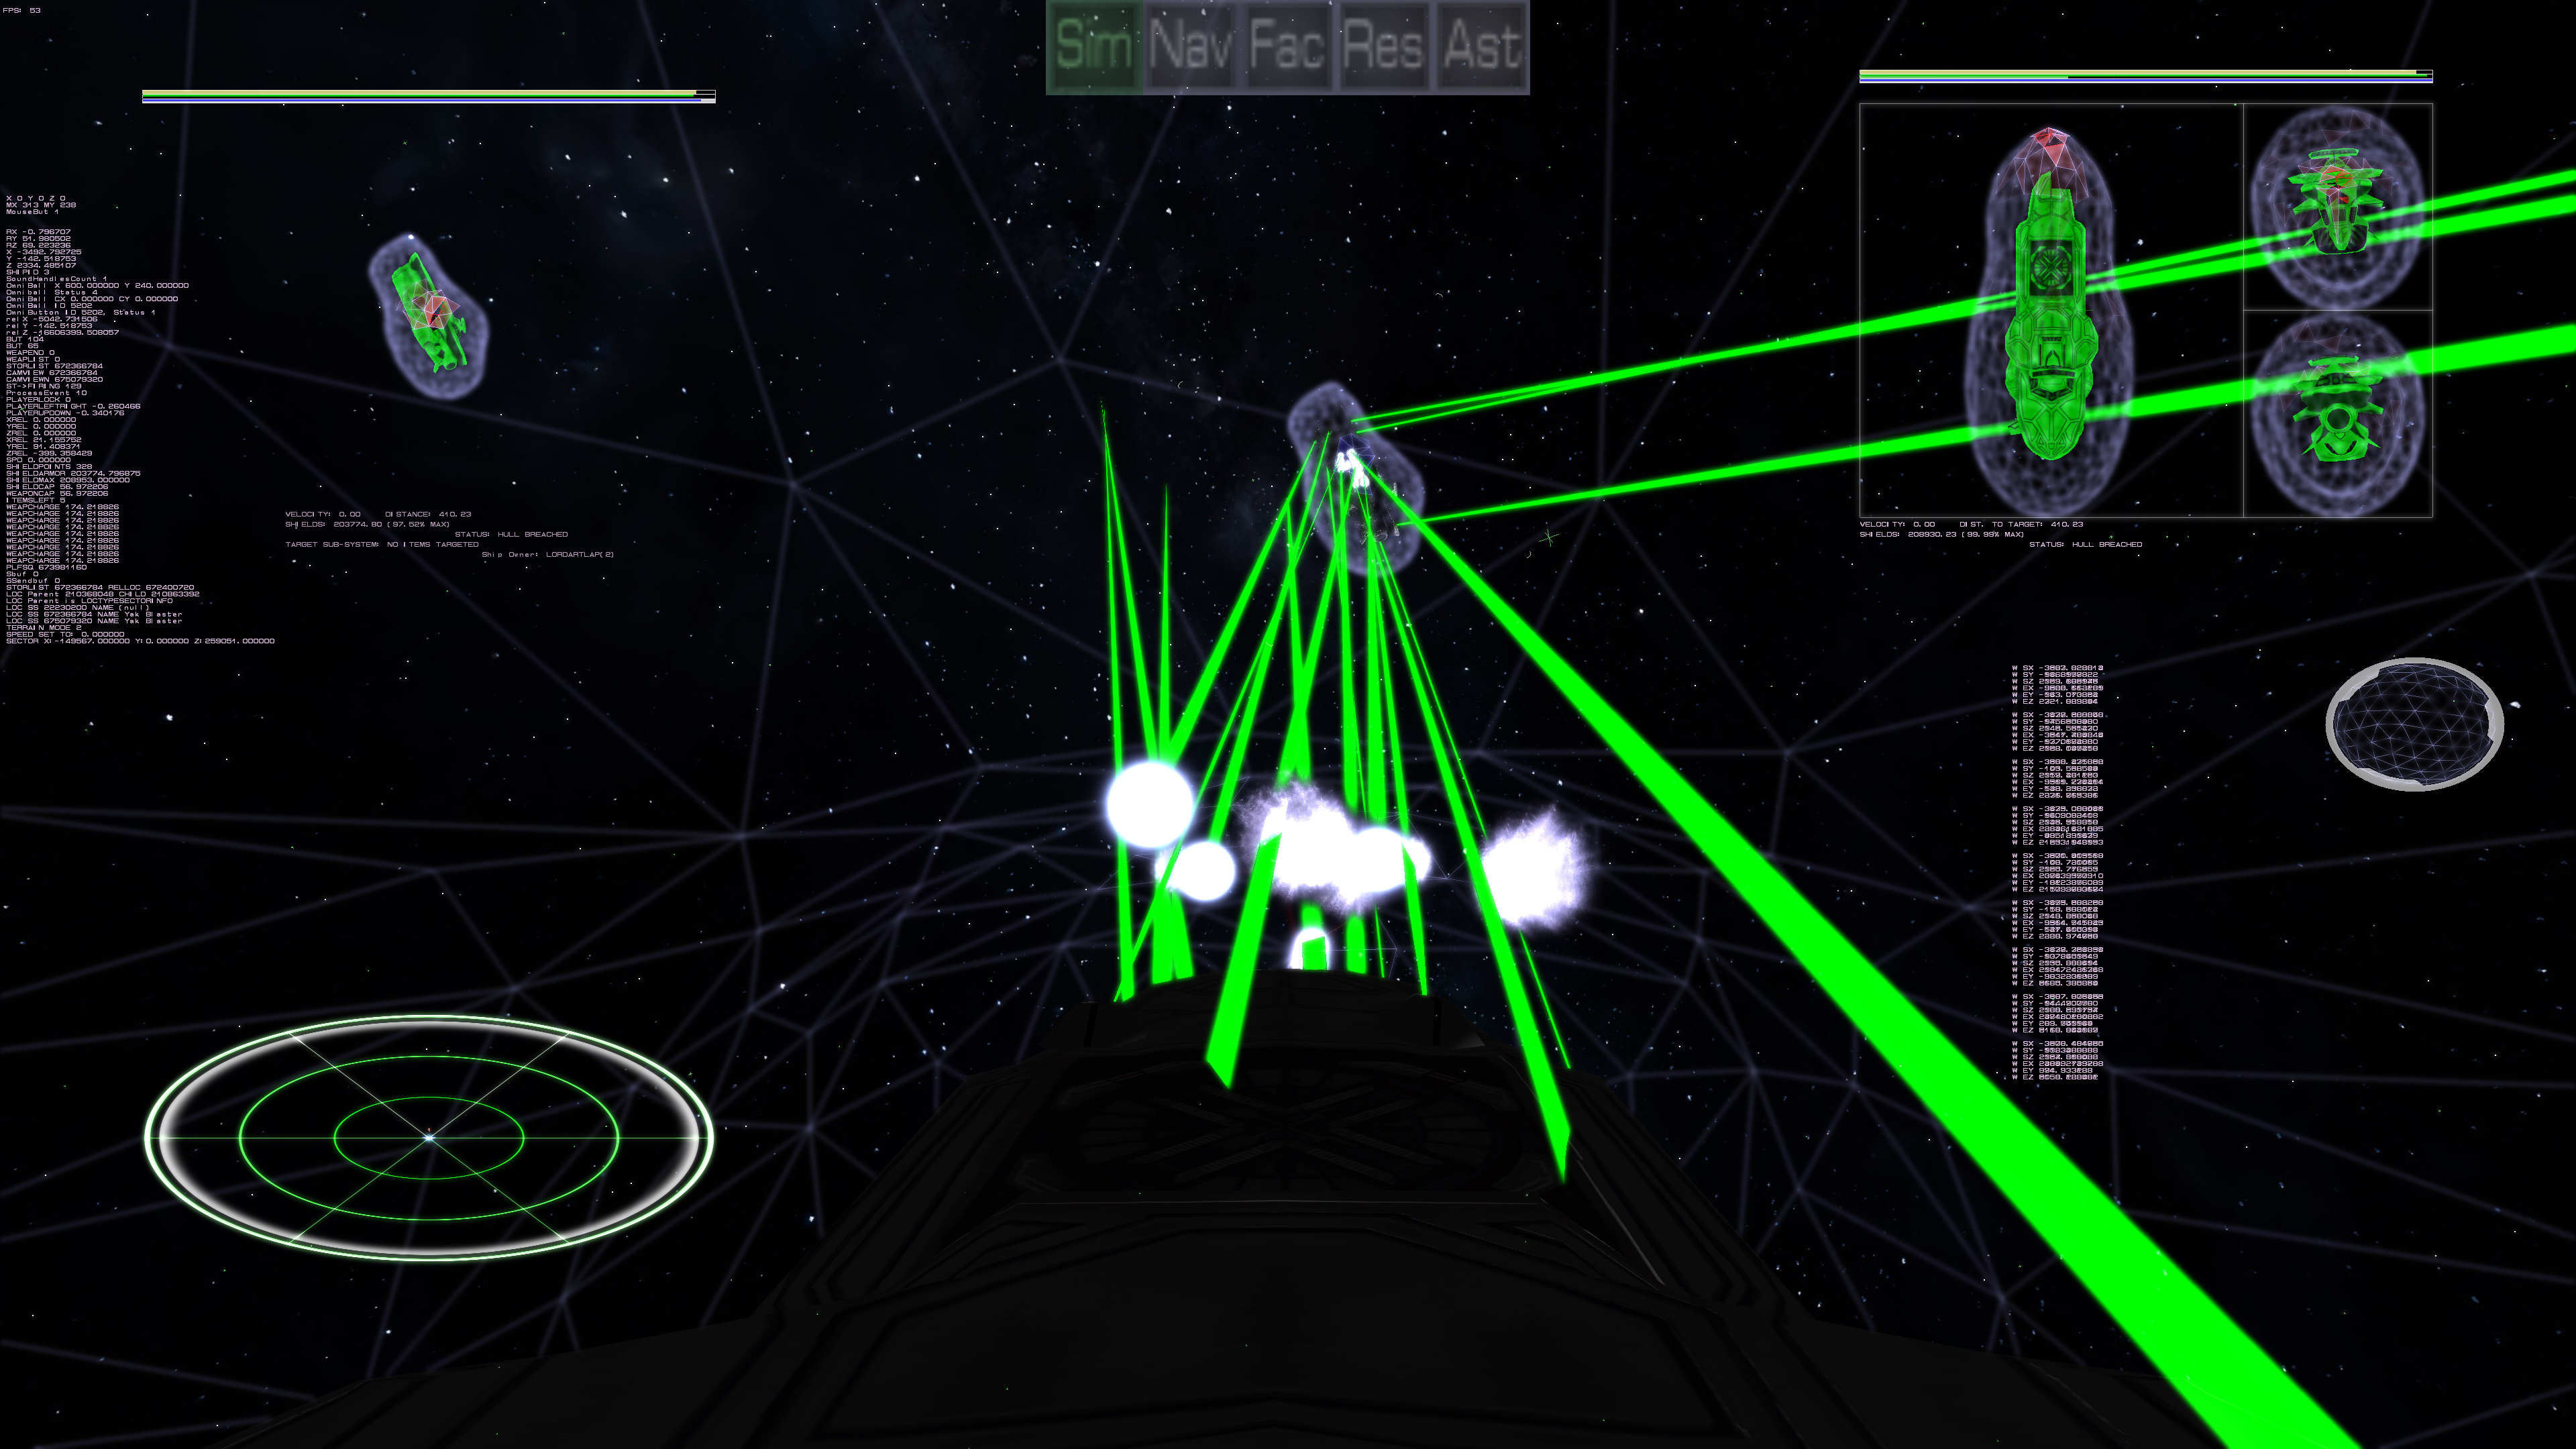

Here is an example of the multiplayer with capitol ships firing upon each other. You can see the turrets firing as well as the enemy capitol ship firing and the player taking damage. The shields on both the target and self-damage monitors are showing the damage by showing the blue turning to red. When it is just a red outline, then a shield breach exists. In the last screen shot, the shields are in the process of dropping because the hull was also breached and the reactor was destroyed so the shield can no longer be powered (hence the status of disabled).
So behind the scenes, turrets over the multiplayer now work properly. This is significant because the turret AI therefore also works across the network, which is the first time AI has worked across multiplayer (which you are seeing in the screenshots). A successful test of the ability for the players to select their ships also worked fine. We tried out an ALL capital ship battle, and a fighter versus a single capital ship. This is to help with game balance, and certainly the pulse based ships did better against the capital ship shields. I have code now via the scripting engine that is able to sends messages and activate local scripts. This enables the scripts to detect when a ship gets destroyed, who did it, and then keep track and respawn that ship based on the rules of the scenario. These will be tested during the next multiplayer test. We keep trying to add more clients, but it seems it can handle everything we throw at it without stuttering or lag. The multiplayer is becoming more and more mature, and I look forward to the “King of the Hill” scenario now currently being created.

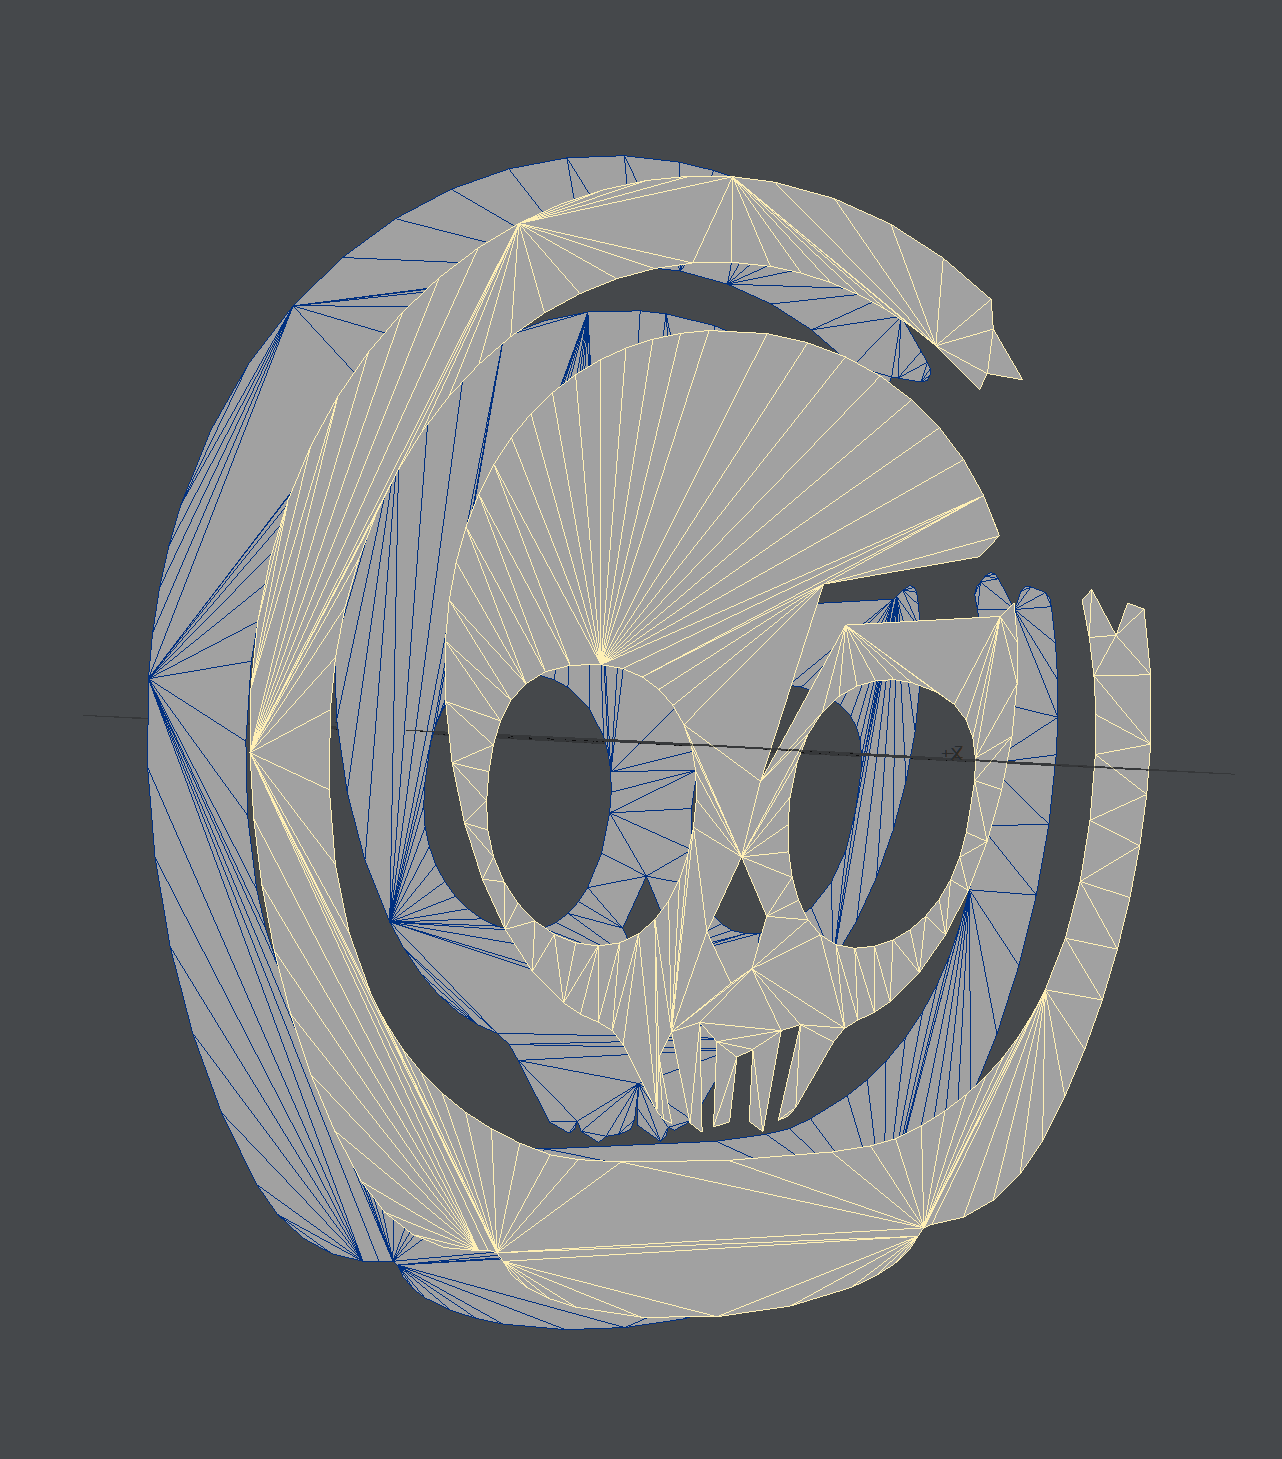
Even the Smallest Details Make A Big Impact
Nov 14th
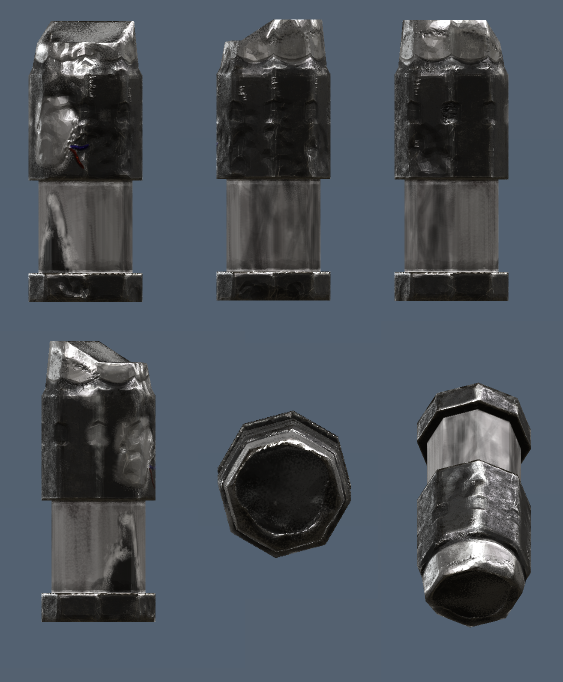
Below are some samples of the debris you may witness as your adversary blows up in front of you. The models were created in zbrush and textured in 3D coat.
Full story »
How to Science: A Beginner's Guide to Technological Superiority
Nov 11th
Hello again, this is Adam coming to you with another look at Rank:Warmaster's systems and mechanics! Today I'll be talking about the structure of our game's technology tree.
Researching new technologies, buildings and ship components begins with constructing a Research Facility in a player's base. The technology level of the base determines the speed at which it will generate Research Points (RP) when actively assigned to a project, so researching how to research is always a solid investment! Each Research Facility can be assigned to a project or to assist another facility on the same planet in researching a project. There are several different Research Facilities to unlock, some of which are powerhouses for RP generation on their own while others are more suited towards effeciently supporting the research of other facilities. All research projects experience diminishing returns the more facilities you assign to them, so diversifying your research will always be more efficient overall. However, the advantage gained from quickly researching a powerful new technology by throwing all available resources at it can also be considerable, so adjusting strategy to match the situation is key.
The most basic level of research is Primary Technologies, such as Electromagnetics, Materials and Fabrication. These are the trunk of the technology tree and are required for every other technology. You begin the game with a basic knowledge of each and can advance every Primary Technology through several tiers of power. All other technologies at a given tier have a basic requirement of one or more Primary Technologies, so these are the most important projects a player can complete. Each new tier of Primary Technology also helps improve some of the traits of the previous tier, making buildings and components cheaper, lighter, or more power efficient, wherever applicable.
Branching off from the central trunk are Secondary Theories, including research into Electromagnetic Hypervelocity, Integrated Nanoconstruction, and Wave Motion Harmonics. These are much more focused and are the precursor technologies for buildings and ship components as well as related modifications. Secondary Theories require mastery of at least two Primary Technologies at the same tier, so a firm foundation is needed before a player advances their research into more specialized disciplines. Secondary Theories are also divided into tiers, where each new tier builds upon and improves the efficiency of the previous tier's buildings and components.
After researching a Secondary Theory, all related Applications and Modifications will be unlocked for researching. Applications are the buildings constructed in your base and the components used when designing ships. Modifications apply a beneficial modifier to a specific class of technology, such as making all railguns hold more ammunition reserves, or all main thrusters are more energy efficient. Modifiers require at least three different Primary Technologies and are the most intensive to research but their benefits apply to all technology within its class, allowing a player to improve their current equipment without fully committing the resources to reaching a higher tier of the technology tree.
Moving forward, the technology tree will continue to be expanded and refined to achieve a balanced, enjoyable and varied game experience. There will be multiple paths to success and many potential strategies to pursuit of system-wide domination. No one method will always be the best, as opponents will deploy vastly different tactics that require each player to formulate counters based on their own playstyle and available technologies.

Asset Screen #4: Messages & behind-the-scenes progress
Nov 8th
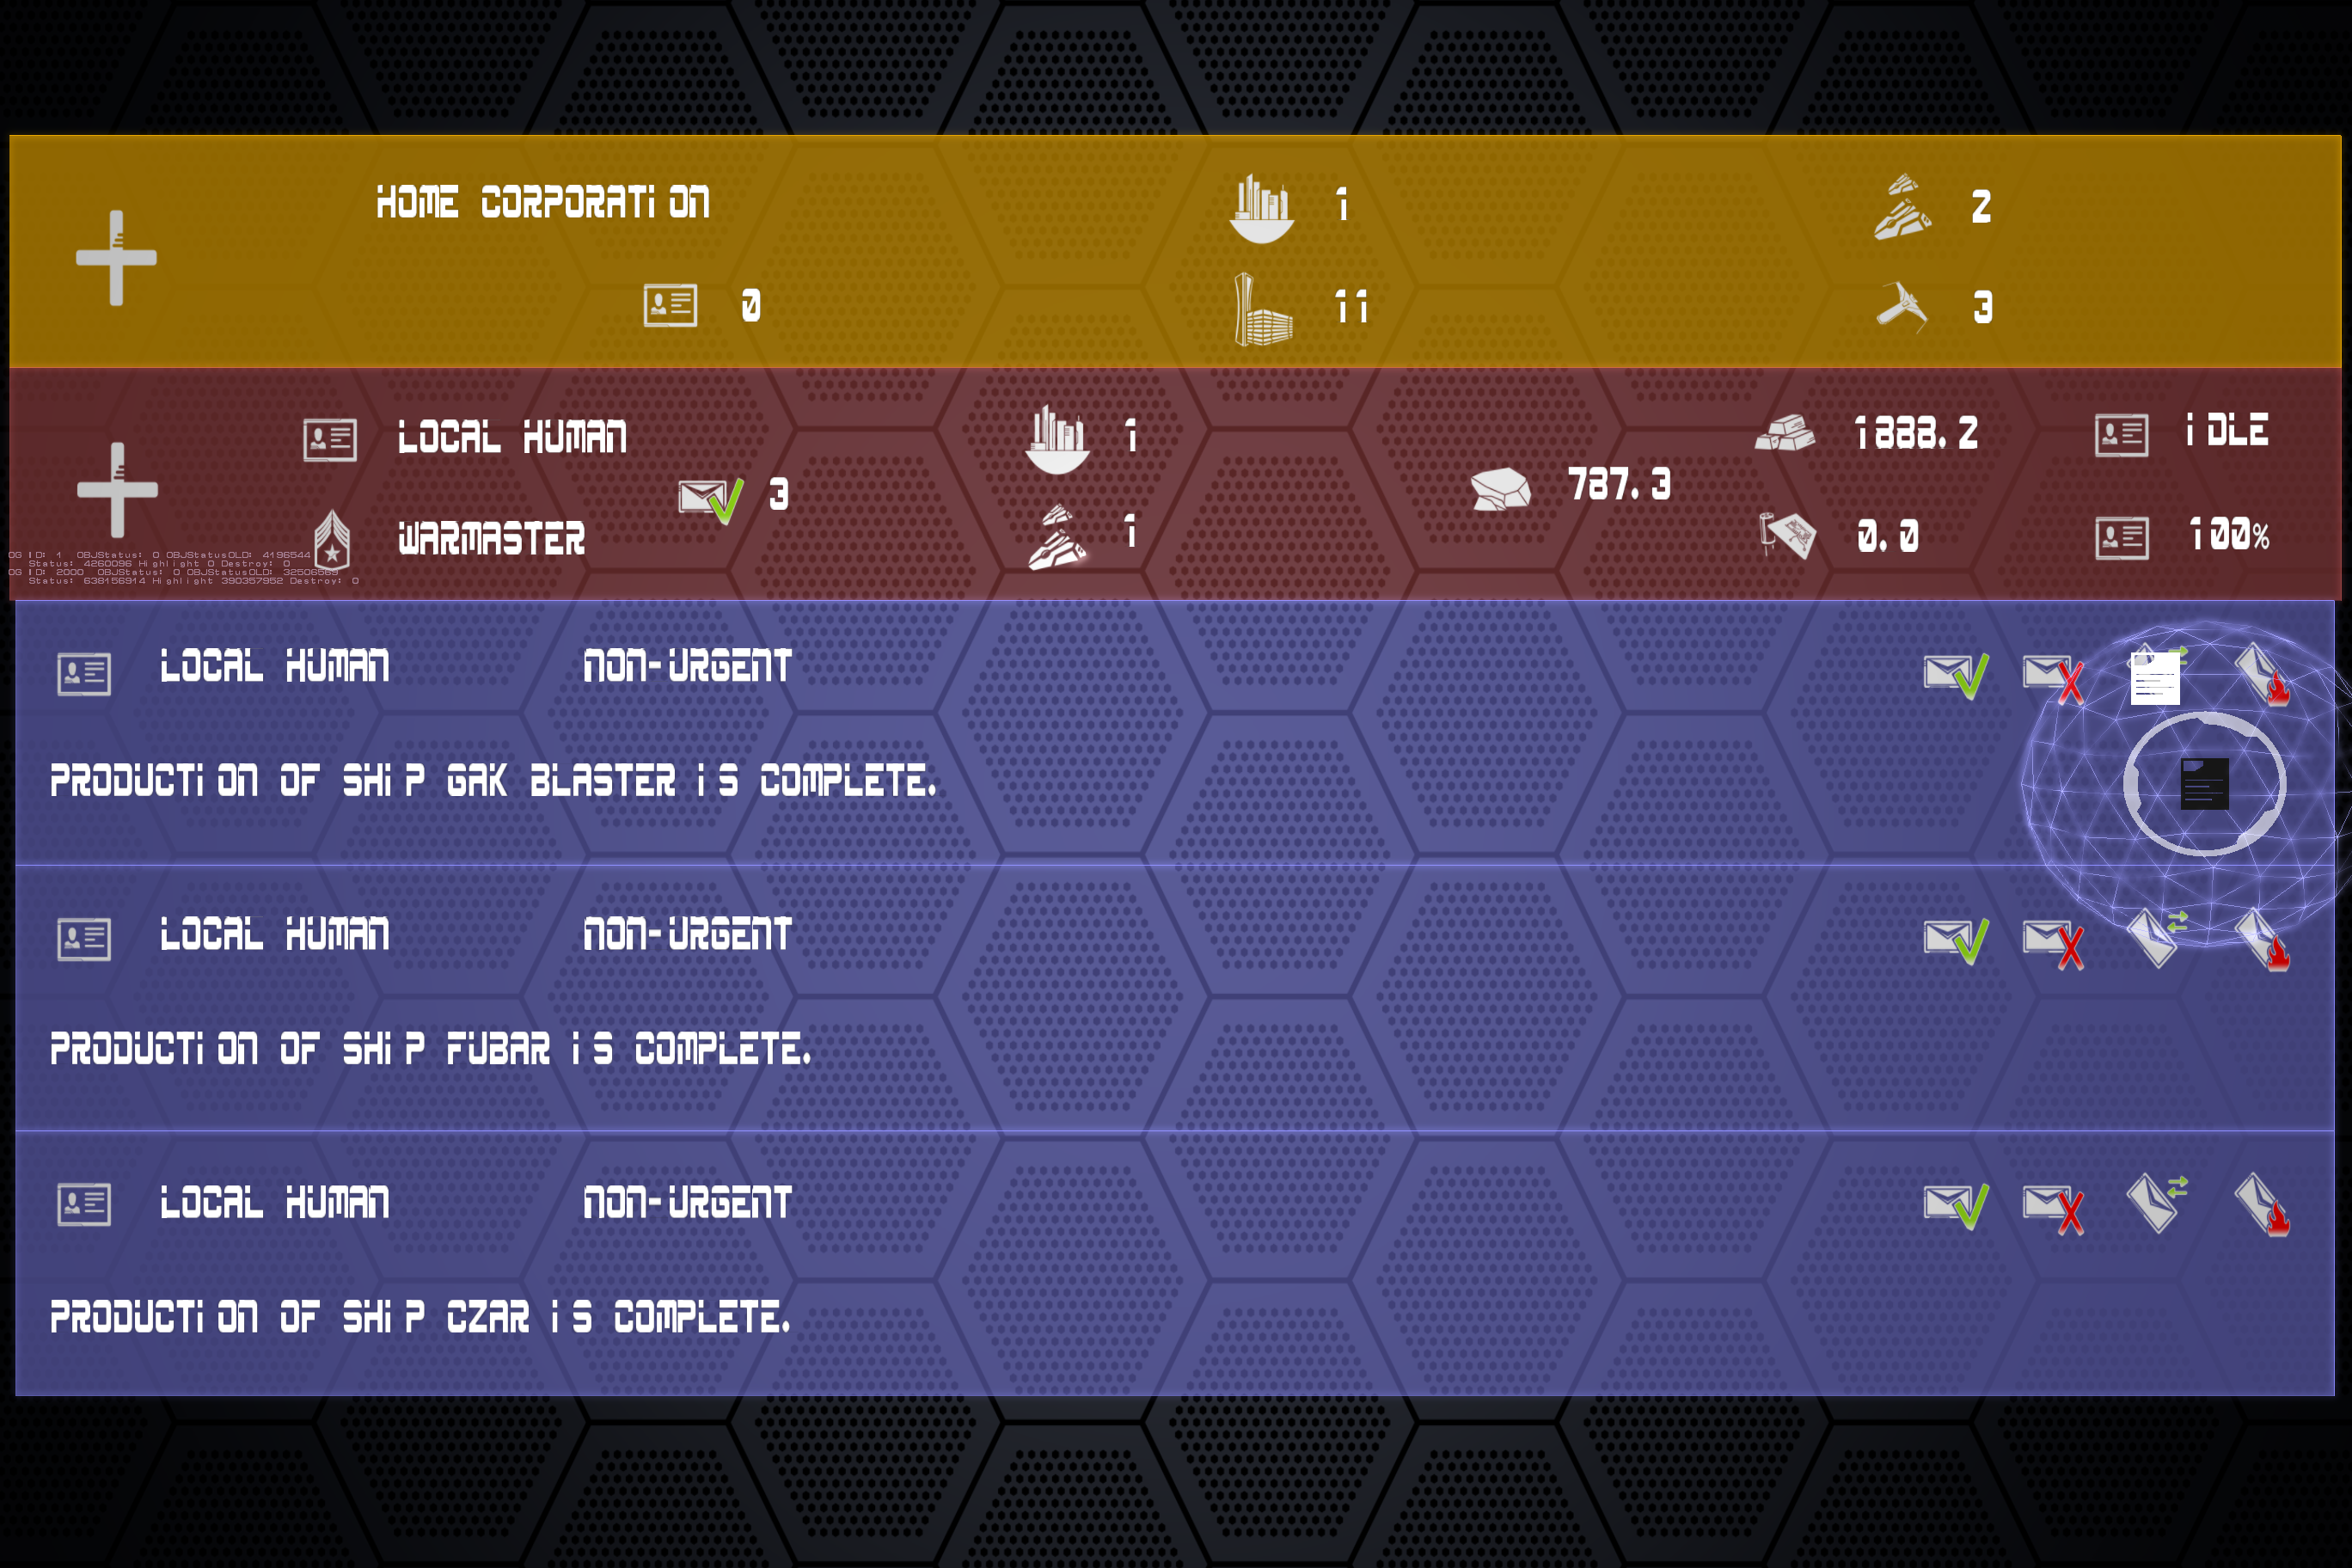
We can now receive status messages and requests from other players or the AI via the asset screen in the new message asset bar (seen here in blue). You'll receive messages when ships or buildings have been constructed, when your AI needs orders (maybe the mayor of one of your cities needs to know what to build next), when an AI or player needs resources such as ore or refined materials, and more.
We've also begun to hook up classes of behavior behind the scenes of the asseet screen. You can now open and close almost all of the asset screen info bars from within the screen just by clicking on the relevant icons.
But the real work of the last few weeks has been the further integration of the gwob system with the rest of Rank: WarMaster. What's a gwob, you may ask? Most games bundle their files together for release: Doom famously used a file format called a WAD. Bethesda games use a format called a BSA. R:WM uses a custom format called a GWOB. Accordingly, we've built an in-house tool called Gwobster to package loose files into gwob archives; we've also made additions to the game code to successfully parse out any information we might need from a gwob archive. It requires a lot of testing, but when you no longer notice the system working because your game assets just load, you know you've written it correctly.

UI/UX Artist: HUD Glow — Behind the Scenes!
Nov 7th
Hello all, this is your UI/UX artist Paul here.
For this week I thought it'd be neat to give a little more "behind the scenes" look at how the icons are going to do what they do, and even what the look like without their make up on.
To lay the groundwork, future-proofing has been a key element in our development plan from the beginning, and the way to ensure graphics stand the test of time is scalability. In other words, we wanted to ensure that the in-game design elements look smooth and crystal clear no matter how large a screen you're throwing them up on and what resolution you're setting it to (I myself recently saw an ad for an 8K smart TV while scrolling through Instagram; it's not far off.)
For this very reason, all of the in-game user interface icons are actual 3D objects consisting of two-dimensional polygon meshes that simply "float" in the game engine's 3D environment. The advantage of doing it this way over simply using raster-based image files like JPG's is that polygons are basically 3D vectors, meaning that they are shapes formed by numerical values, not pixels, and therefore can be manipulated mathematically. This is all a fancy way of saying that polygon icons can be enlarged infinitely, without ever worrying about any blocky pixelated edges. The textures that will be applied to the objects are a uniform solid flat white that GLSL shaders will then add further detail on top of, thus maintaining scalability.
In my last post, I presented a mock-up of the Targeting HUD icons as they are slated to appear in-game. These icons are considerably more colorful and flashy than all previously shown game icons, and the reason is they needed to convey vital information as quickly as possible but without otherwise distracting the player. Thus, a color coding scheme was devised allowing the icons (and hence their message) to be read at a glance, and a glow effect was added to create that sense of urgency.
But this introduced a question: how to we make a 3D polygon with a solid texture glow?
The answer was simple but functional: duplicate the icon, expand its boundaries as if you were "typing" it as character in bold font, and place that behind the original icon as a separately handled object. The glow would be created in the game engine itself via the shaders, bluring the secondary larger icon and giving it a luminous bloom. Poof, instant halo effect! And one that scales!
Full story »

Counting to 7
Nov 4th
I listen to a lot of prog rock and metal, and I always liked things that used uneven time signatures (meters that aren't in 4 or 3). For this track, I wanted to create a groove that was slightly off-putting if one tries to count it or feel a steady beat.
The meters are: 1 2 1 2 1 2 3 | 1 2 1 2 1 2 3 | 1 2 1 2 1 2 3 | 1 2 3 4 5 6 .
Full story »
Better to hit effects!
Nov 1st


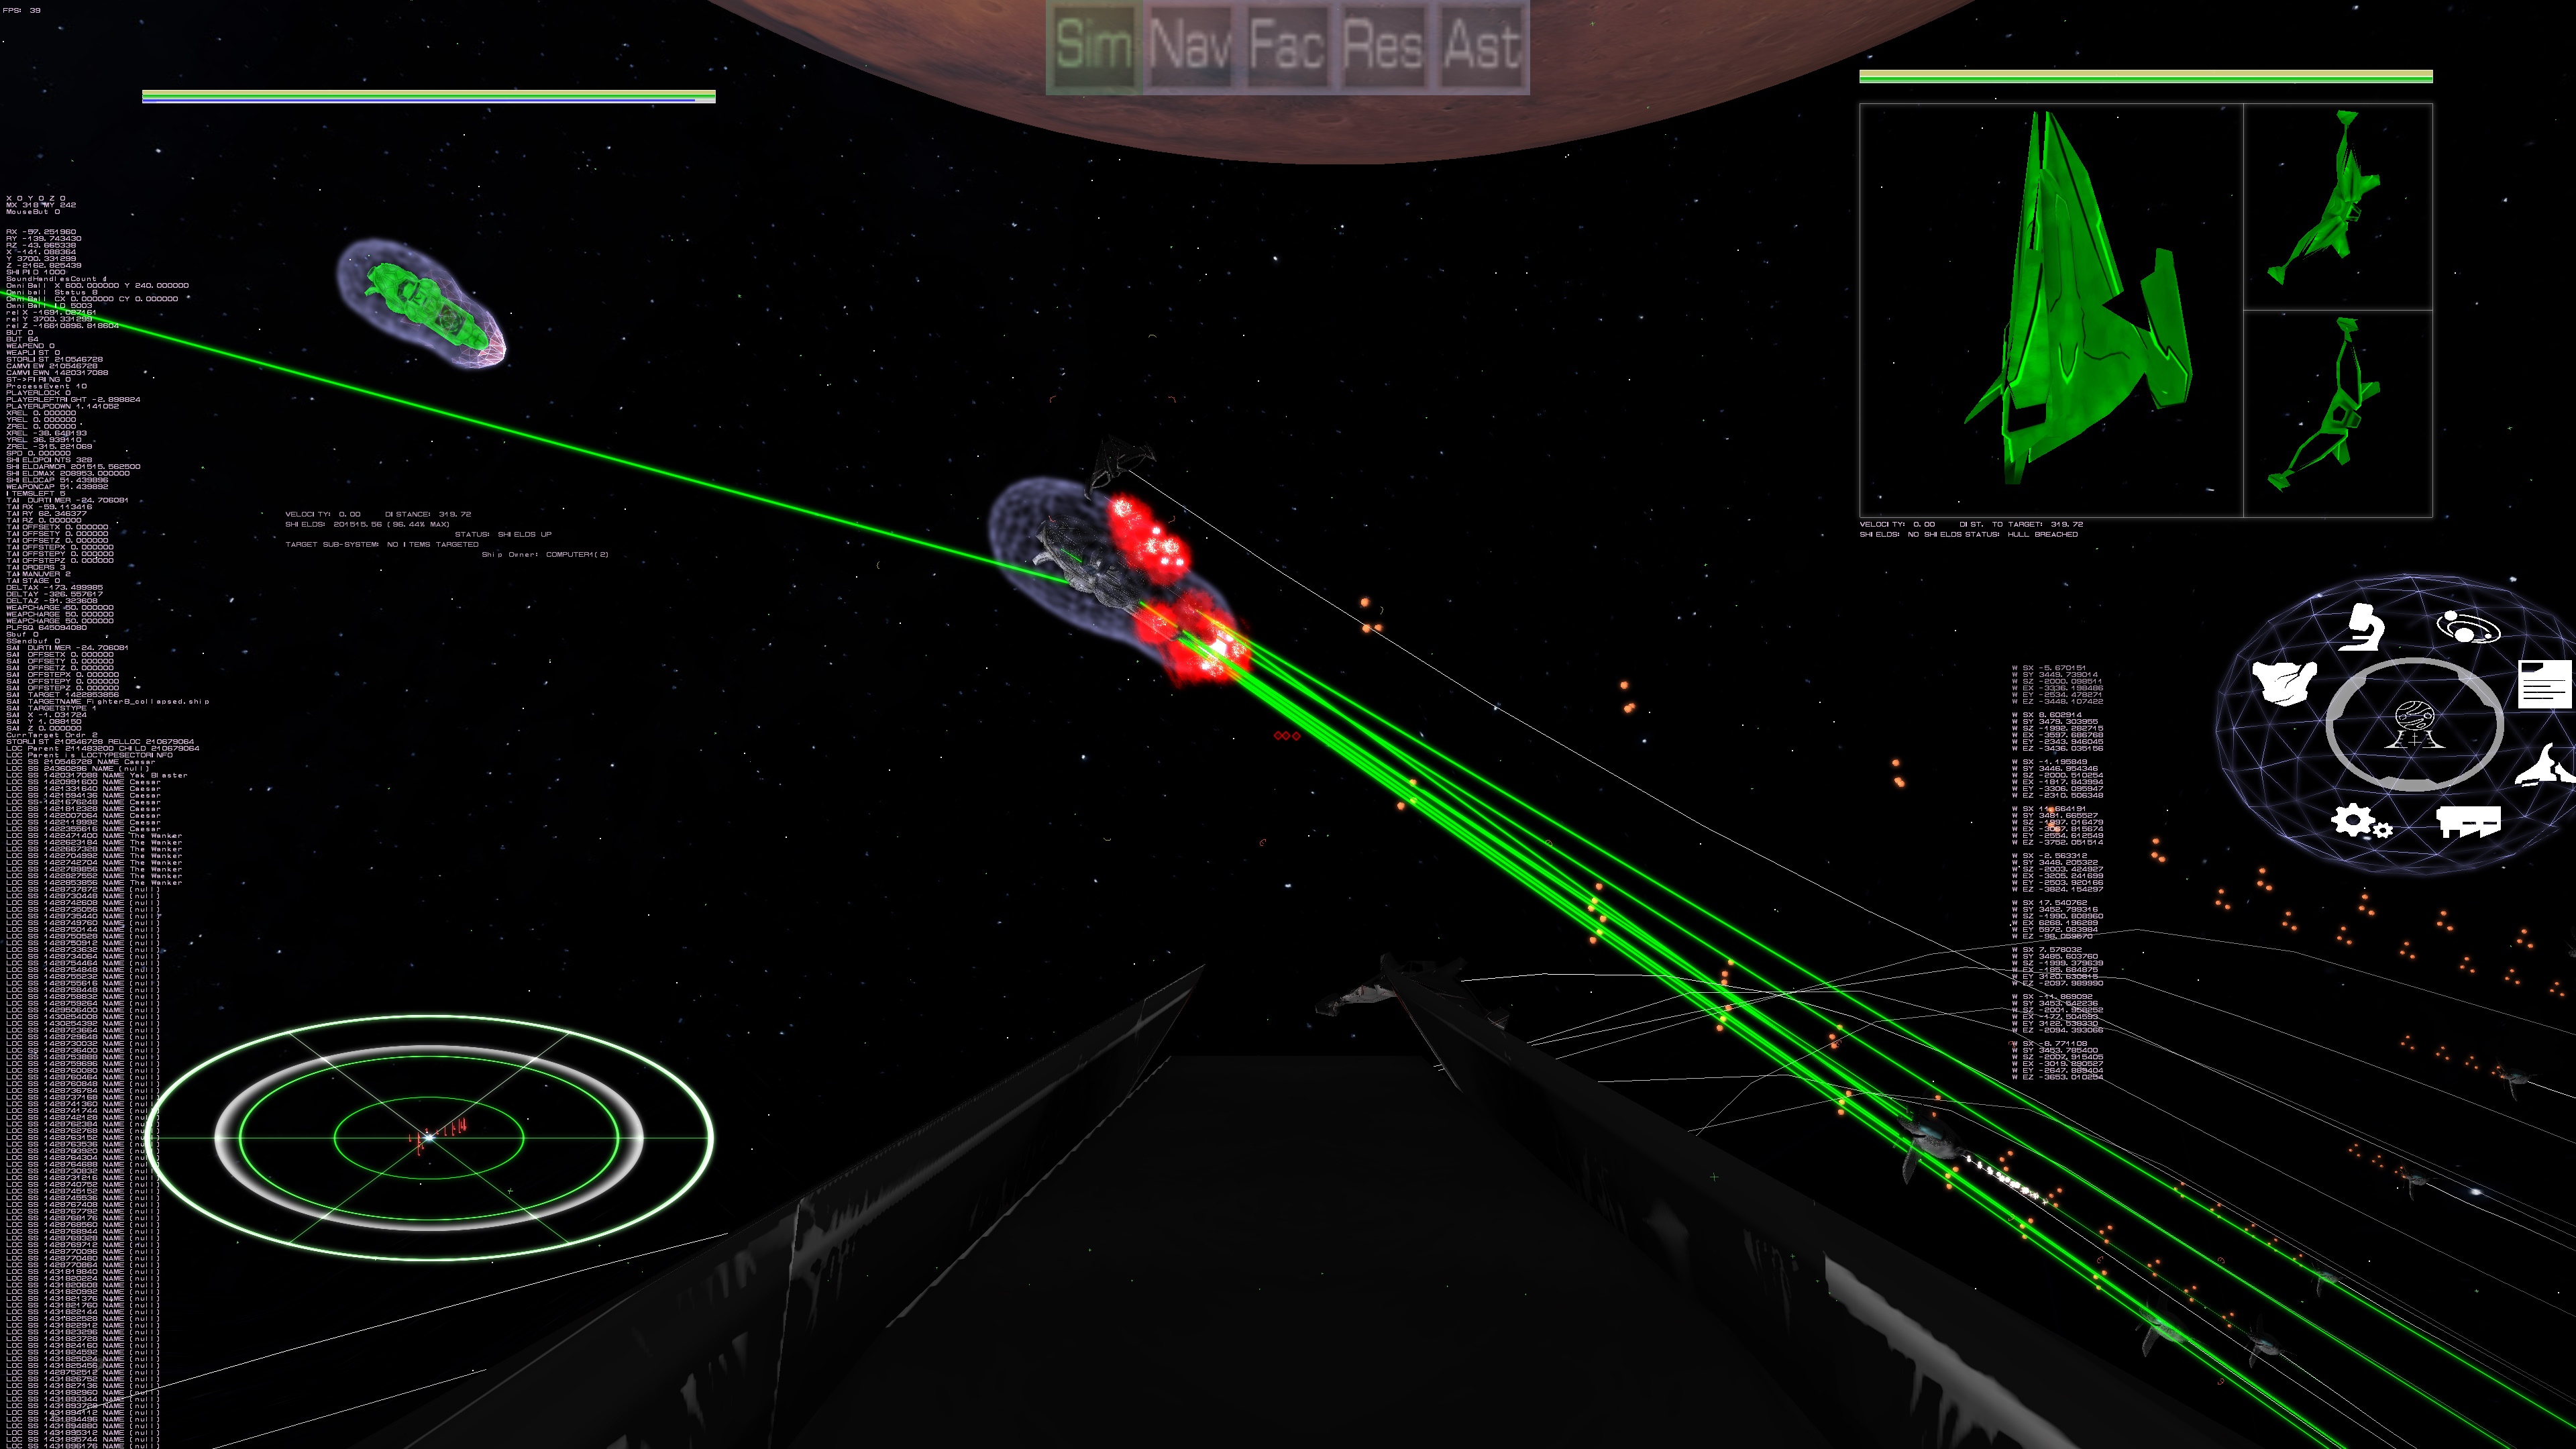
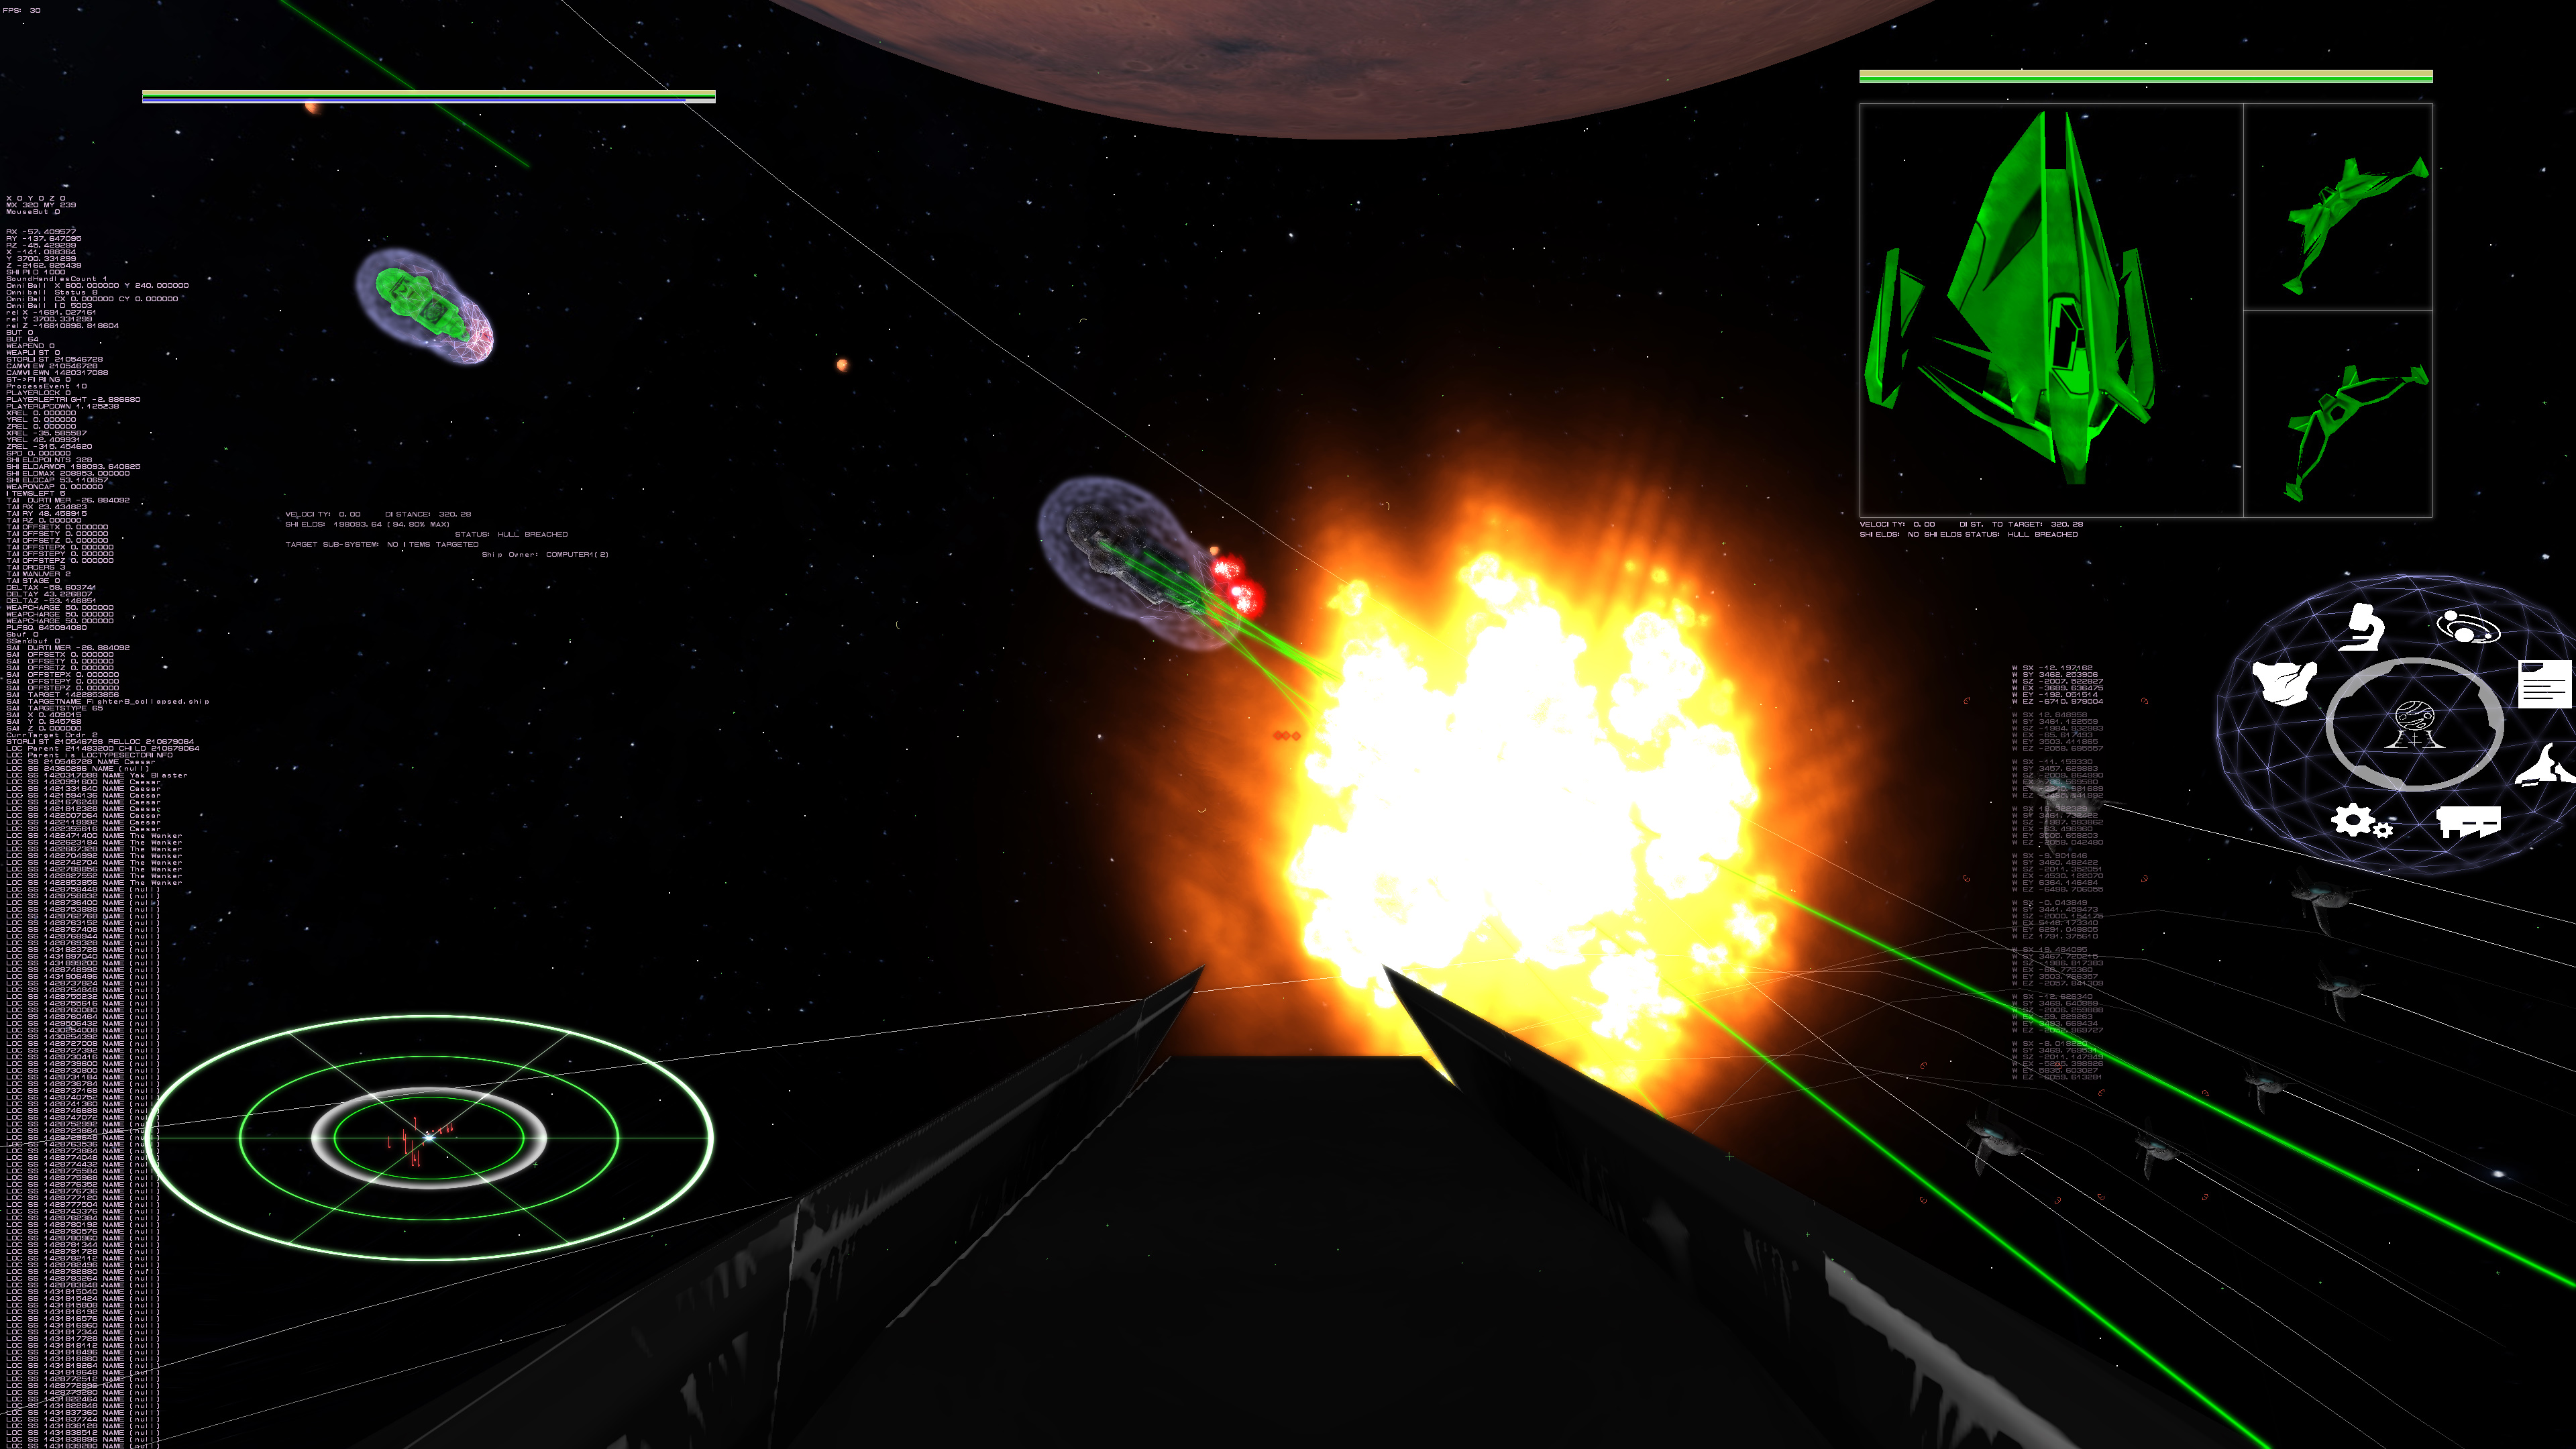
Lots of things behind the scenes such as better network code and support for scenarios and game styles in multiplayer. Tests have already shown that 6 players have no issues playing. I'm trying to organize an larger test. Of course the things that are more obvious is better "to-hit" effects, which is what is in the screen shots. When beams hit shields they flare up as blue-white, when area orange-white and the ground, green-white. When pulses hit something they make larger explosions that are red. Because of the way things now work, one can now trace a trail with the beams which can be more easily seen in the latter screen shots. There is going to be a lot of other visual updates in the coming weeks.
Full story »Concept art for The Warmaster
Oct 31st
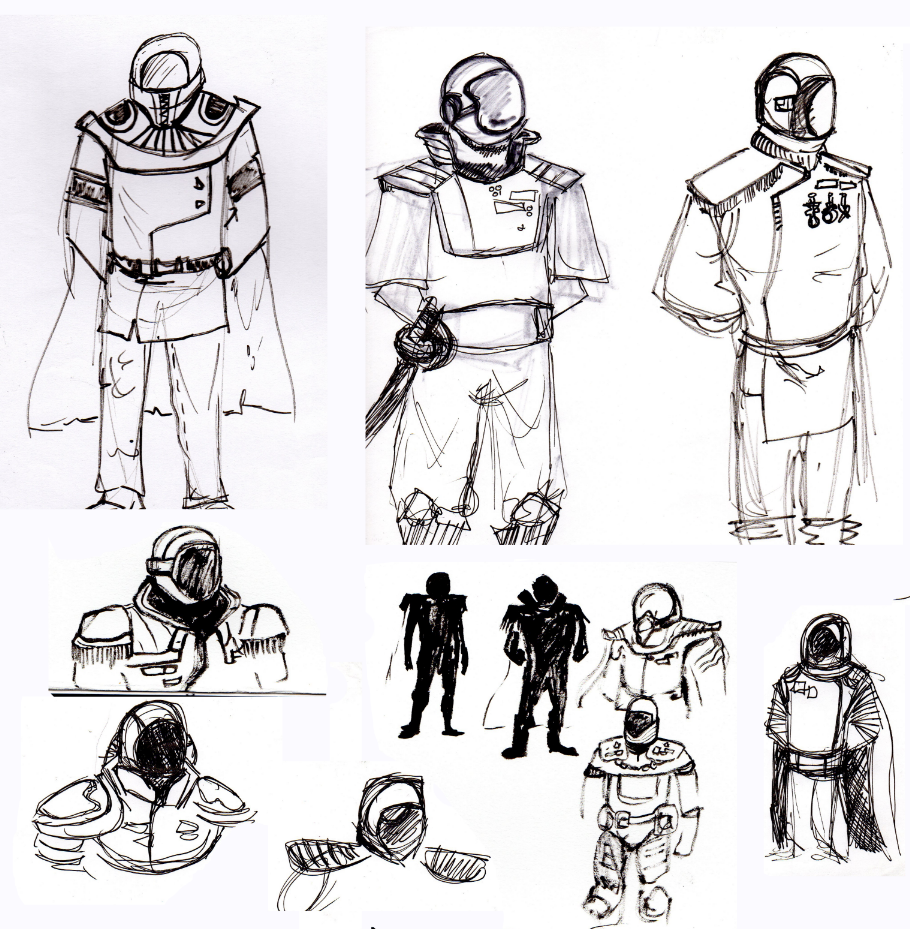

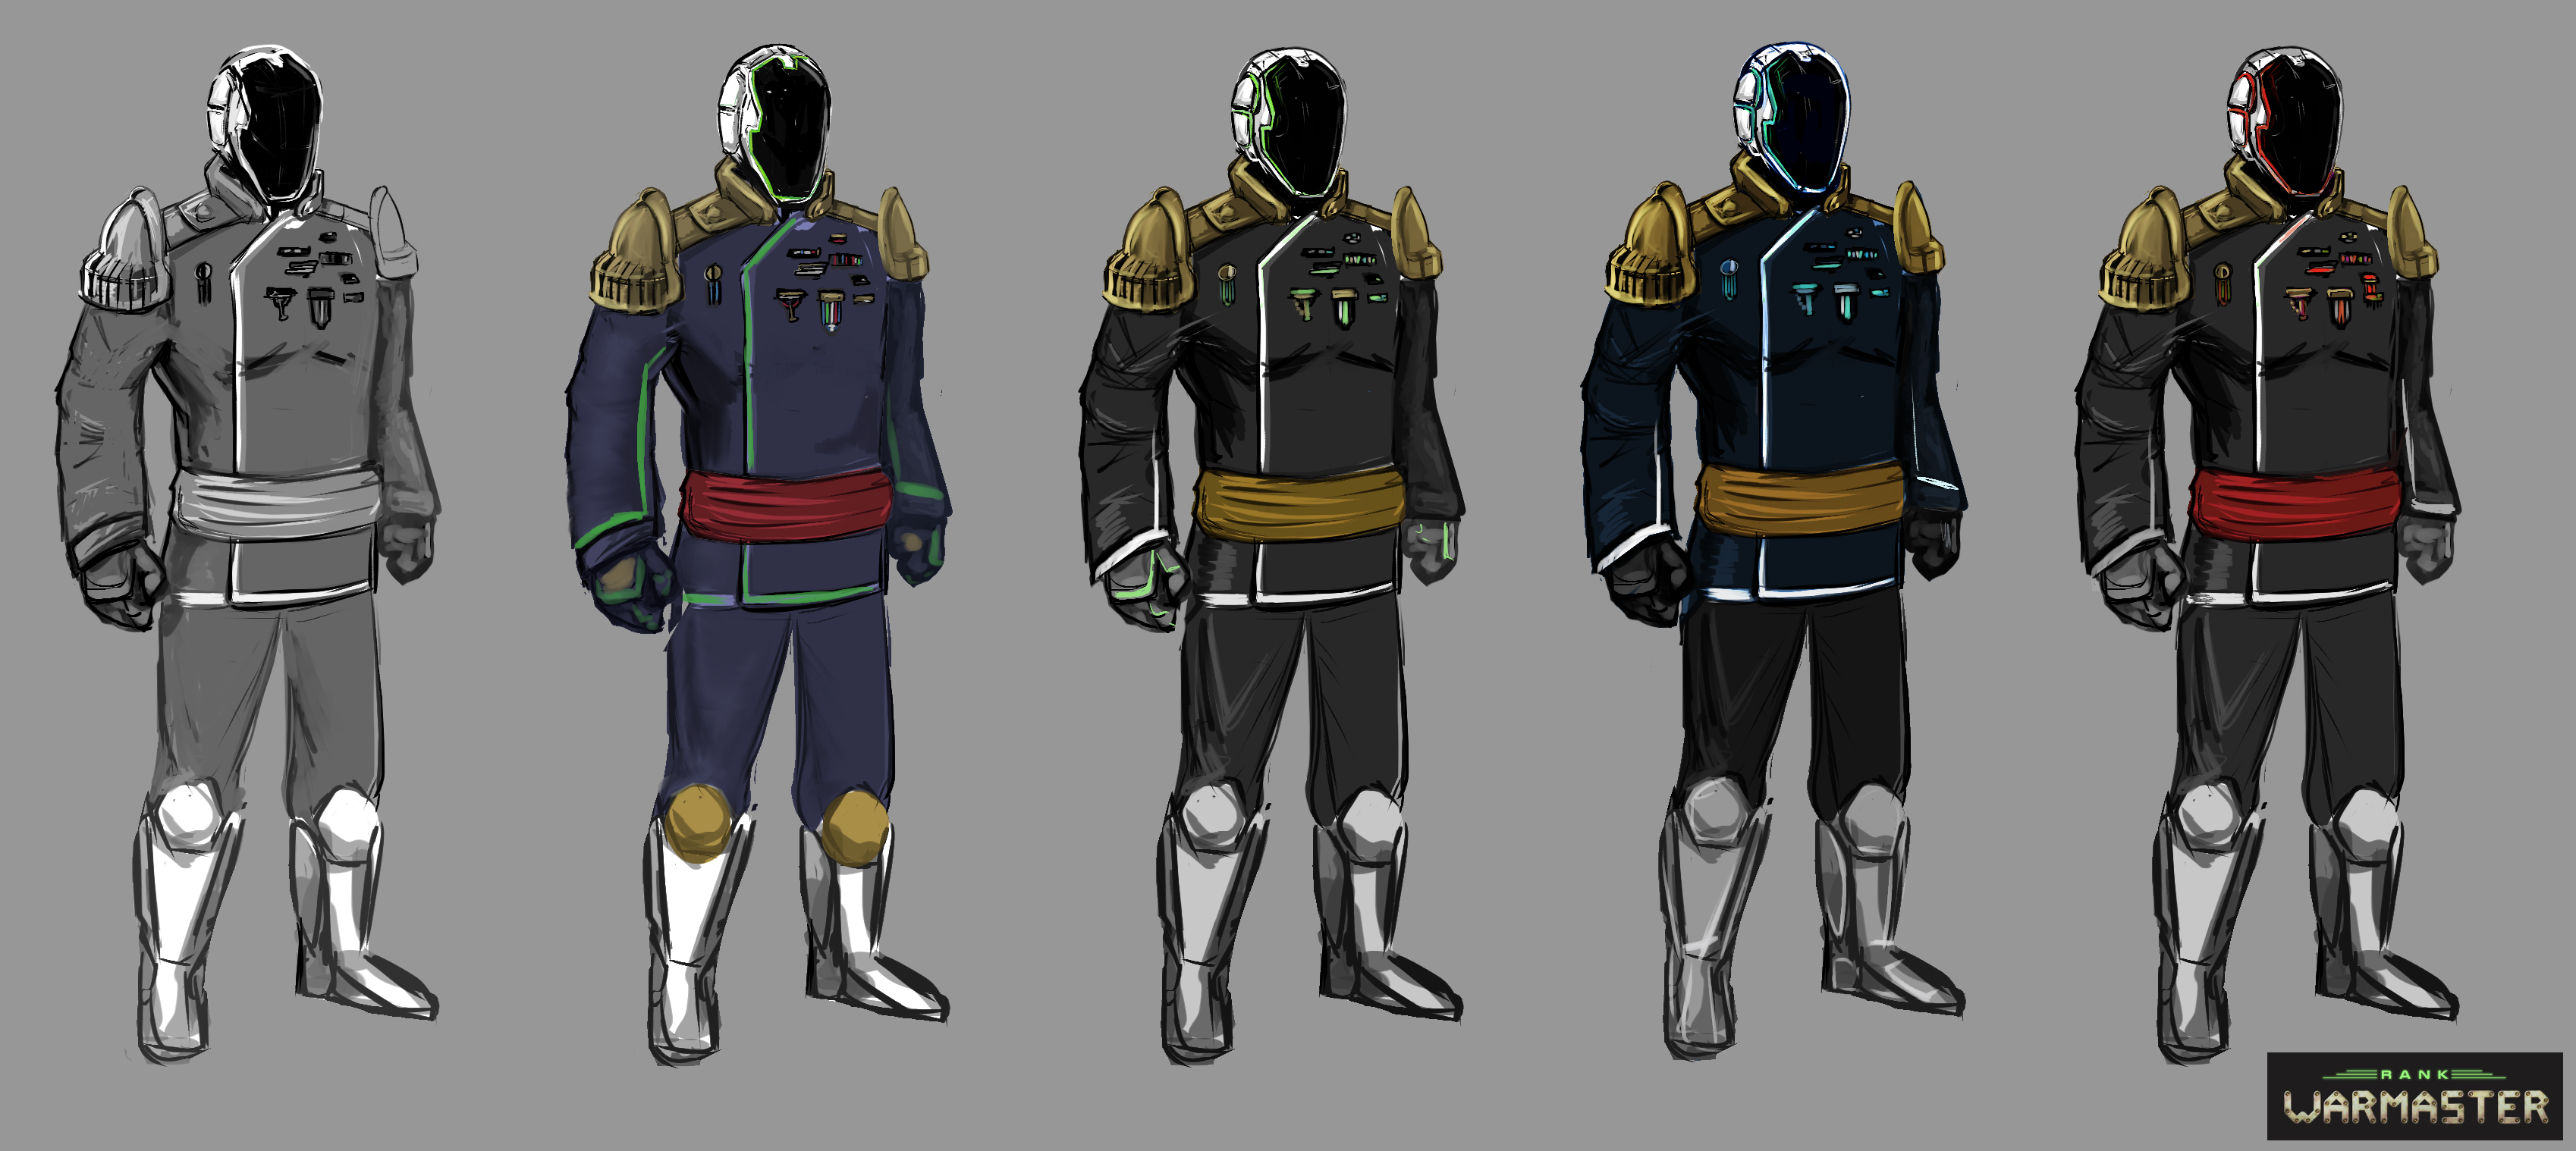
Hey, Kat again. It's finally time to share a character feature and not just any character, it's the Warmaster!
Below are some concepts. My biggest concern for the character was the helmet and I wanted to keep the Warmaster's face hidden for two reasons. One was to portray them as someone who is powerful, strategic and unyielding. The second and most important reason is for the player to decide the Warmaster's face, that anyone could or can become the warmaster.
For inspiration I looked at old military outfits and retro sci fi comic book outfits, however the retro sci fi focus would later shift to a more sleek techno look. I love crazy epaulettes and was able to keep that in the design without it looking like a costumed villain. At one point the character will be more customizable but the helmet appearance may remain the same.
We have decided on a final default appearance from the color line up but I'll be keeping that a secret for now.
Anatomy of a Warship
Oct 28th
Well met and greetings! Today I'm going to dive into how to design a ship. This is a central part of Rank: Warmaster's gameplay, as a fleet of ships is the player's primary tool for exploration and discovery, as well as projecting power in the treacherous game of corporate politics.
The design process begins with selecting a silhouette. This is a purely cosmetic choice because it's the components that determine your ship's stats. The size of the ship will dynamically increase as more components are added, so fighters will be small while capital ships will loom over a world like an extra moon. Next the player will select the components for their ship and place them on the design grid. This grid represents the internal layout of the ship and determines how damage propagates throughout the vessel when its armor and shields fail. Components explode when destroyed and damage other nearby components, so the arrangement of vulnerable or critical components is an important aspect of ship design.
Each class of components can have multiple options with various advantages and disadvantages; at the beginning of a game players will only have one choice for each but as they perform research, find salvageable technology via exploration, reverse-engineer the equipment taken from their defeated foes, or even trade with other corporations they'll quickly begin to unlock a wide variety of choices.
Every ship will need thrusters for propulsion, and players will want to select both a main engine designed for speed and afterburn capacity as well as inertial thrusters used for lateral maneuvers and turning. The most common type of power source will be a reactor core for supplying energy to the entire ship. The cockpit is where the pilot and crew are located and acts at the command center for the ship; if it's destroyed, the player loses control of the vessel. Armor and shields both provide defense for the ship against incoming attacks, while weapons are used to destroy the enemy. The reactor, thrusters, weapons and shields can each have a set of dedicated capacitors installed that will provide a small reservoir of power to ensure that these systems will maintain full performance when the vessel is running at maximum capacity. Further along in development, there will be numerous utility components that can expand your ship's capabilities, such as cargo holds and hangar bays.
Once all the components are arranged on the design grid, the player will need to assign a hardpoint on the ship's silhouette for each weapon they have installed. Hardpoints are the location on the ship from which weapons will fire and are independent from a weapon's location on the grid. The next step is to decide how much armor and shielding is needed. Both are fully scalable and can be assigned independently to the top, bottom, right side, left side, front, and rear of the ship, and/or evenly applied across all. The more armor and shielding, the more cost and weight (and power for shielding) are added to the ship's design, so it's up to the player to decide how much they prefer.
The ship's reactor, engines and thrusters are also fully scalable. Each can be manually incremented to whatever value is desired, but the ship design screen also comes with tools to help the player make those decisions. There is a slider for selecting the target speed for the ship which will automatically assign the correct engine and thruster strength needed to reach it, as well as a slider for selecting the ratio of main engines to inertial thrusters; more engines than thrusters means faster acceleration and afterburning at the cost of maneuverability and turning speed, and vice versa.
Another slider allows the player to select what percentage of the ship's maximum possible power demands they want their reactor to be able to sustain. Reactors are large, expensive and explode like a bomb when destroyed so having a reactor large enough to sustain 100% power load can be a risky choice but ensures that your ship will always function at full capacity regardless. Setting the reactor slider lower and installing capacitors to act as buffers for each subsystem makes a vessel cheaper and safer, but it may run low on power in the middle of an intense battle when all systems are working at full strength.
There's no limit to the number of weapons the player can install, nor the amount of armor, shields or other components that can be added, giving players as much freedom as possible to design their ships. The primary limiting factor is that everything added increases the ship's cost and thus the amount of time required to build it, so deciding what to include and when to save on cost is an important strategic decision when deciding on the composition of a fleet.
Asset Screen #3: Now We're Getting Somewhere
Oct 25th
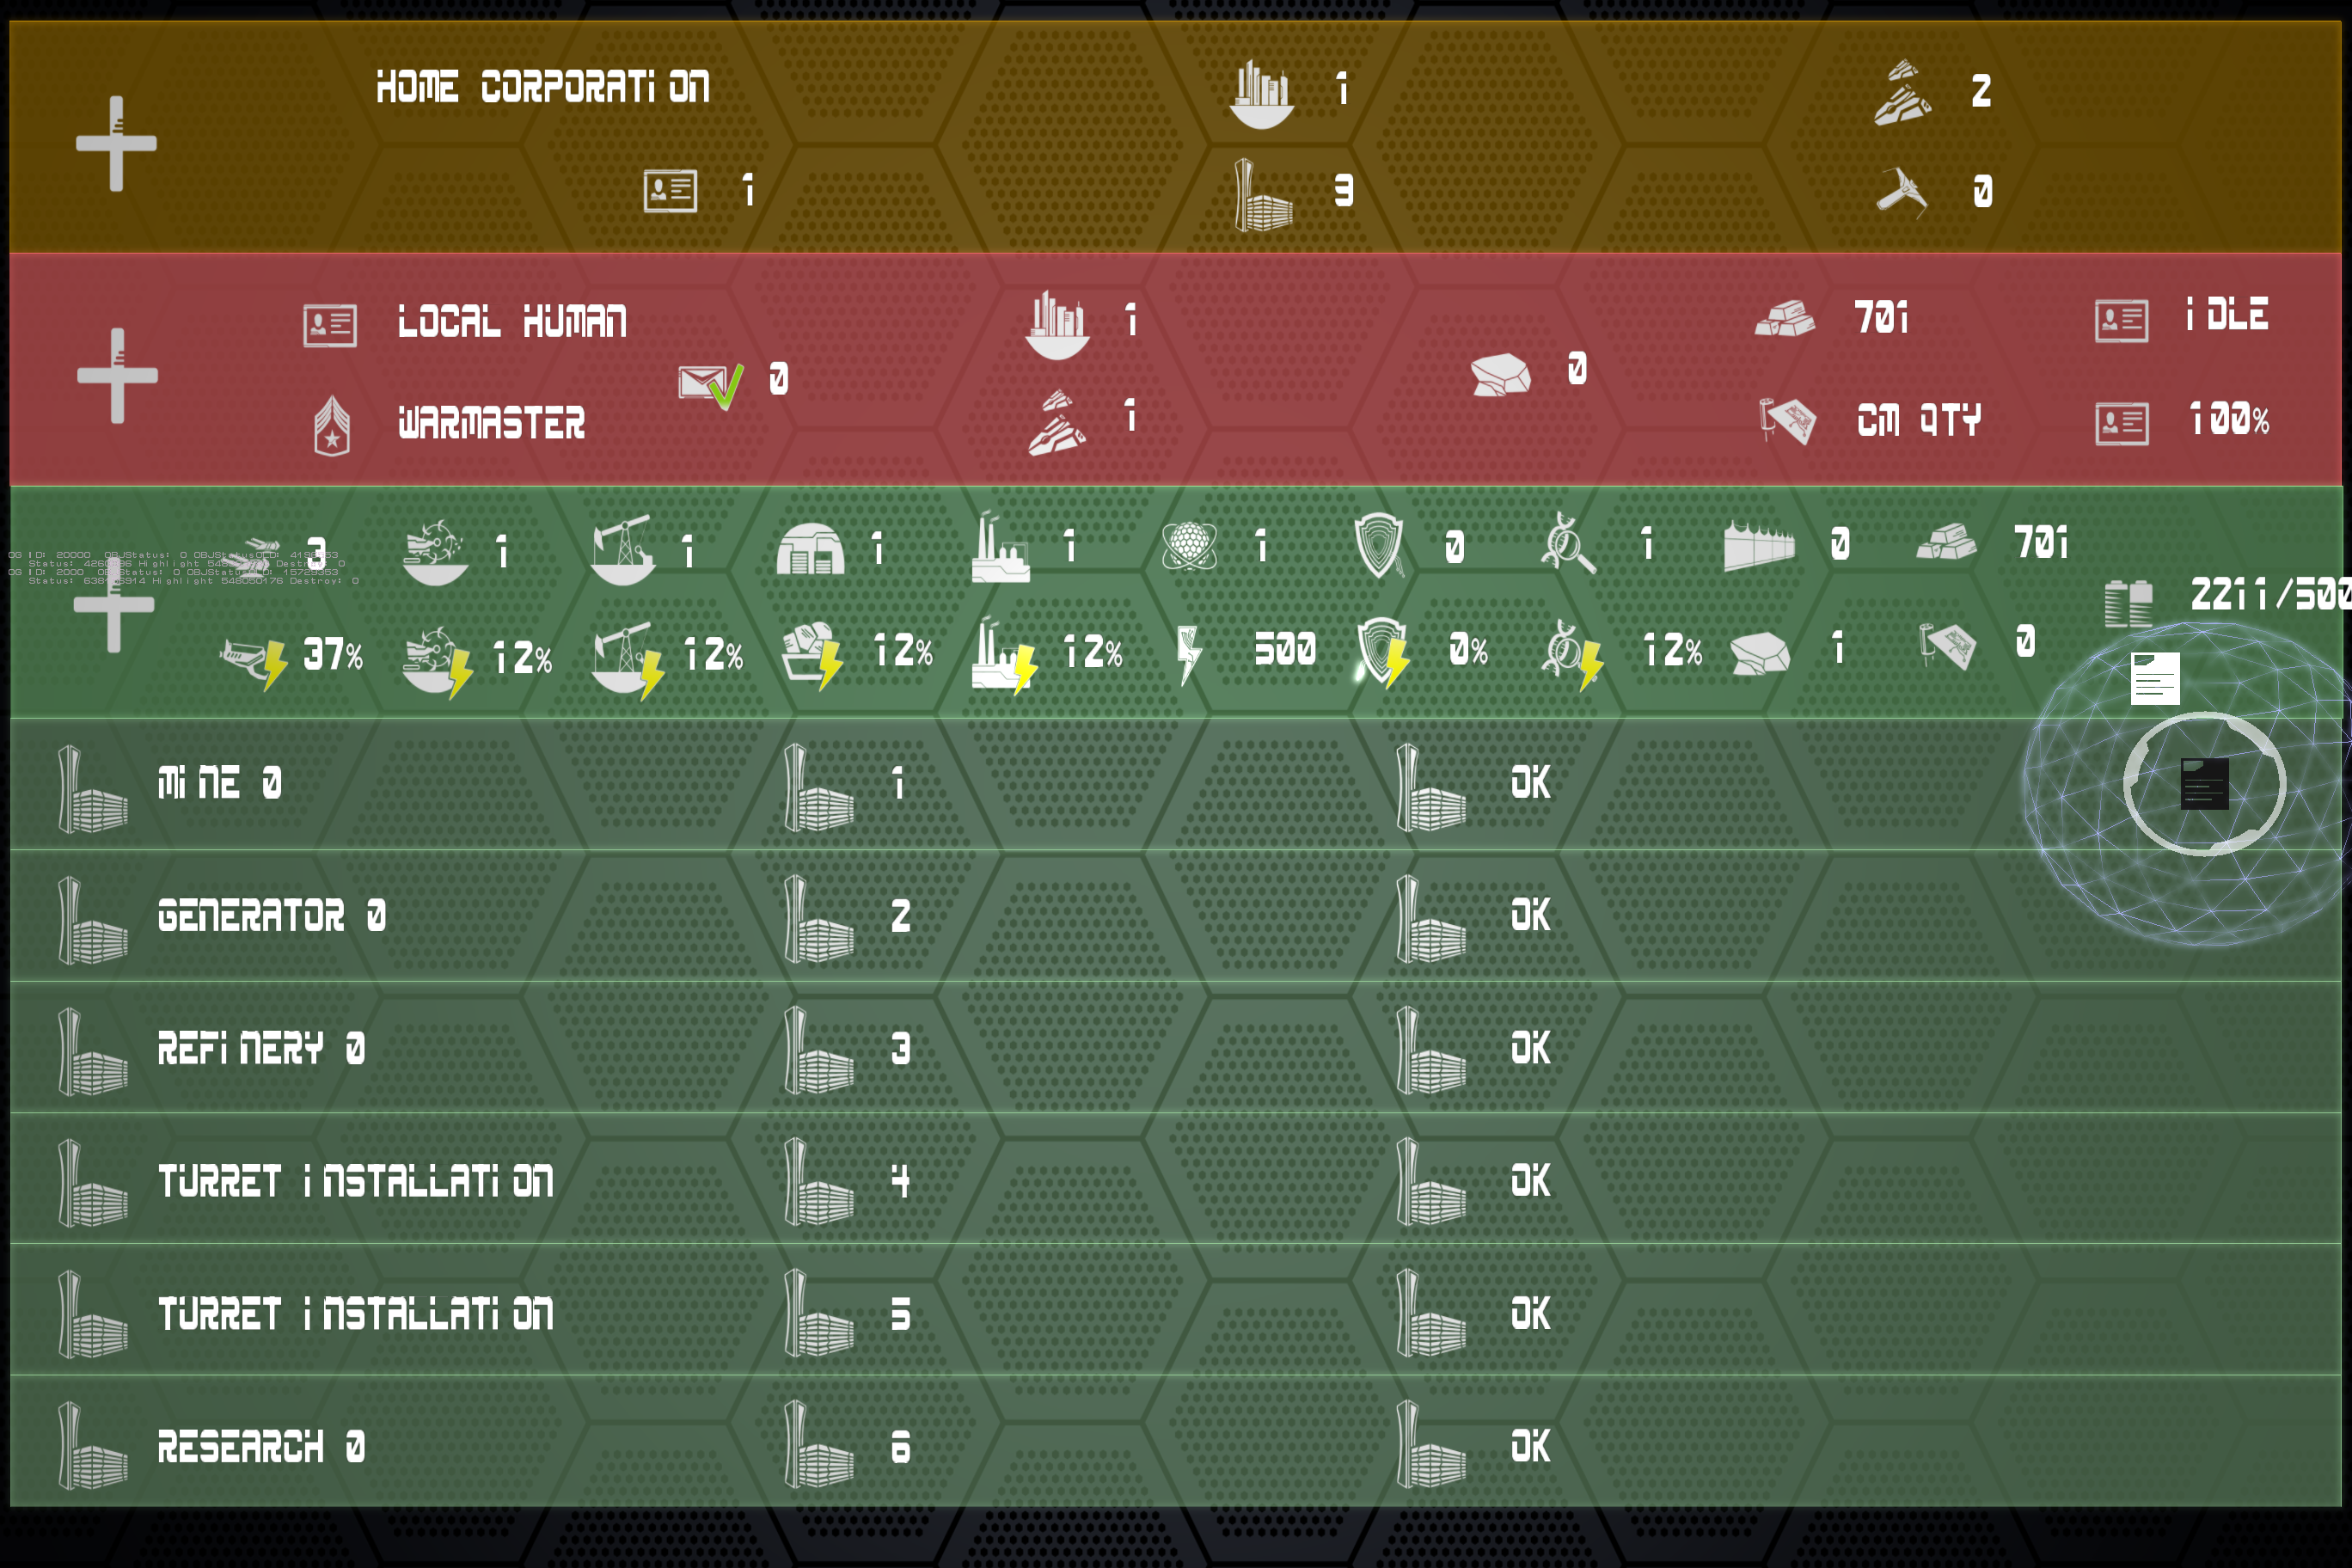
The asset screen is starting to come together. We can now see, in order from top to bottom: 1) information about our corporation, 2) information about our personnel file(s), 3) information about the city or cities that we've built, and 4) information about each of the buildings in our city or cities.
As you can see, this is a lot of data, but we've tried to make it easier to find things at a glance with unique and recognizable icons. Want to know how many cities your corporation has, or how many cities you as the player control (which might not be the same number, depending on how you're playing the game)? Just look for the city icon at the top center of the gold and red bars. Want to know if your city is adequately defended? Just look for the turret icon on the left side of the green city bar.
In addition to what you see, the asset screen will also show you information about how many squadrons you or your corporation control, as well as stats for individual ships. Stay tuned as we turn this into a fully-functional control center for your corporation and all your assets!