Category: "R:WM Dev Blog"

Update on the User Interface!
Sep 20th
Hello all! It has been two months since the last blog update, but the dev team has been hard at work. Here is a snippet of most recent state of the UI/UX Library. We are now officially progressed to the point where sectioning them into their respective sub-screen categories. From now on all upcoming icon update will be presented in this contextualized manner. So with that, here are the updates from your UI/UX designer!
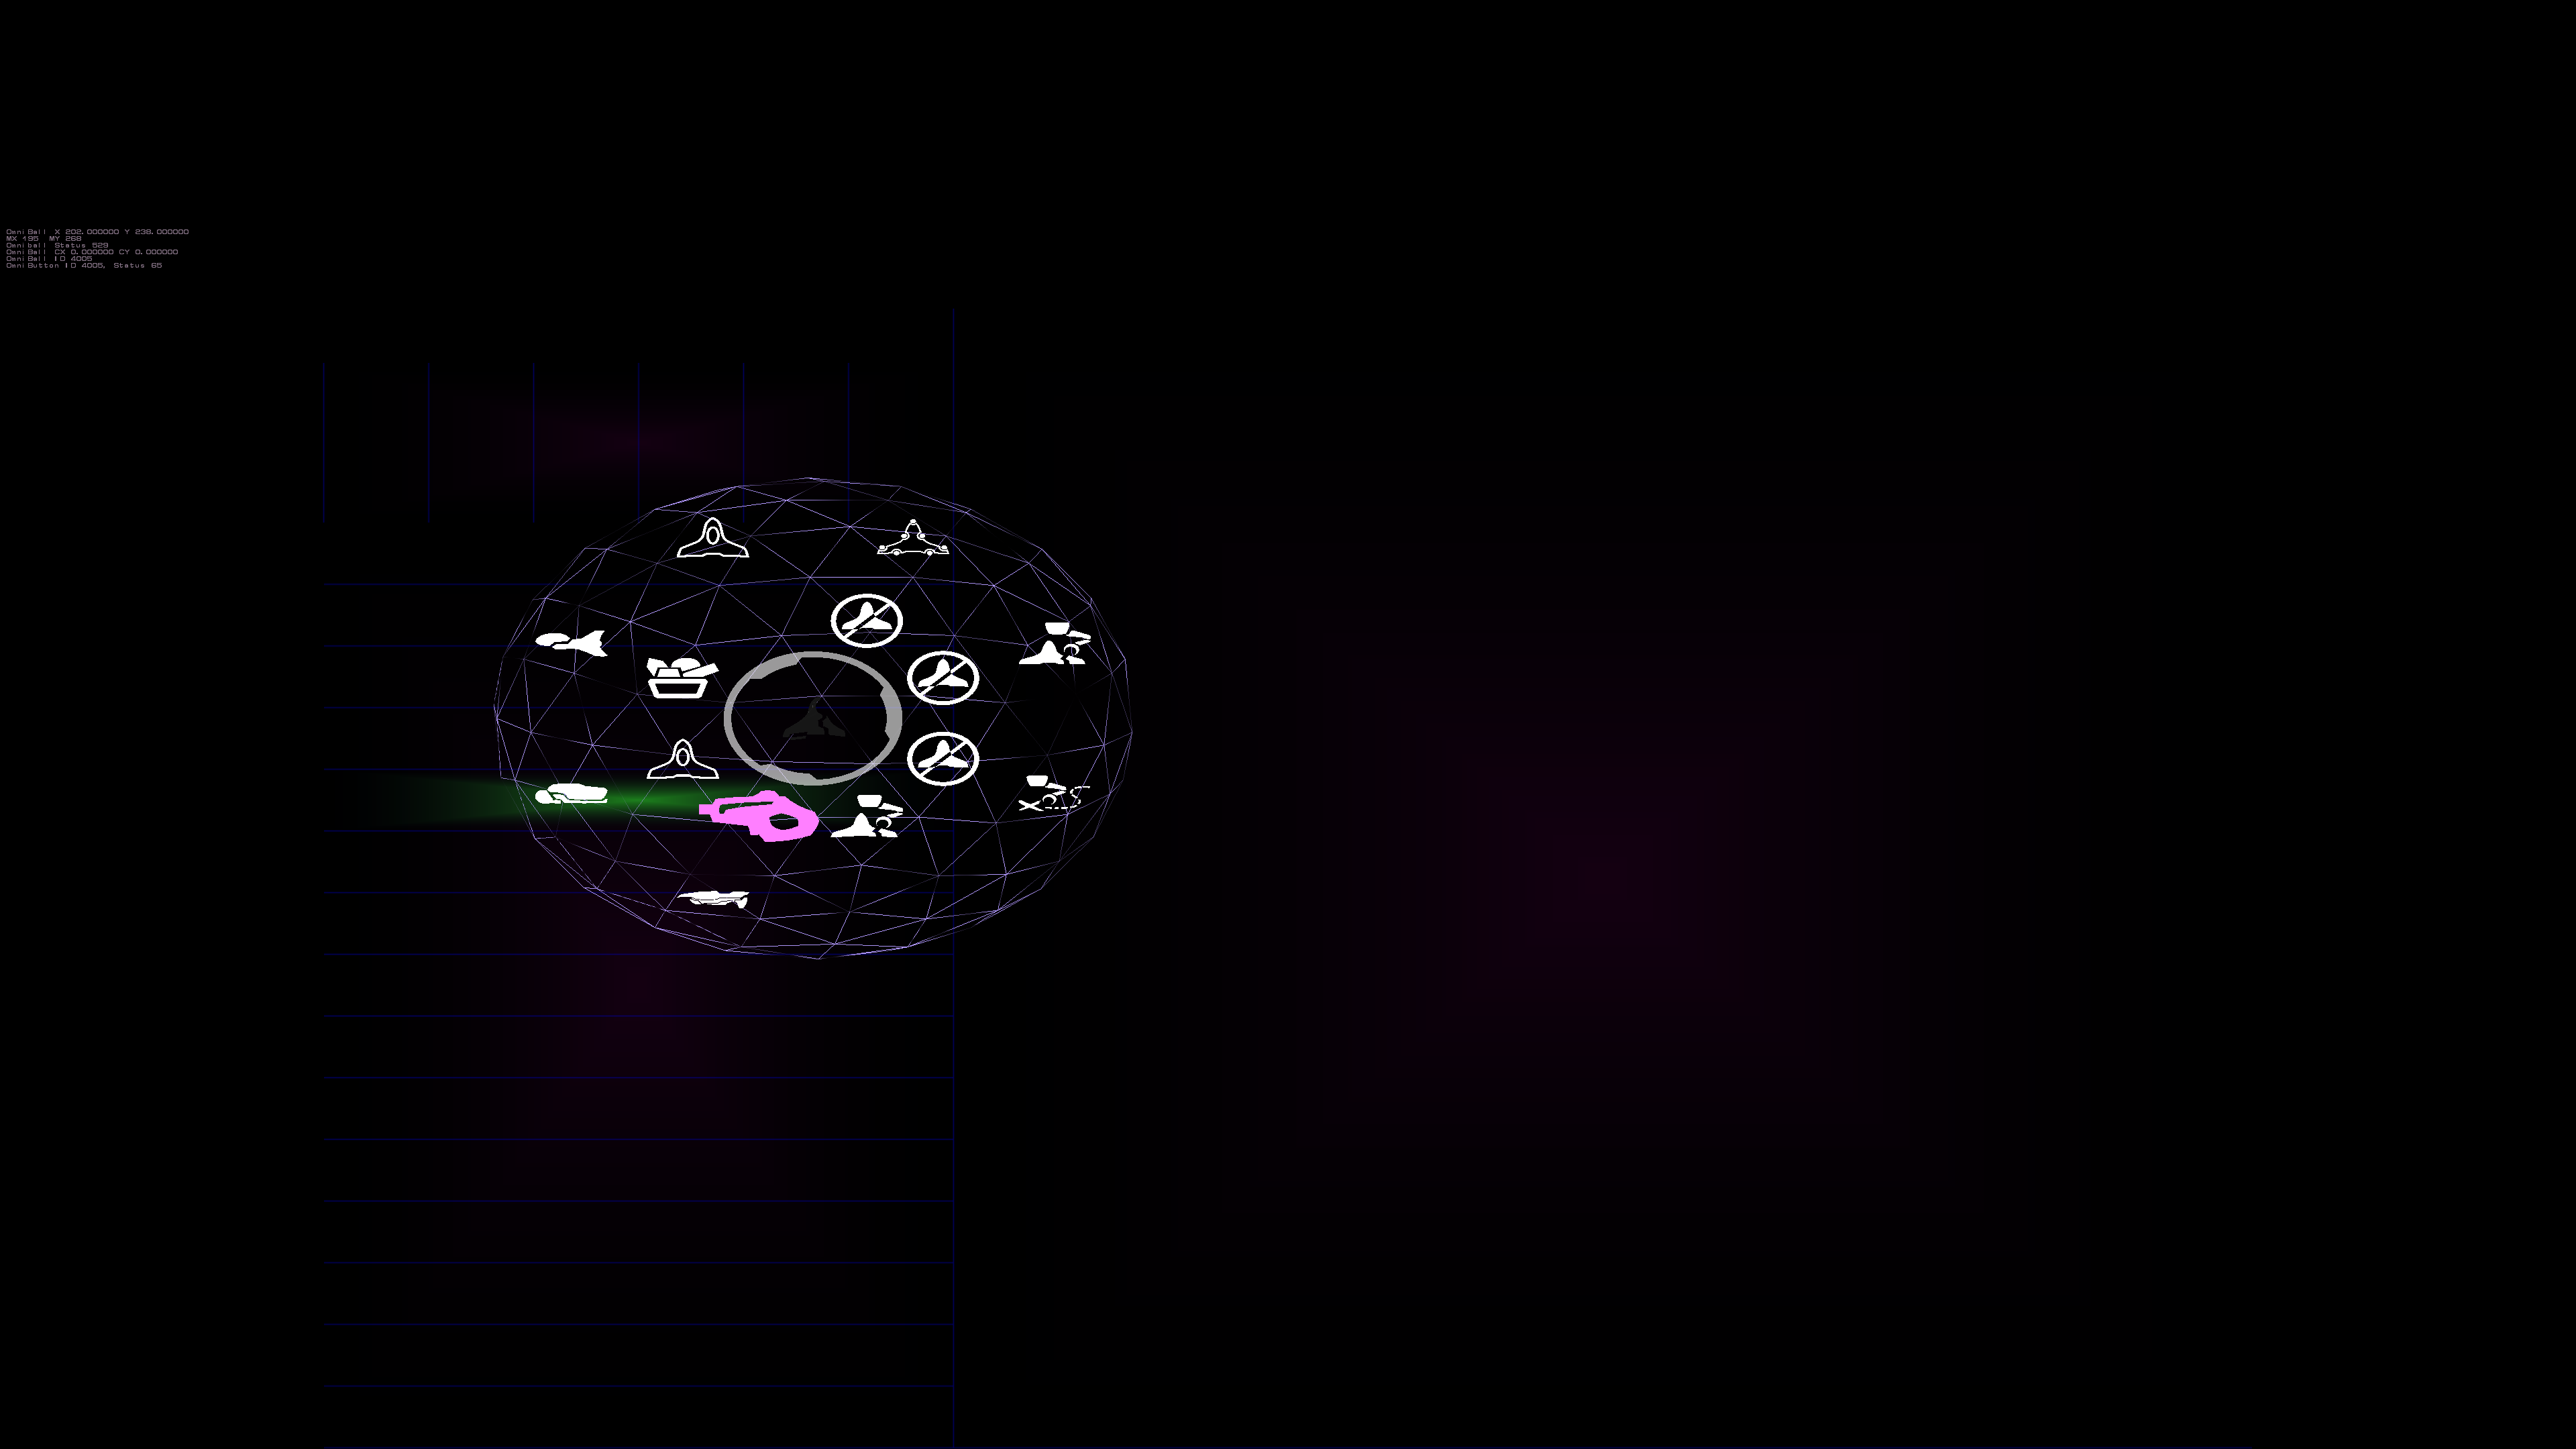
The first image base icons show the root level of the radial interface, as well as a few of the immediate sublevels and some "particle" icons that specify further actions with the same category.
The second image presents the newest set, the Ship Builder screen icons. These are the icons for the controls used when building and customizing player-made ships.
The third image shows the radial interface in its expanded secondary ring form, along with several of the new icons placed within (several are dummy repeats for the sake of spatial referencing.)
UI Icons
Jul 25th
Here is a WIP screenshot of the icon set that will be used for the different levels of the Omni Ball user control interface. Further updates are pending. In full implementation these will be grouped by category making up the branching levels of the Omni Ball. For now this is a sneak peek at the aesthetic style of the user interface's components.

Progress in the main trunk up to the beginning of July
Jul 7th
I always thought these were cool. This should also give you an idea of the scope of what has already been done. This is just of the main trunk and doesn't include the assets directories of everyone else. The music is by Chris and is part of one of his unreleased tracks for the game. Enjoy!
First look at new UI control
Jul 7th
While not that pretty yet, the functionality is almost there. In the screen caps shown here, you can see the pretty Omniball on the left, but the main interest here is the new "grid" control. This grid control, once fully completed, will not only work to allow items to be placed on a grid, but also end up serving as scrollable pick lists of objects. The idea here is that you will be able to select an object, and drag it to another grid control, and insert that object. Sounds boring, but think of having a pick list of all these different weapons. You can simply with a flick, move through all the available weapons, with the scrolling automatically keep going like on your smart phone and slow down over time. You can then just grab an object and not only place but push the already existing objects on the grid. Perhaps have a queue of ships that you want to insert a different design in the queue, so you can push your way into the line of "to be built" objects.
Right now, this is just testing and development assets, so it's not that pretty. I'm using the old planetary turret base as an object to test pushing things around. The control supports friction and gravity, as well as bouncing off each other and the side walls. So right now, it's a cheap game of air hockey as the impacts makes the velocities reflect off each other. Why gravity? So that objects placed far from the center will slowly move to be with other objects. Friction to slow things down or they would never stop. Many more special effects will be added eventually.
Part of what took so long was the matrix math, since the grid is represented in perspective space and on an tilted angle. Meaning, going from screen coordinates to world coordinates and back again. It's a lot more complicated than one might think. You can't just have a mouse position and transform and rotate it. Well, you do, but you have to turn it into a directional vector originating from the camera eye. Sort of like having your entire arm pointing at something in the world. Your arm shoulder socket isn't moving, but you can make your straight arm rotate around to point to a bunch of things in the real world. Think of your arm socket as the camera's eye position and trying to point to something (which is the purpose of a computer mouse). I did it differently, back in the day, making a lot of assumptions that would have broken the game, so this "new" and honestly, correct way is obviously better. For those that care about the math: Turn the mouse coordinates into a homogeneous coordinate (a 4 dimensional coordinate) looking like this: ScreenPosition = {Mouse X, MouseY, 1.0, 1.0}. Mouse X and Mouse Y can't just be the pixel position on the screen. It has to be a ratio between -1 and 1. 0 would be the very center of the screen, with -1 being to the left edge and 1 being to the right edge. Same idea for the Mouse Y. (As an interesting note about homogeneous coordinates, a 1 in the 4th position (sometimes referred to as W, vs. X,Y, and Z of the other positions) means a position in space and a 0 means it's a vector direction in space. It's just how the math plays out). Yes, I know in the end we want a vector but the mouse currently is a position. Then you multiply that against the Inversion of the Projection Matrix * the View Matrix and you'll have your 4D mouse vector. Make it 3D by chopping off the W, and then "normalize it" and you are good to go. Then just used my code that handles intercepts between lines and planes (the plane here being the grid). While that gave me the world space where the mouse was pointing to on the grid, it didn't give me "grid space", which would make more sense to the control itself. I had created a series of 3 "normals" for this kind of translation. Basically, you take 3 normalized vectors (X {1,0,0} Y {0,1,0} Z {0,0,1}) and rotate them as the object is rotated. Then it's easy to trace things from world coordinates to grid coordinates with a simple division. (i.e. Intercept X would be divided by the X from the normalized Vector for X). Yes, I'm aware this won't work in extreme situations and is a hack, but it's quicker than going back to matrix multiplications which is how it really should be done. Meaning, on a 30 degree tilt, I'm doing 2 divisions (one X and one Y) versus the scores of multiplications to do matrix math.
Ok, that was the easy part. The hard part was the reverse, because there is a part left out that the graphics hardware does that you don't need to know about when doing shader math, and therefore it doesn't come up when doing shader code. The reason why I needed the reverse is because I needed to know the screen bounds of the control (so the system knows if your mouse position is touching or in it or not). It's no longer a simple box, but a trapezoid because of positioning (depth included) as well as rotation. So I wanted to make its bounding vertexes accurate in screen coordinates. Noble idea. Pain in the butt. So the idea of the Projection Matrix, View Matrix and Model Matrix (the grid is just like any other model with position and rotation) is to transform something in world space to screen space (i.e. a pixel on the screen). So one should simply be able to multiply everything together and get the screen space, right? And while technically true, there is always a gotcha. I was expecting after everything that it would come back in screen coordinates or in ratios from -1 to 1. Nope. It came back like this: {-322.666351, -372.583038, 307.002441, 311.000000}. And what was worse, the first two numbers for all 4 corners were basically the same (but sometimes inverted), even though the grid was sprawled over the world coordinates. So I started to see if there was corruption in the math routines. Nope. (Well, I DID find an issue of how NOT to use the matrix multiplication routines but that was something else). So I though perhaps I had things in the wrong order. Nope. That made things FAR worse. So lots of debugging trying to figure out why it wouldn't work, with a bunch of ideas of "perhaps this is it" to no avail. Poked around on the internet and finally found the answer. Remember W? Yeah, that thing. Divide the X, Y and Z by the W and you get: {-1.03751242, -1.19801617, 0.987146139}. THIS makes sense, and this last step is what the hardware does that you never have to account for in shader coding. Dammit W. And yes, these coordinates show that the edge of my grid is outside of the screen, and watching everything bounce, it is. But that's not the point. It works and I verified the math as I translated it to the arbitrary screen size that I internally use and the mouse position officially matched up with the calculated positions. And BTW, that last Z coordinate is how depth buffers work, if you care to know. If the value is between 0 and 1, you can see it. Otherwise, it's out of bounds and OpenGL won't draw it (well, there is ways of fudging that too but that isn't helpful here).
Ok, more about math than you might have wanted, but I needed to vent. :P
Full story »
It's bumpy and hugging
Jun 21st
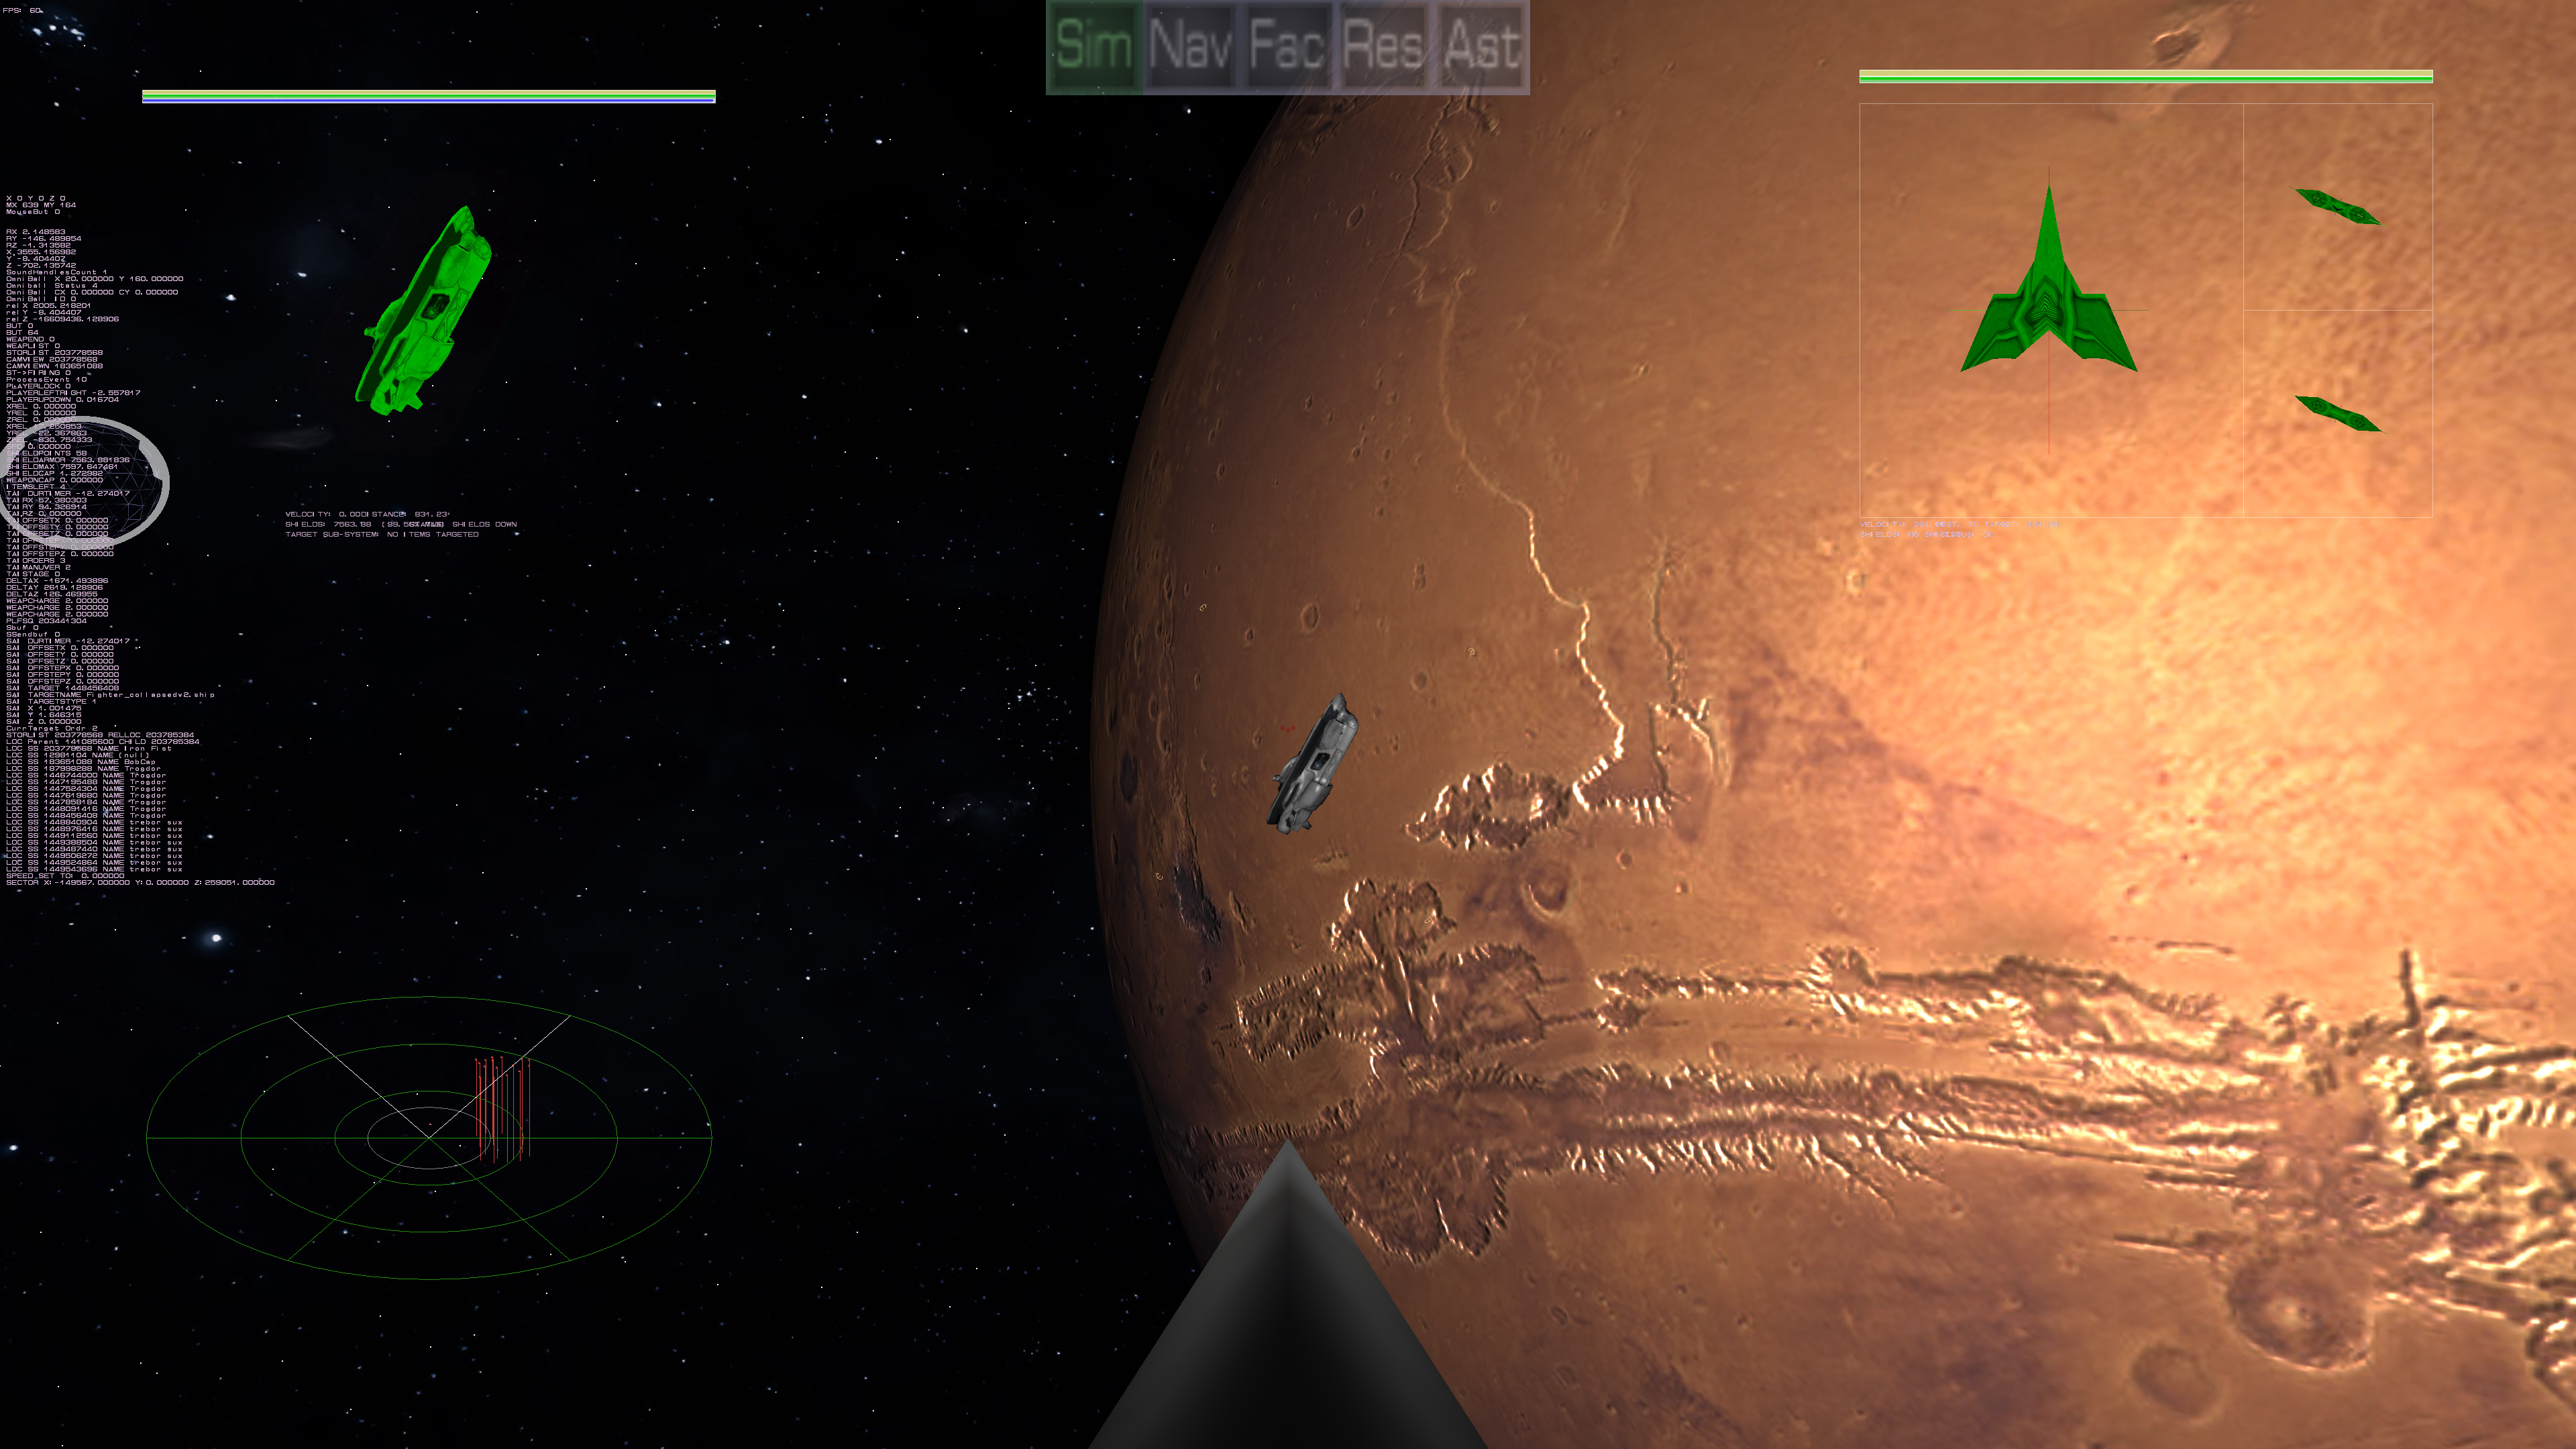
I would like to introduce bump mapping on the ships themselves. It's been a VERY long time coming, but I established the "piping" that was needed to make it happen. The two end points supported it (as you've seen on the planet rendering), so the shader I wrote supported it, and the newer ships (and TECHNICALLY the older ones too) supported bumpmapping, but nothing ever connected the two together. Now that's changed, as you can see.
Also to introduce form fitting shields. Originally, shielding was procedurally generated, and while that worked, the results weren't that satisfying. Now with "hand done" shields, the shields far more look like they were meant for the ship itself. All newer ships will have these shields, while the older ships will still have the procedural ones.
UI / UX Process!
Jun 20th
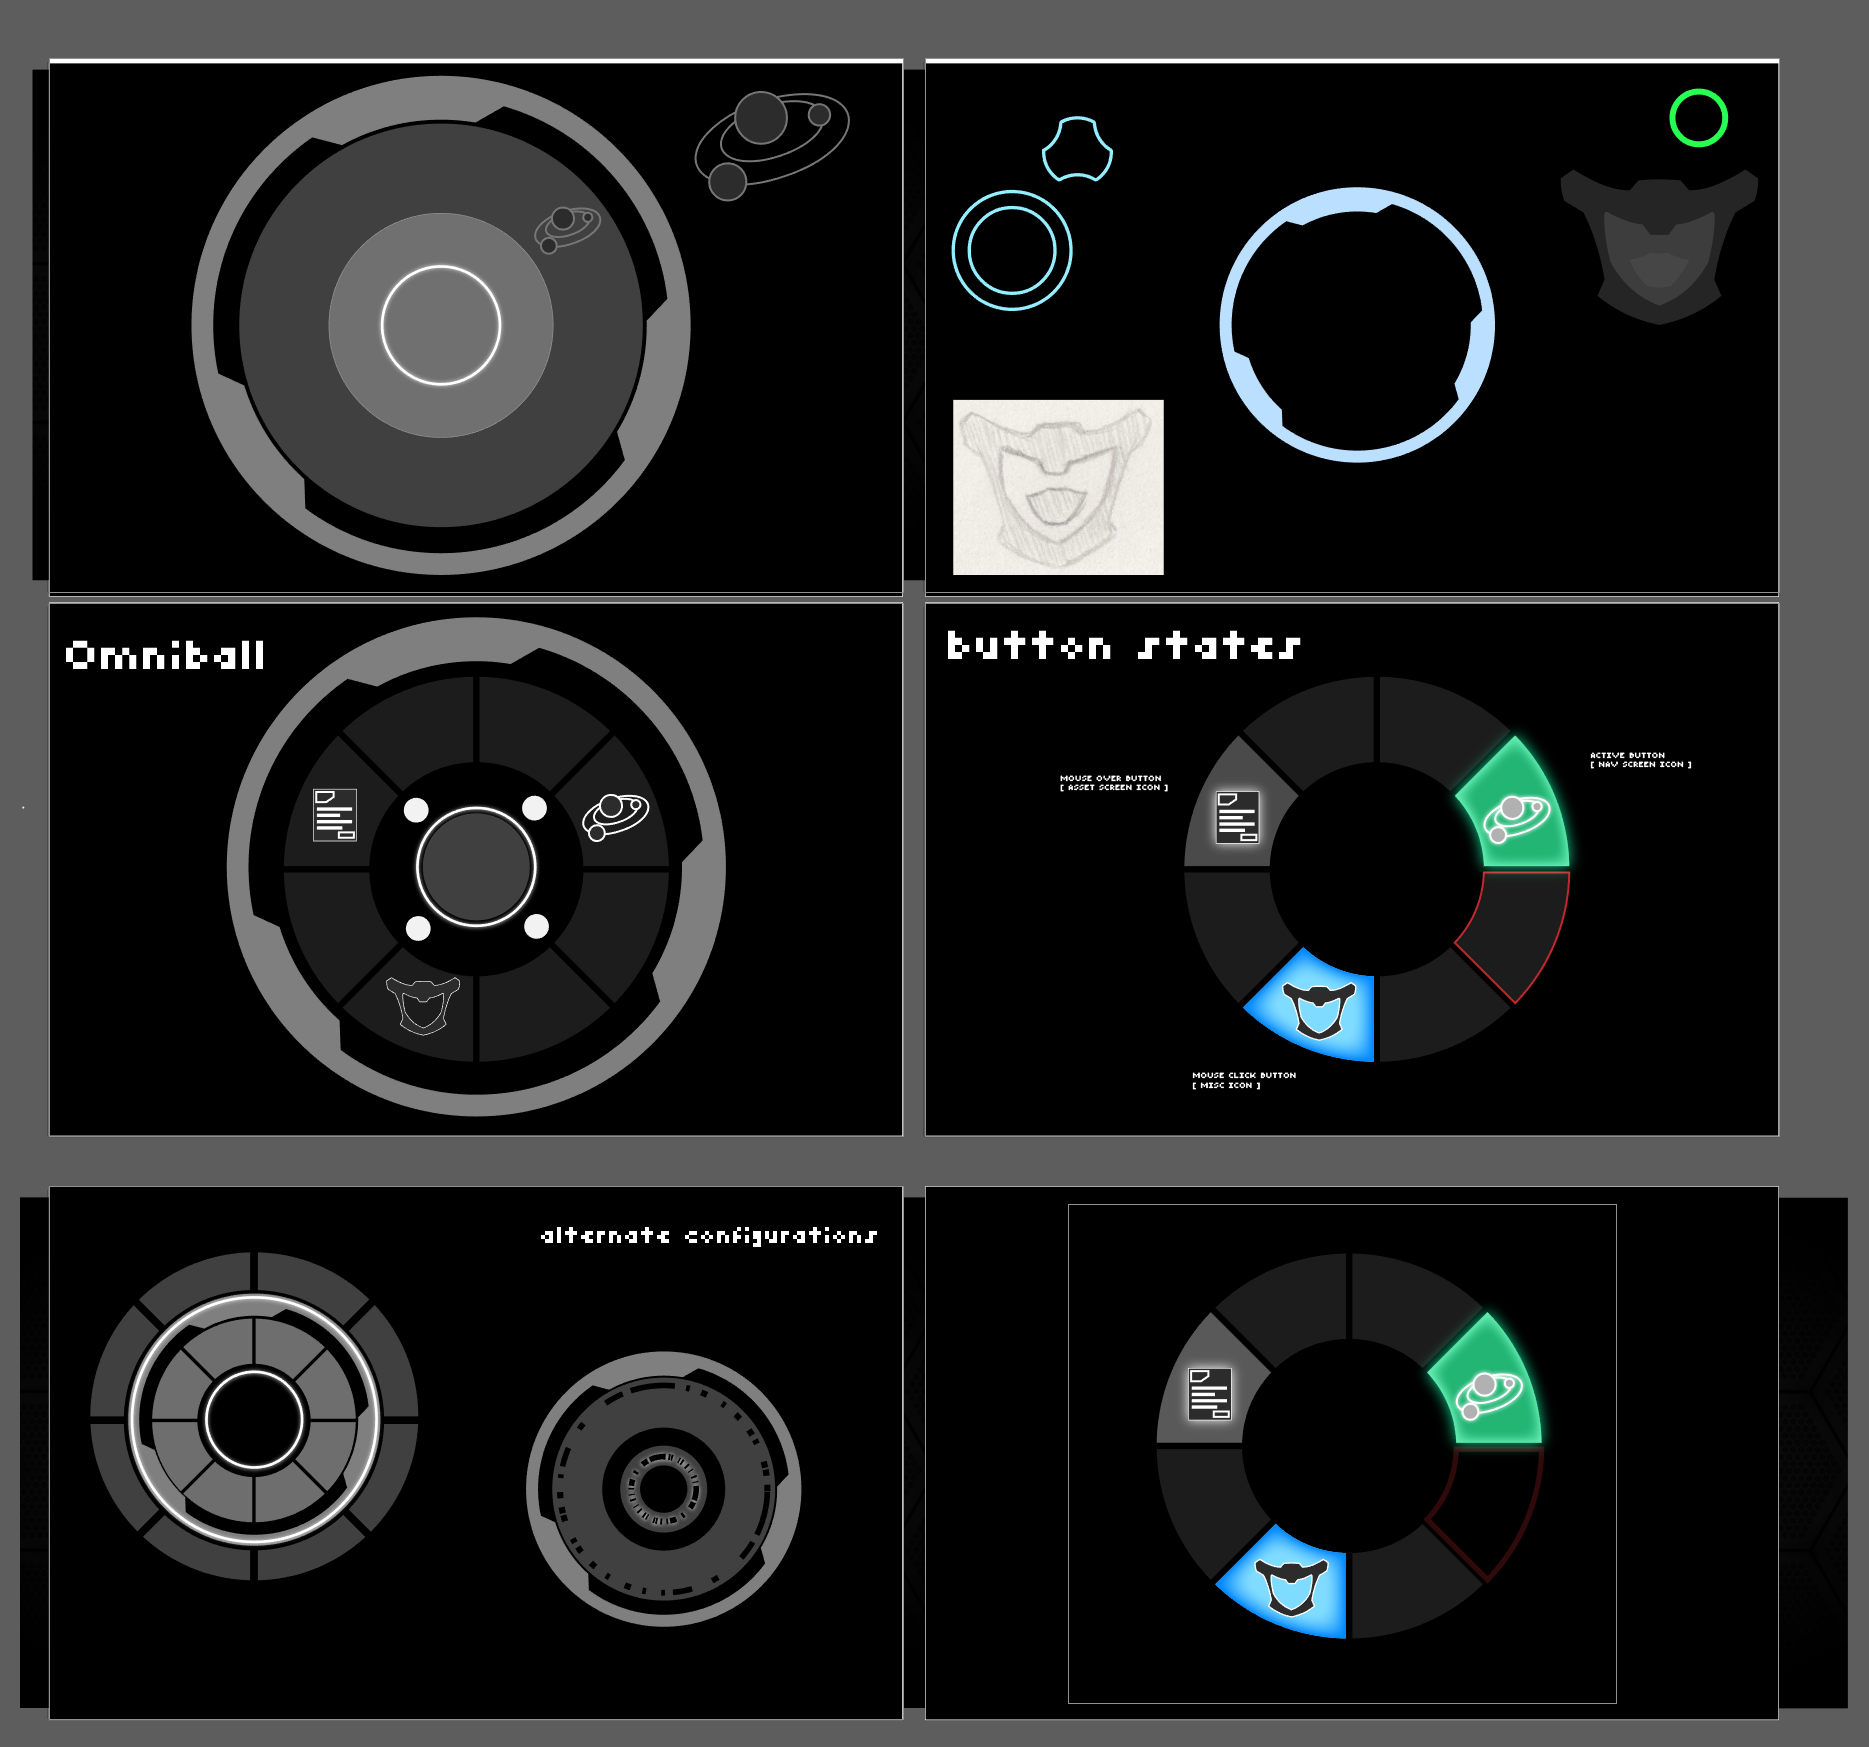
Here's a sneak peak on the in-the-works user interface for Rank: Warmaster! Referred to as the Omniball, this versatile radial interface brings all of the menus and tools into one centralized, multi-tier hub.
First image displays the concept art, showing the aimed-for look and style. Second reveals the actual in-game debug model. Expect more updates on further icon designs and refinement of the radial interface.
Full story »
Damage Monitors Up!
Jun 18th
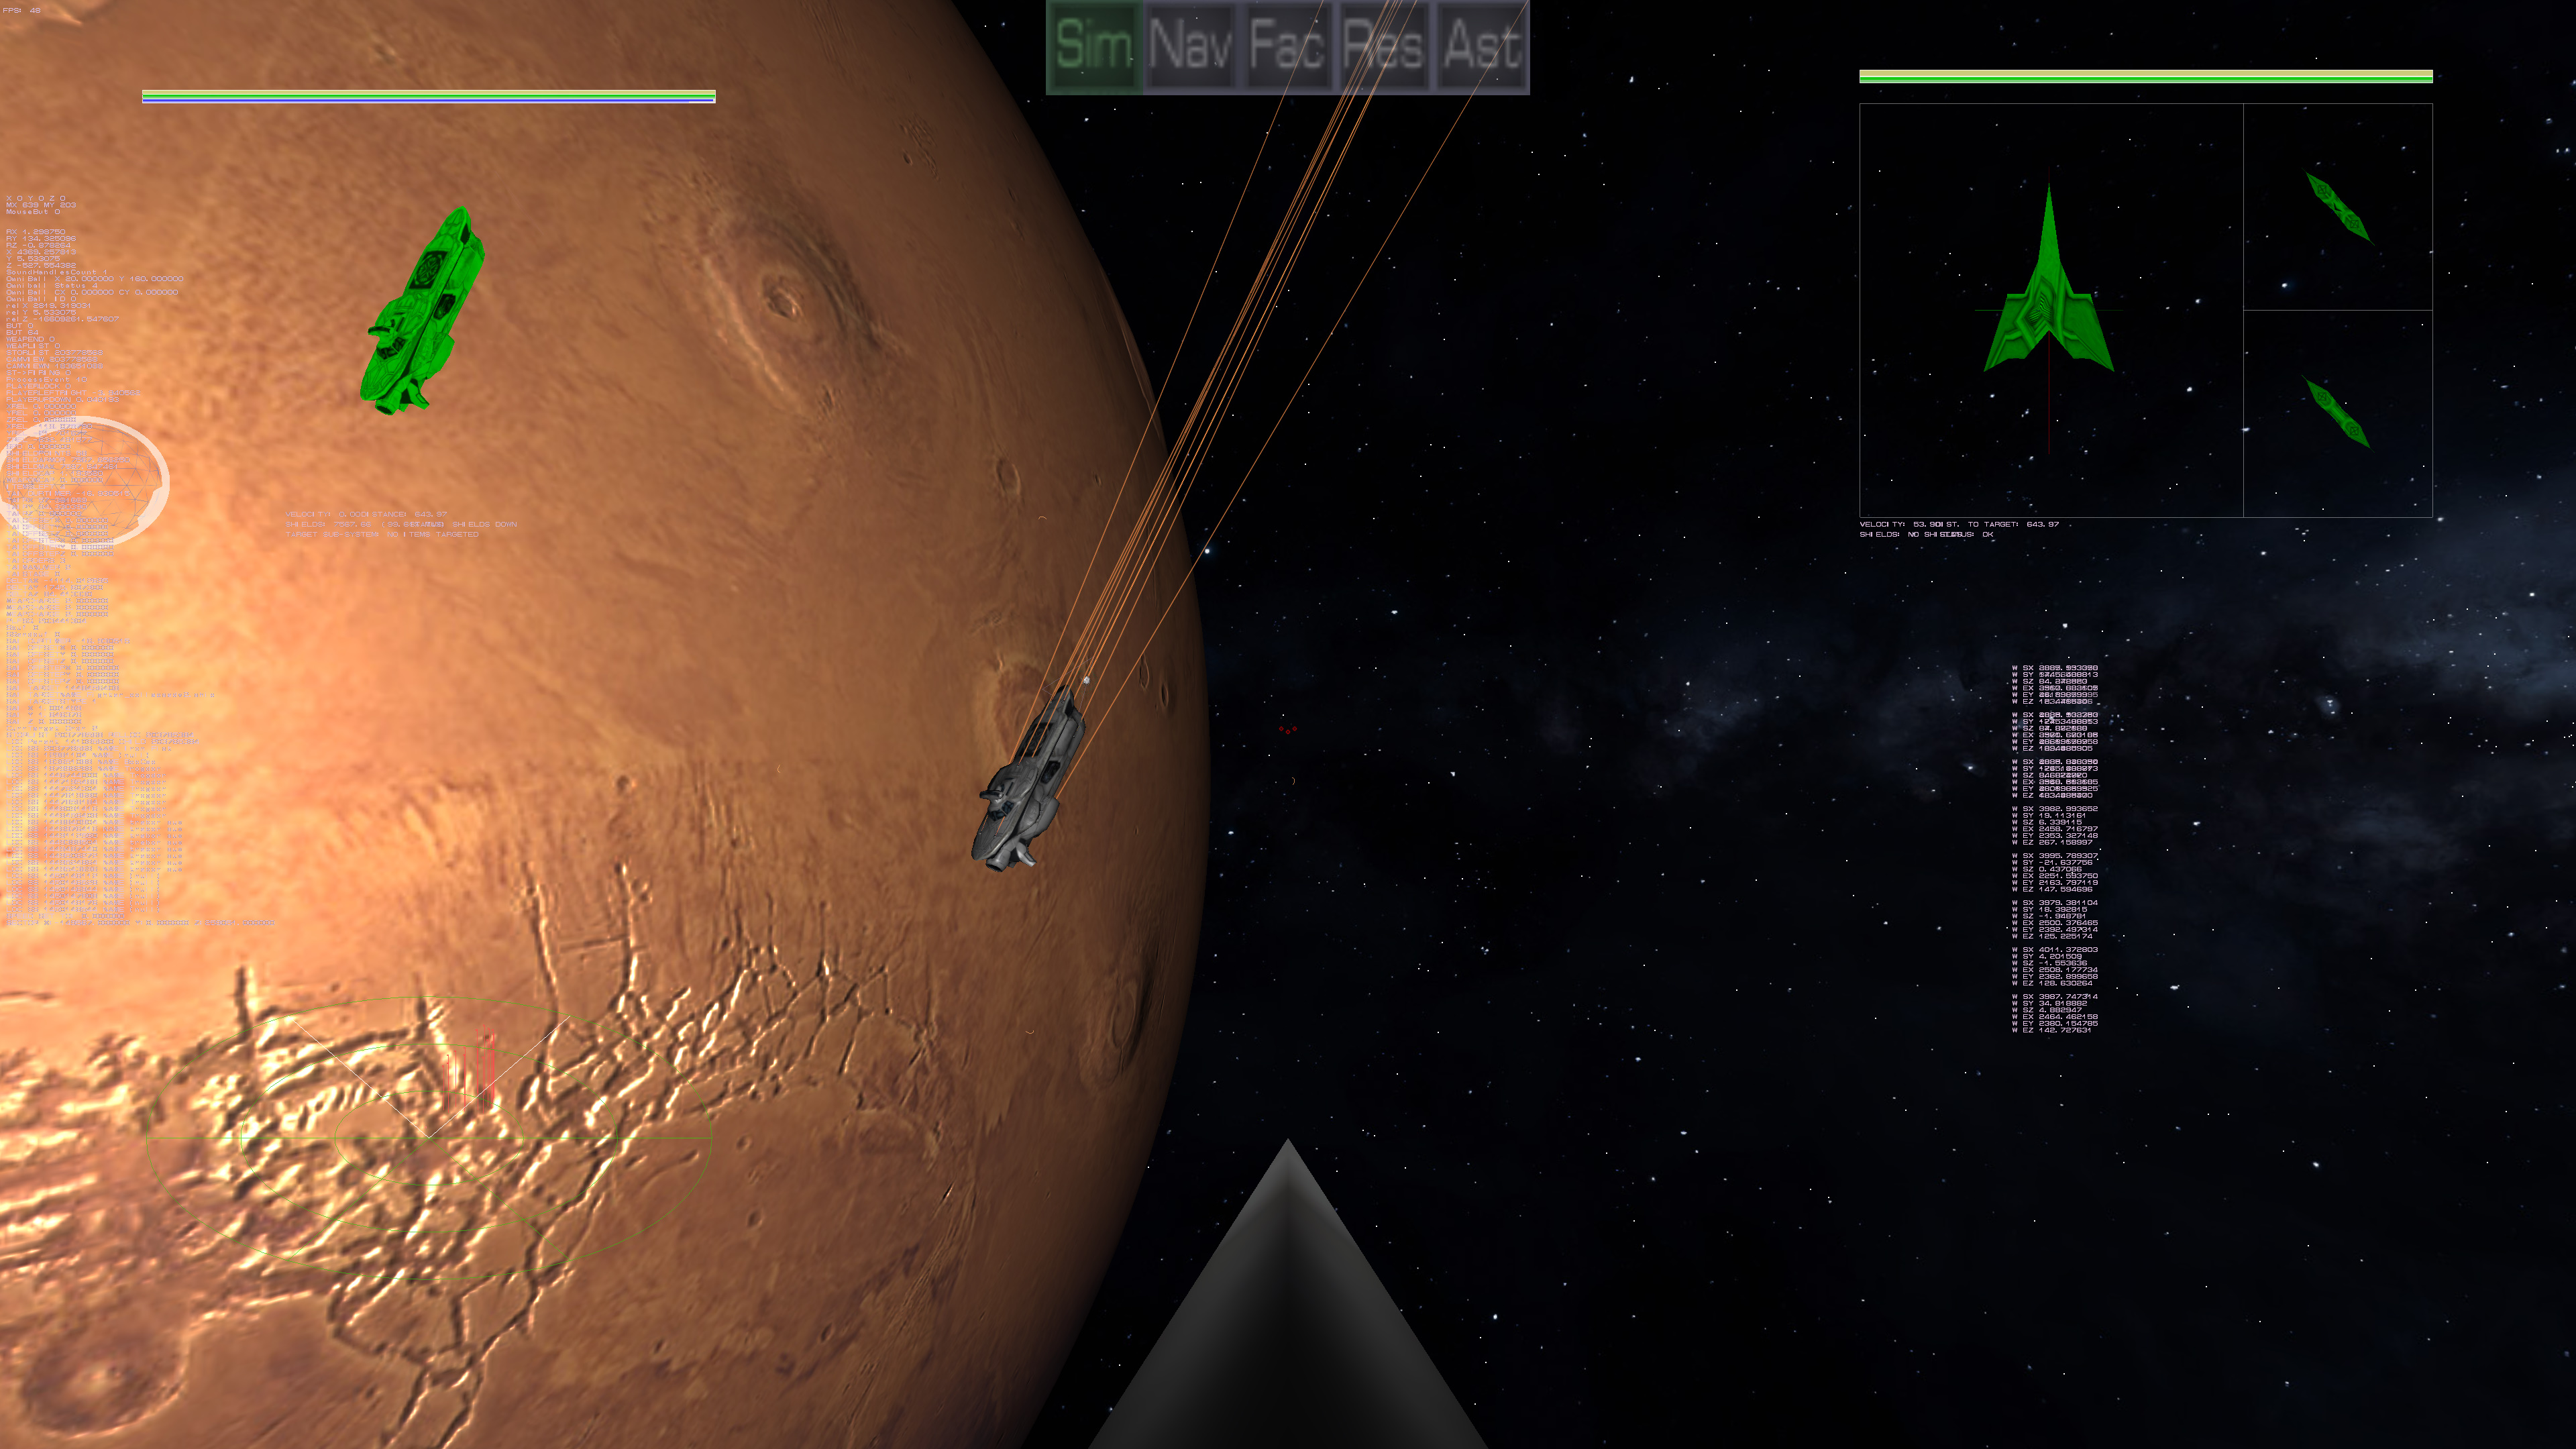
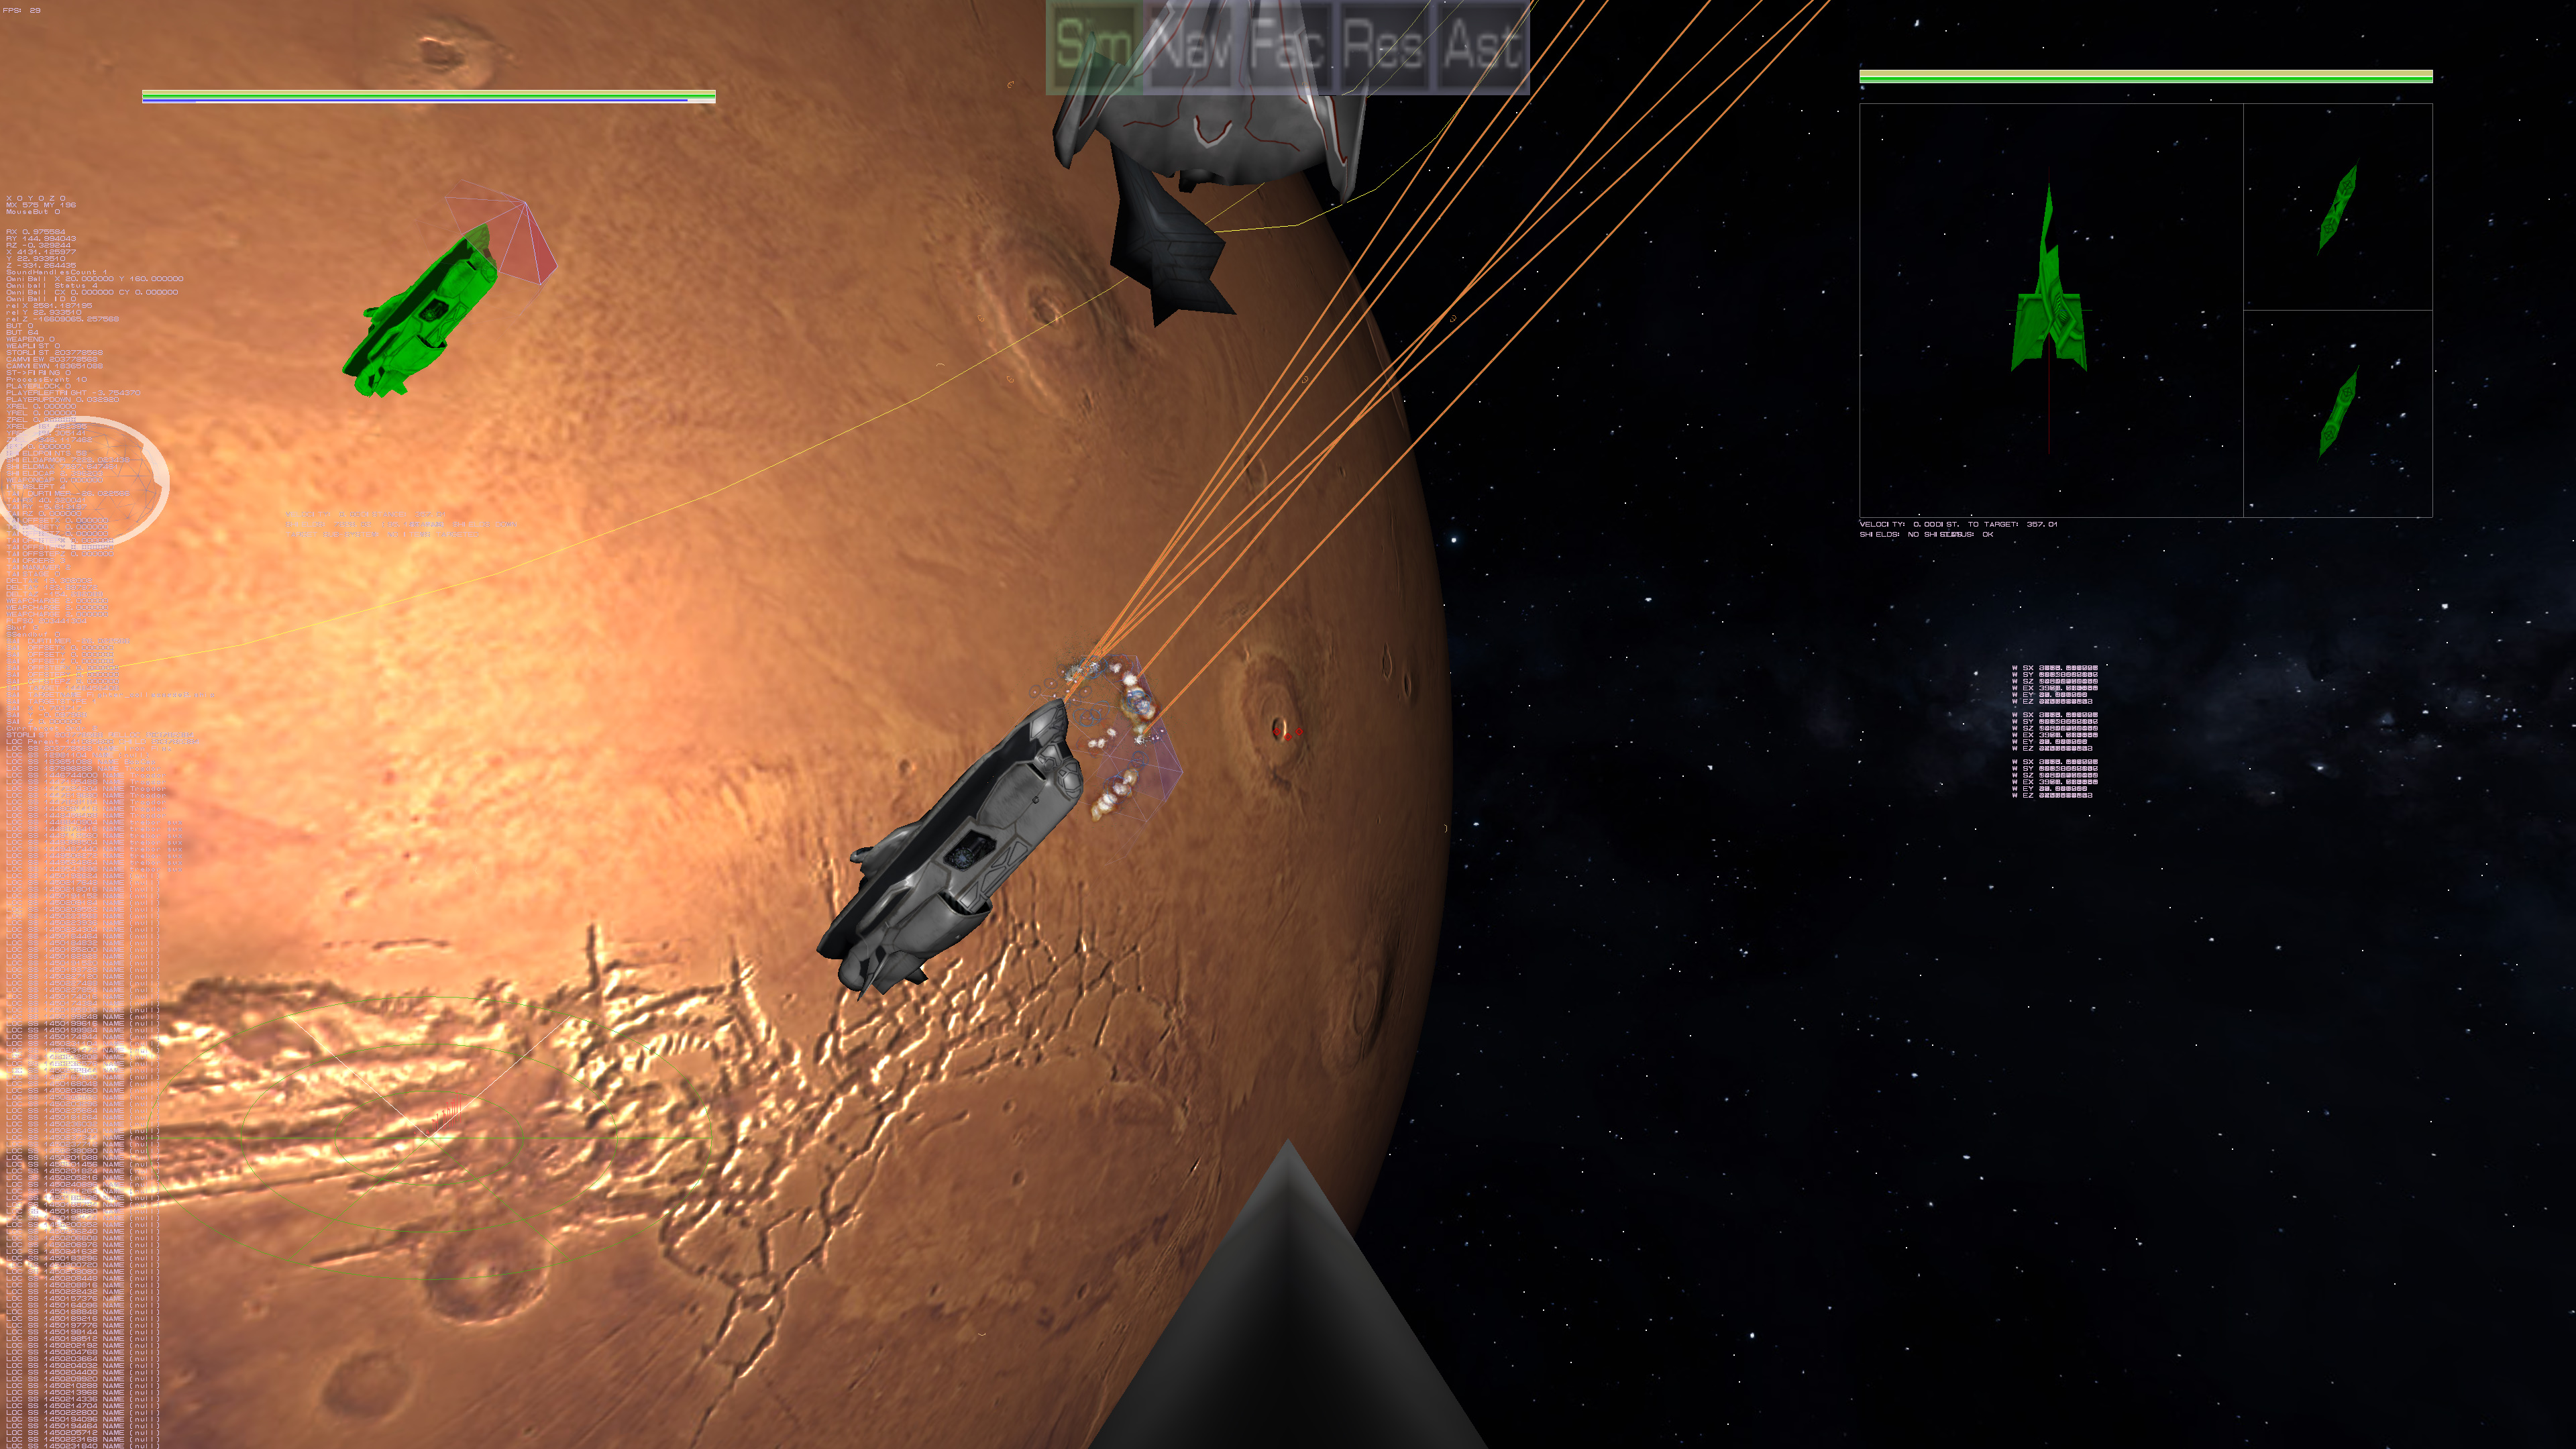
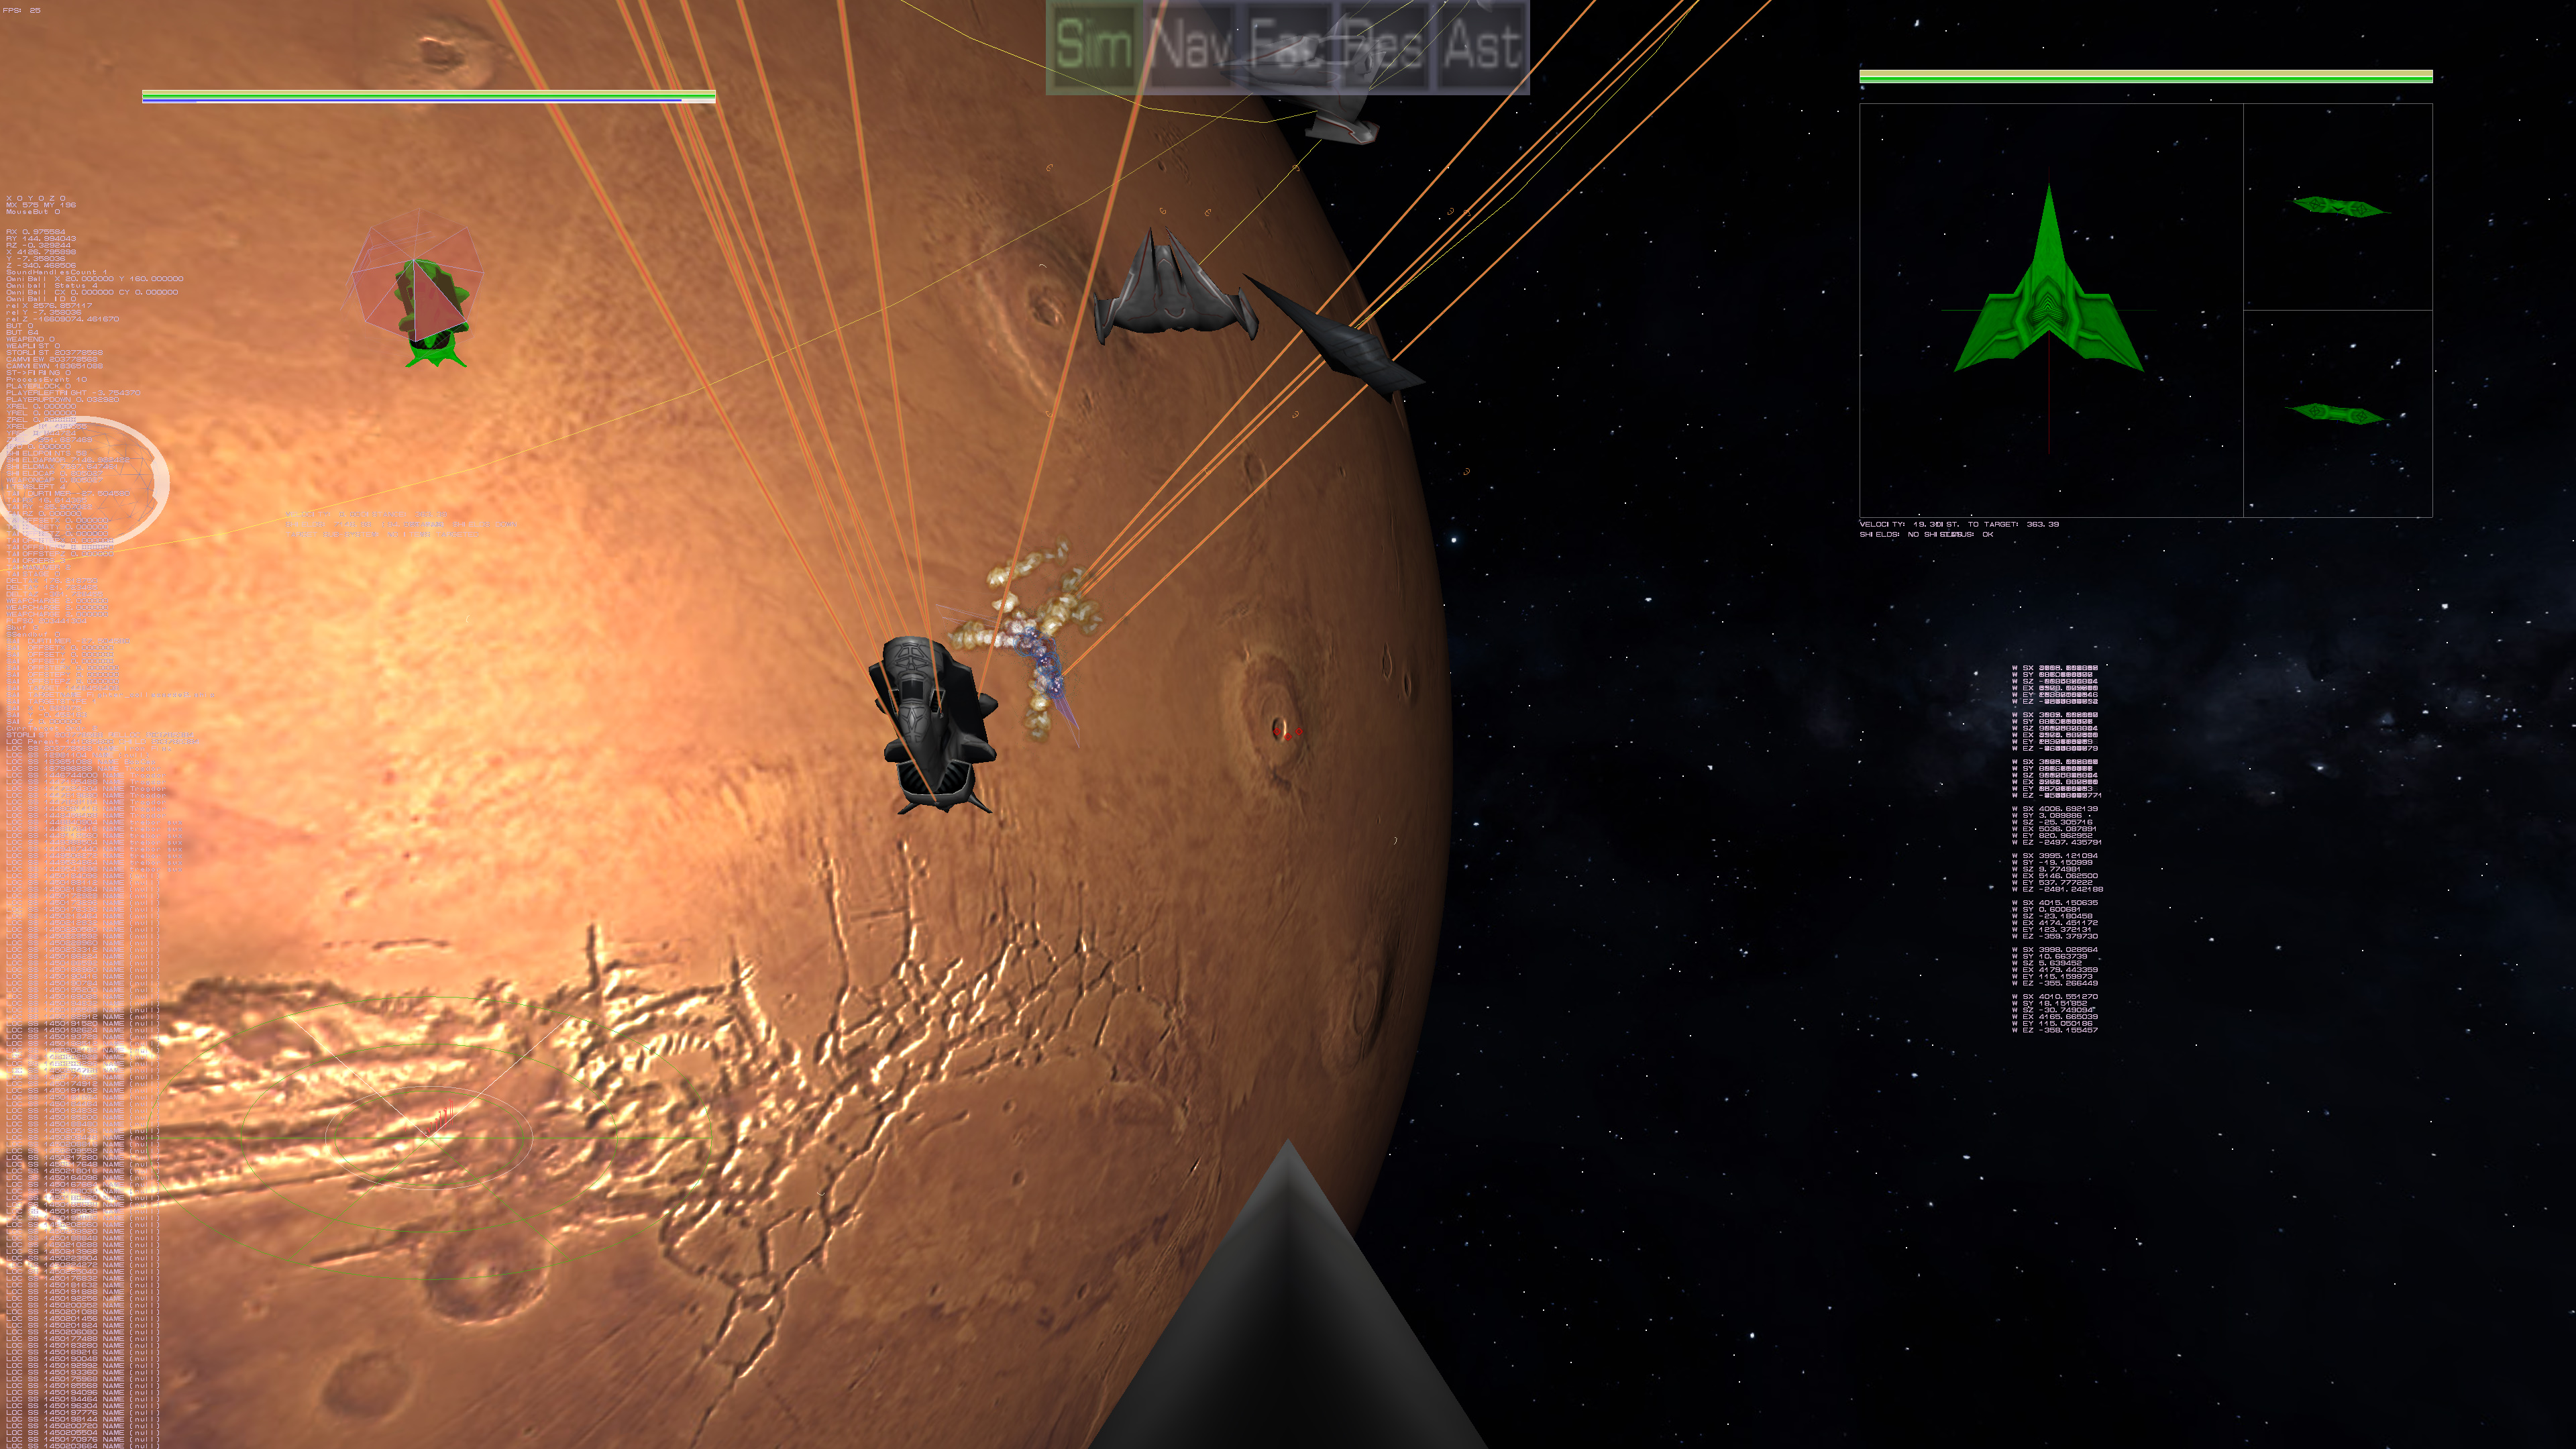


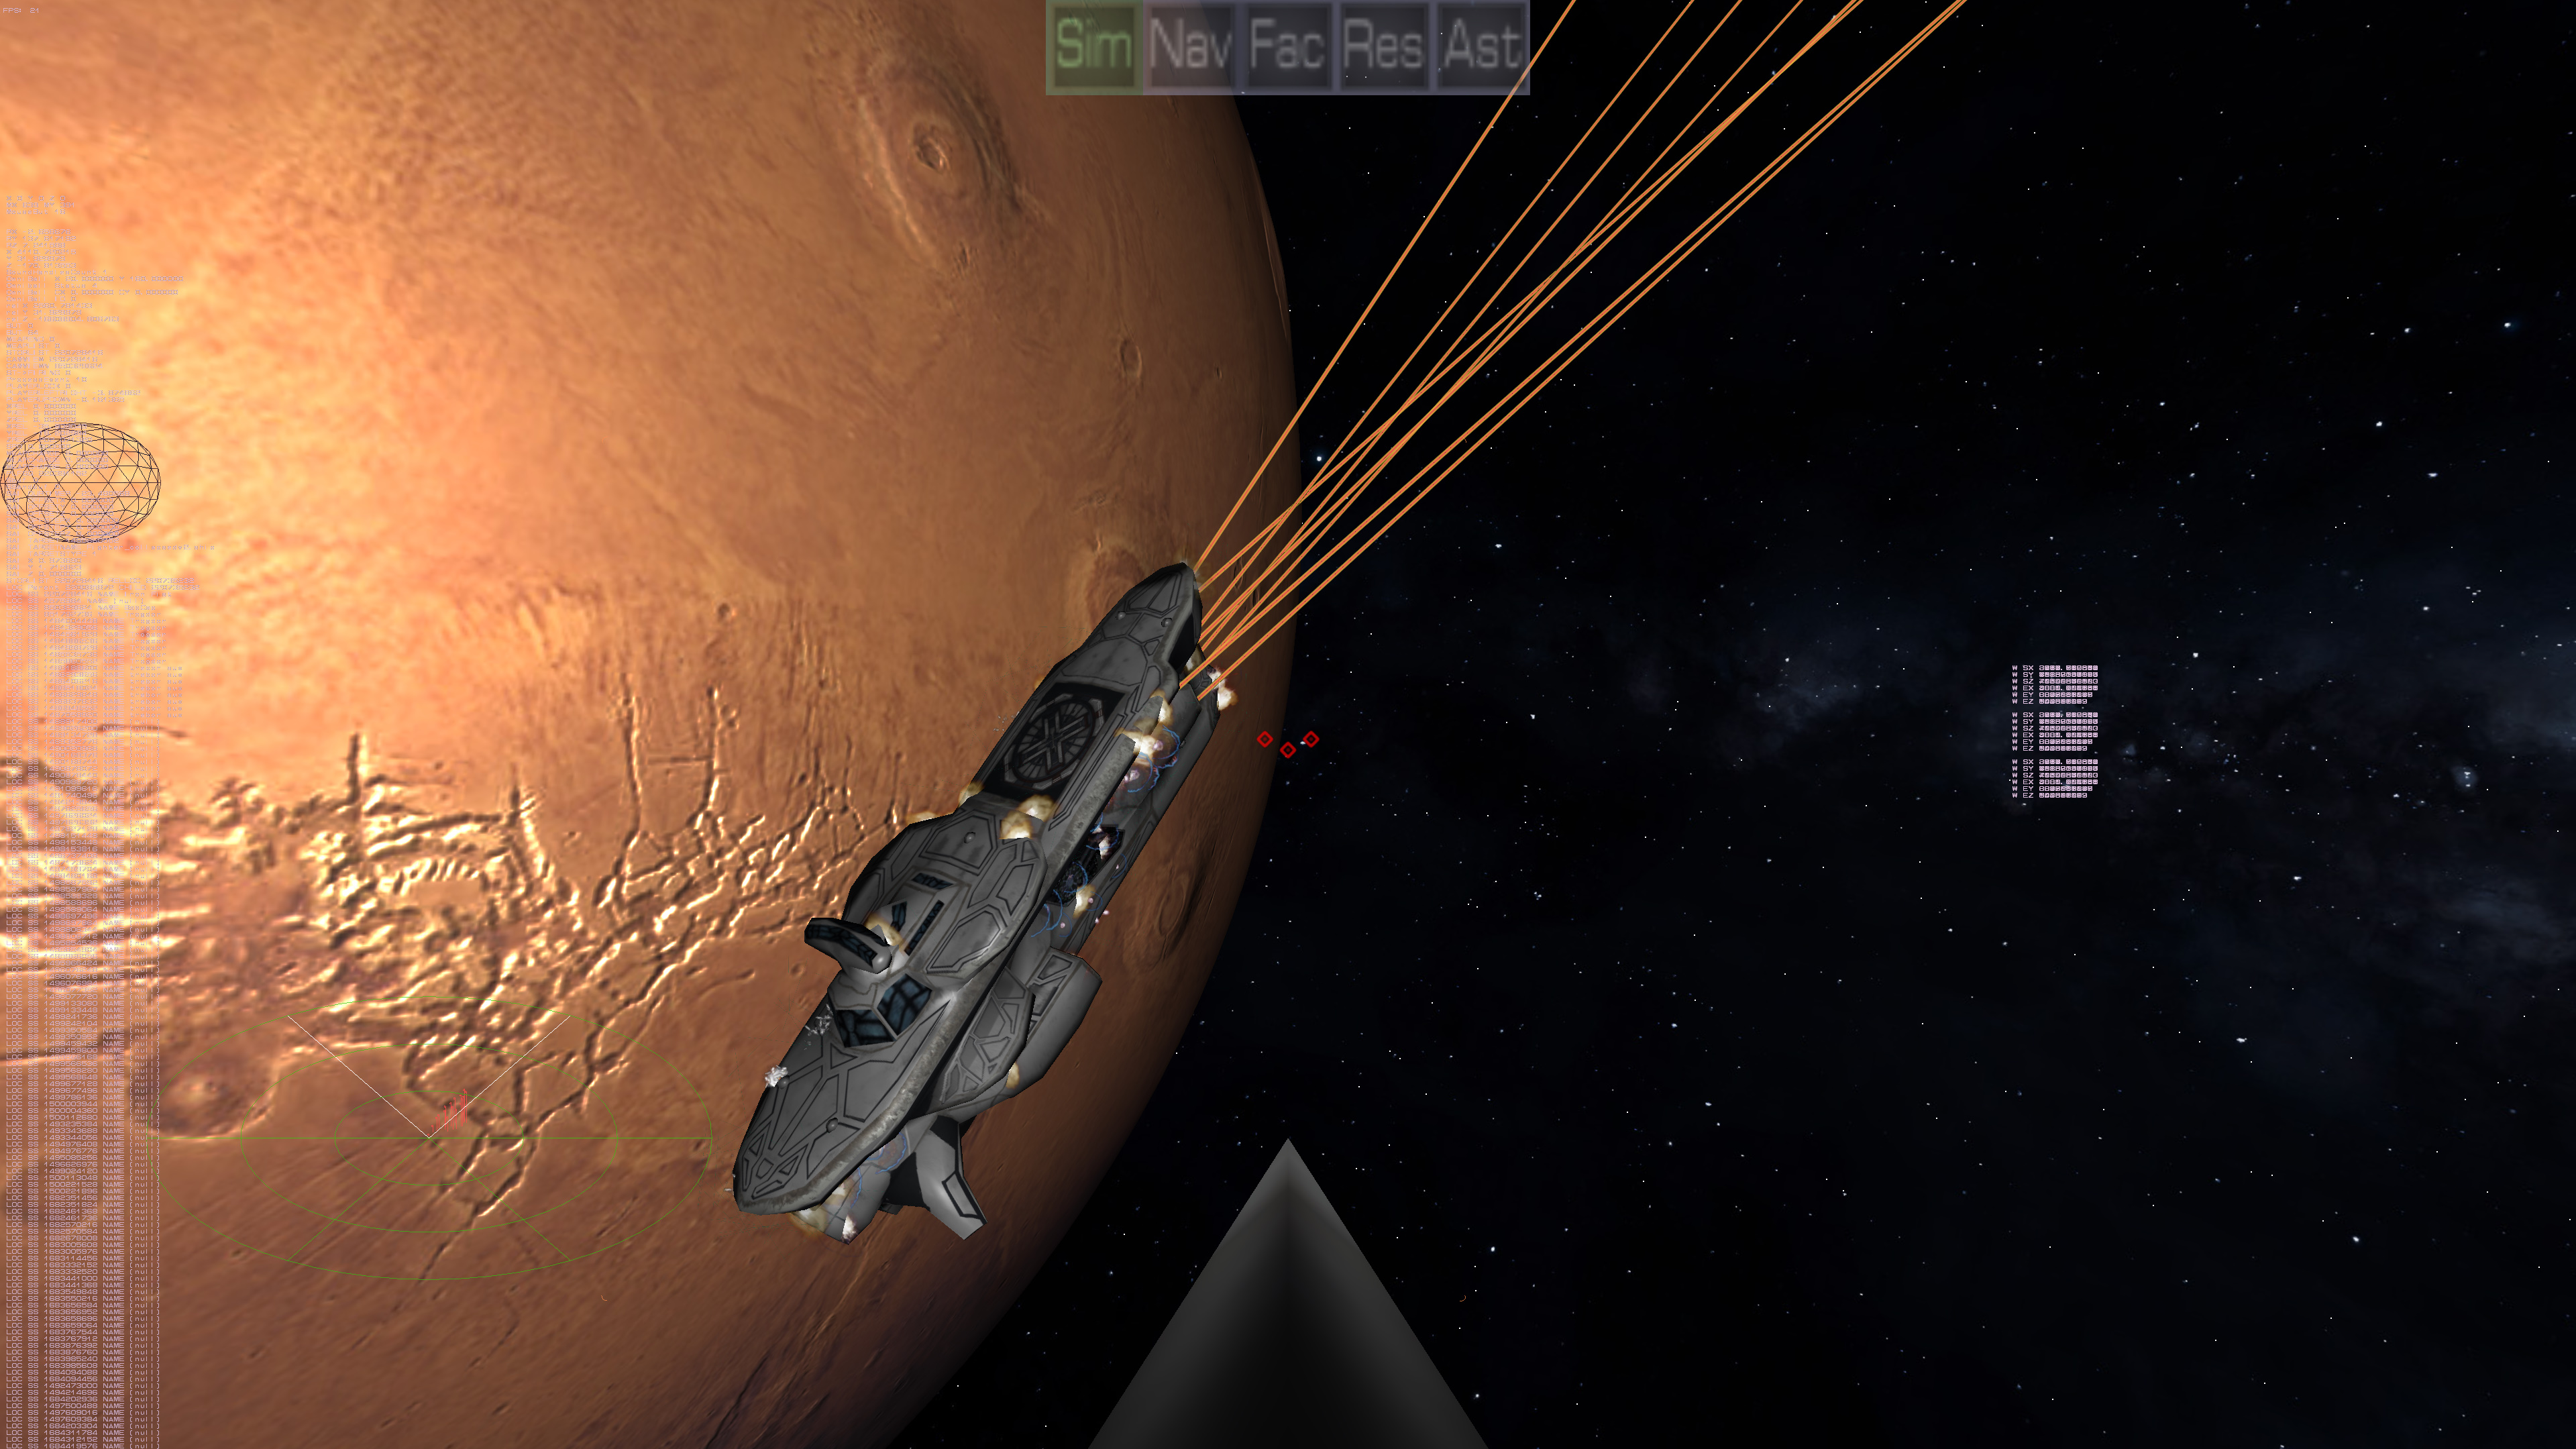
I don't always post, obviously, but a lot has been getting accomplished. The two damage monitors are back up. The self damage monitor lets you see your own ship from all sides so you know where you are being breached and what to cover.
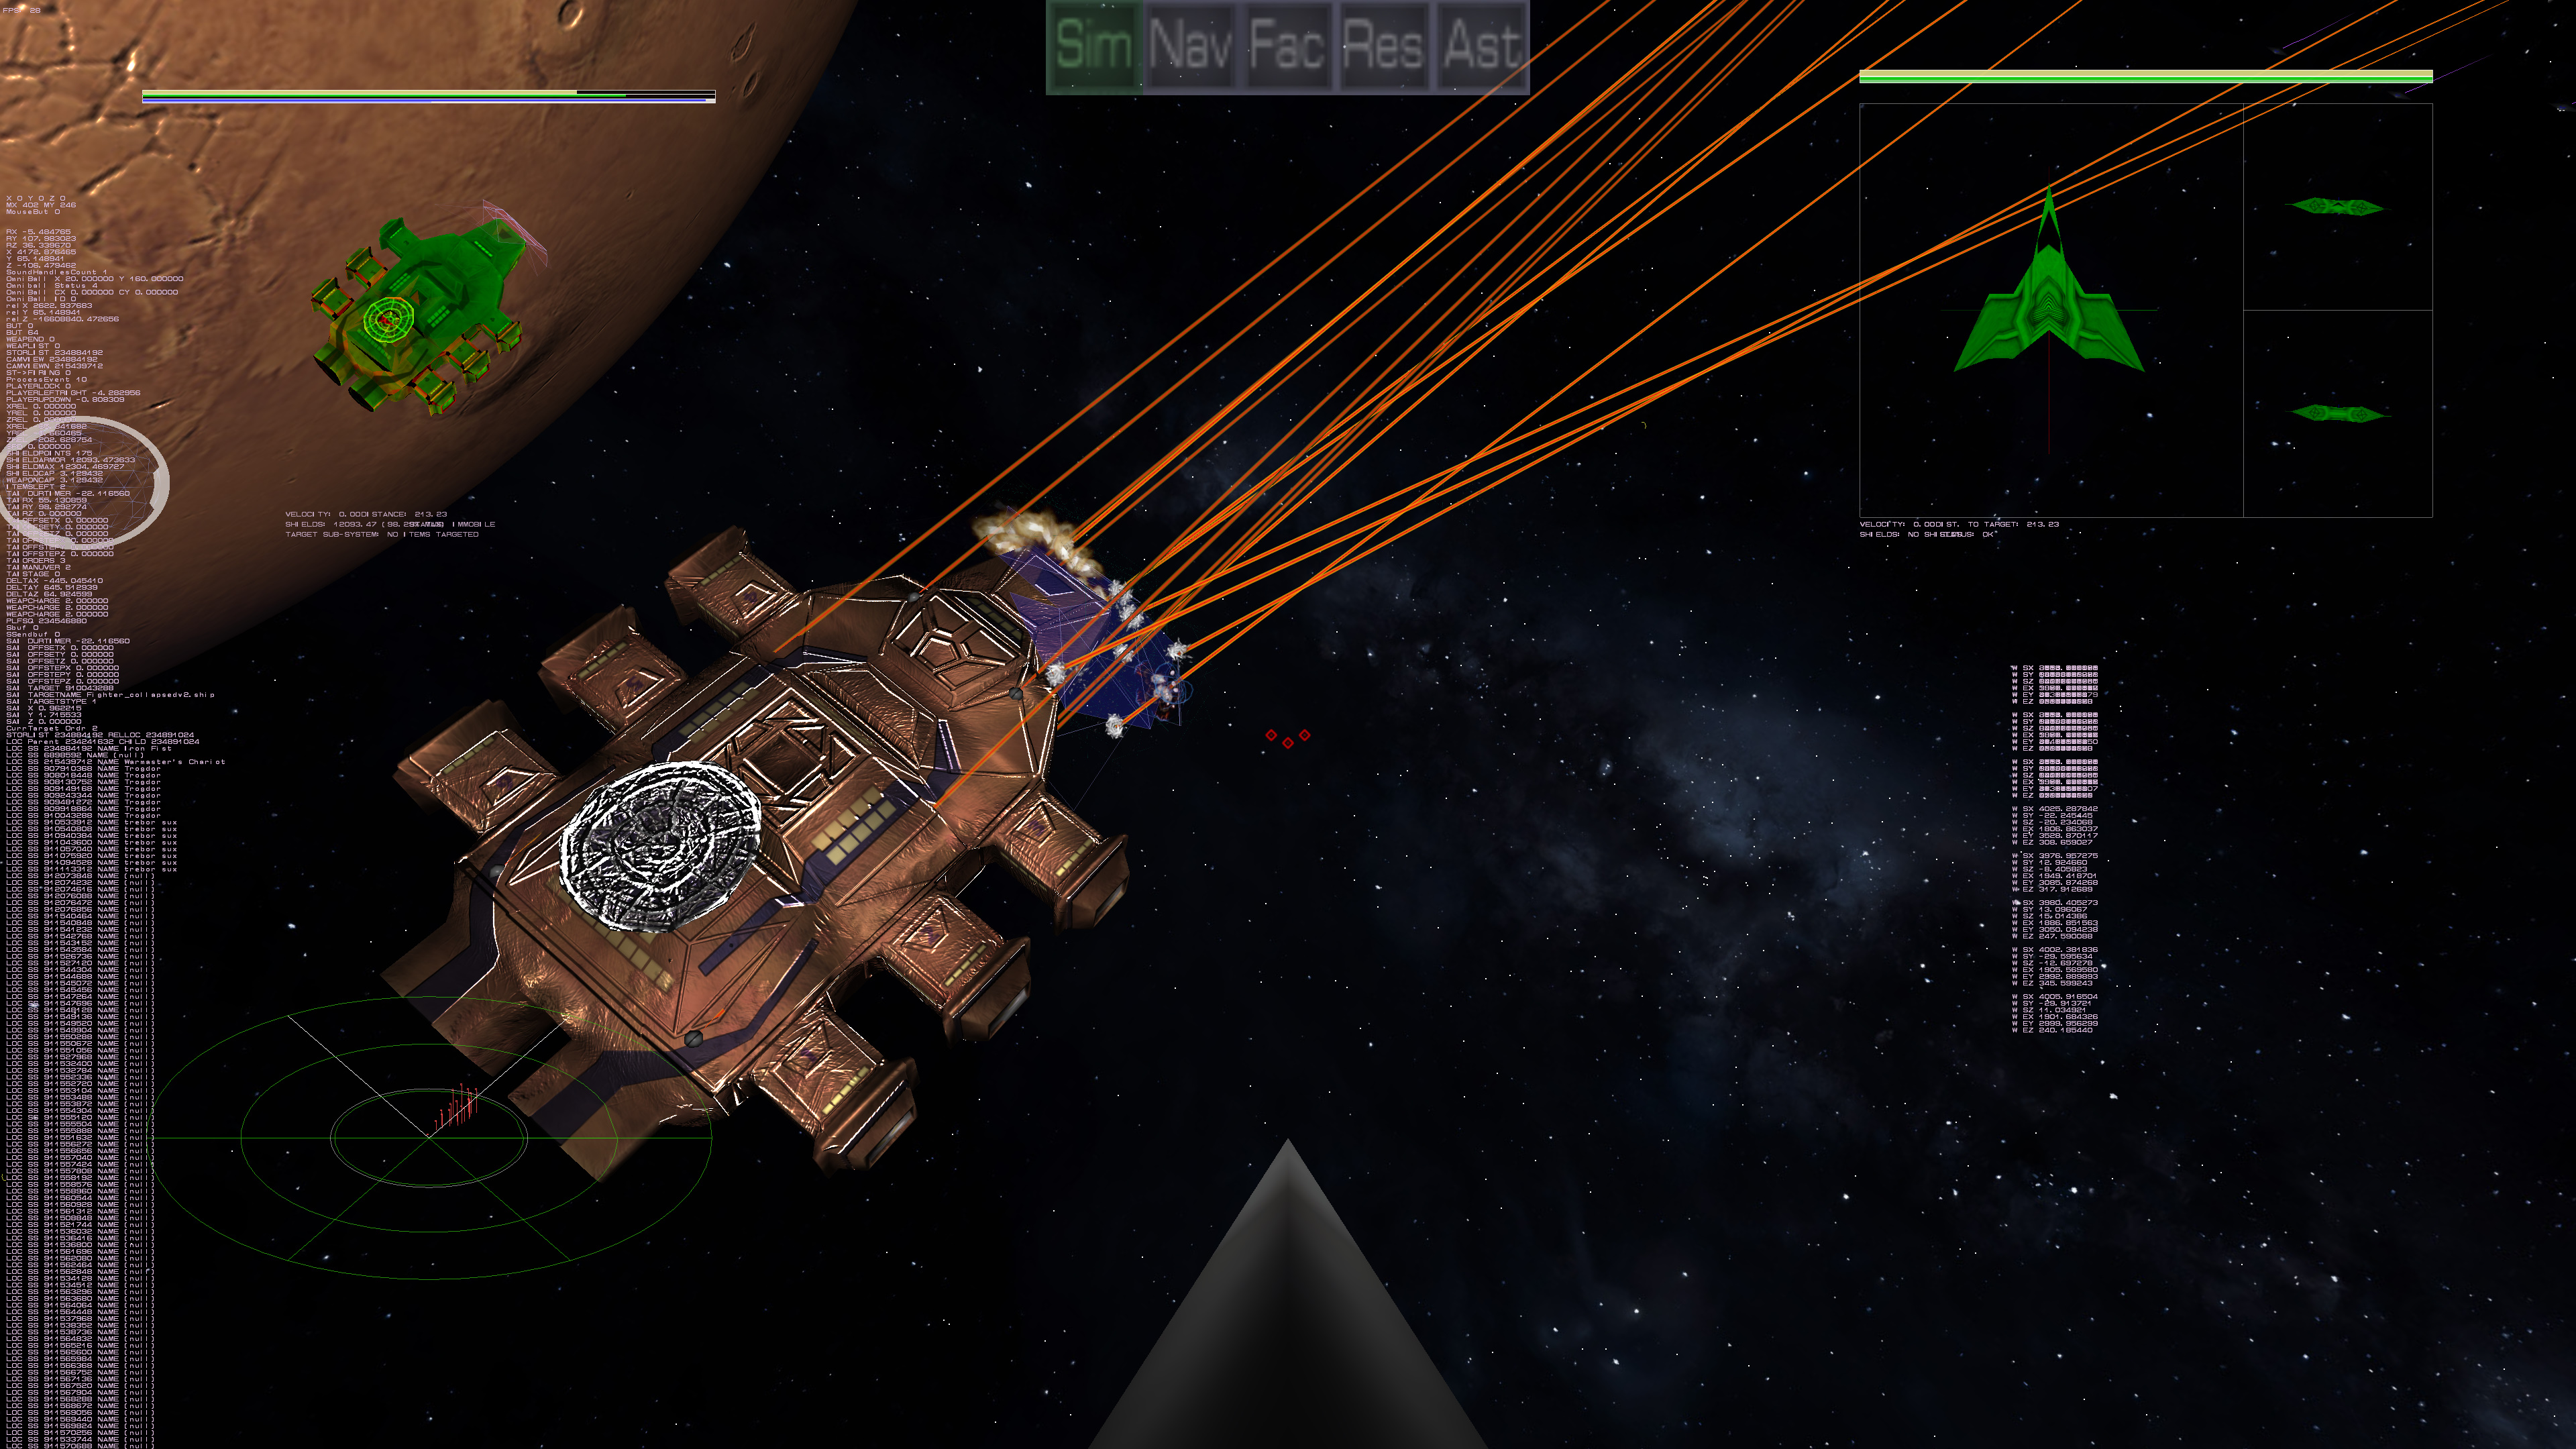
The target monitor has several features. It shows the enemy at the angle to you, and in so doing, shows where they are vulnerable, as shown in the attached pictures. Green is fully armored, which then transitions to yellow then to red then to black. Black means there is no armor left at the location. As you may also notice, shields while in the main game are shown in blue, the damage monitor shows it in red. In the main screen when a shield facet gets hit, it only glows for a few seconds and then fades to being invisible again. On the Targetted Damage Monitor, it shows the damaged facet less transparent as it is more damaged, until it cannot block at that location anymore, in which case a red outline appears and the facet goes completely transparent, so you now litterialy see through the shield, which is the point. As the pictures progress, one can see how battle damage would progress.
The last few screens shots are meant to show item targeting. As you target specific items that a ship may have, the body of the enemy ship will change to blue so you know where to target. So if you want to make sure where the shield generator is on the enemy ship, you know the area to concentrate on.
There are other updates, of course. Some optimizations where were really needed. A new special effects system which I hope to have displayed soon...
Mostly Bug Stomping...
Jun 9th

Mostly Bug stomping in the old shipbuilder. It's actually become stable, which is scary. LOTS of bugs stomped. There were some insidious bugs from the old days that I never figured out back then that I resolved. I made a series of internal debugging tools that have worked wonders. There is one remaining section that needs to be addressed before I will declare it stable (meaning the shipbuilder), which is when an existing ship design is re-imported. The save works fine, the design works fine, the load off the disk works fine (which is obviously a pre-existing design but isn't what I mean). I mean taking a design that is already in memory and loading it in the shipbuilder. While the answer might be just to load it from disk since it's the same design and that works cleanly, the purge of the memory is the problem so if I just orphan it, I'll end up with a memory leak. The clean up code is obviously the issue and I just have to sit down and see what I messed up. But it really should be the last of it.
I already started to design the newer shipbuilder and have a skeleton of a newer more powerful "control" for the new interface. It will be shared in the new factory screen, and likely all over the place. It will be nice when I can show that. ;)
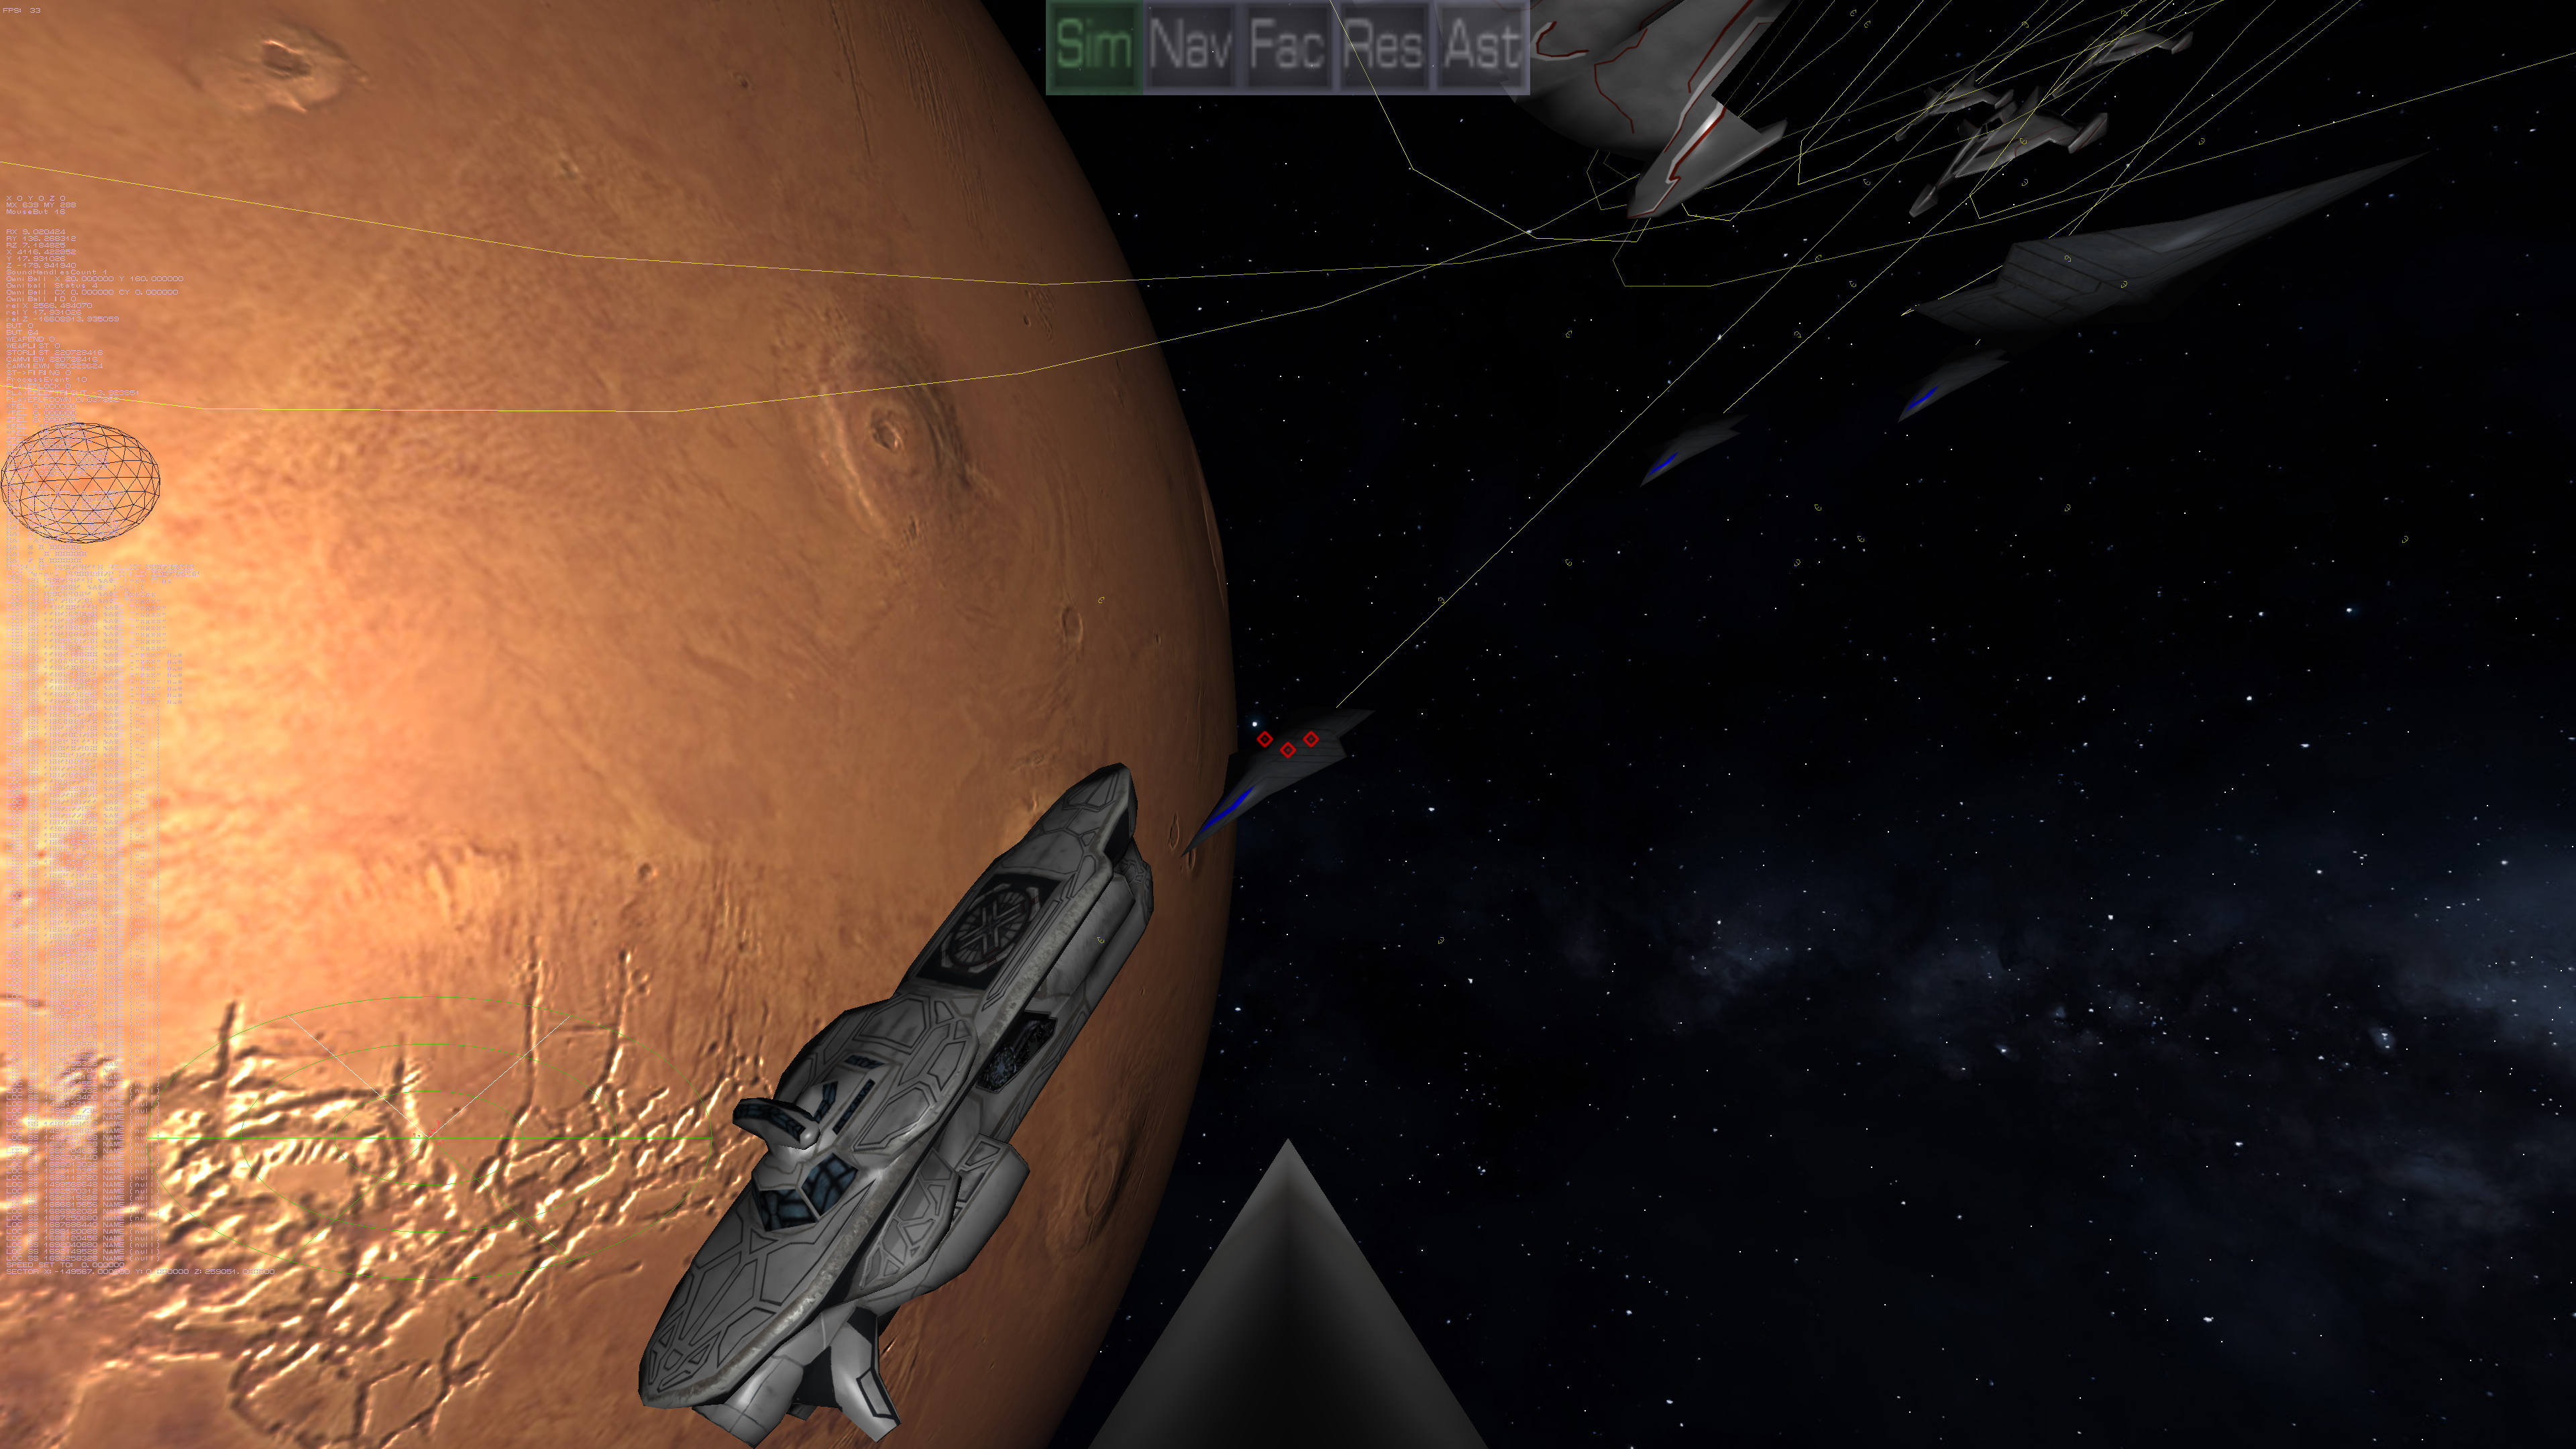
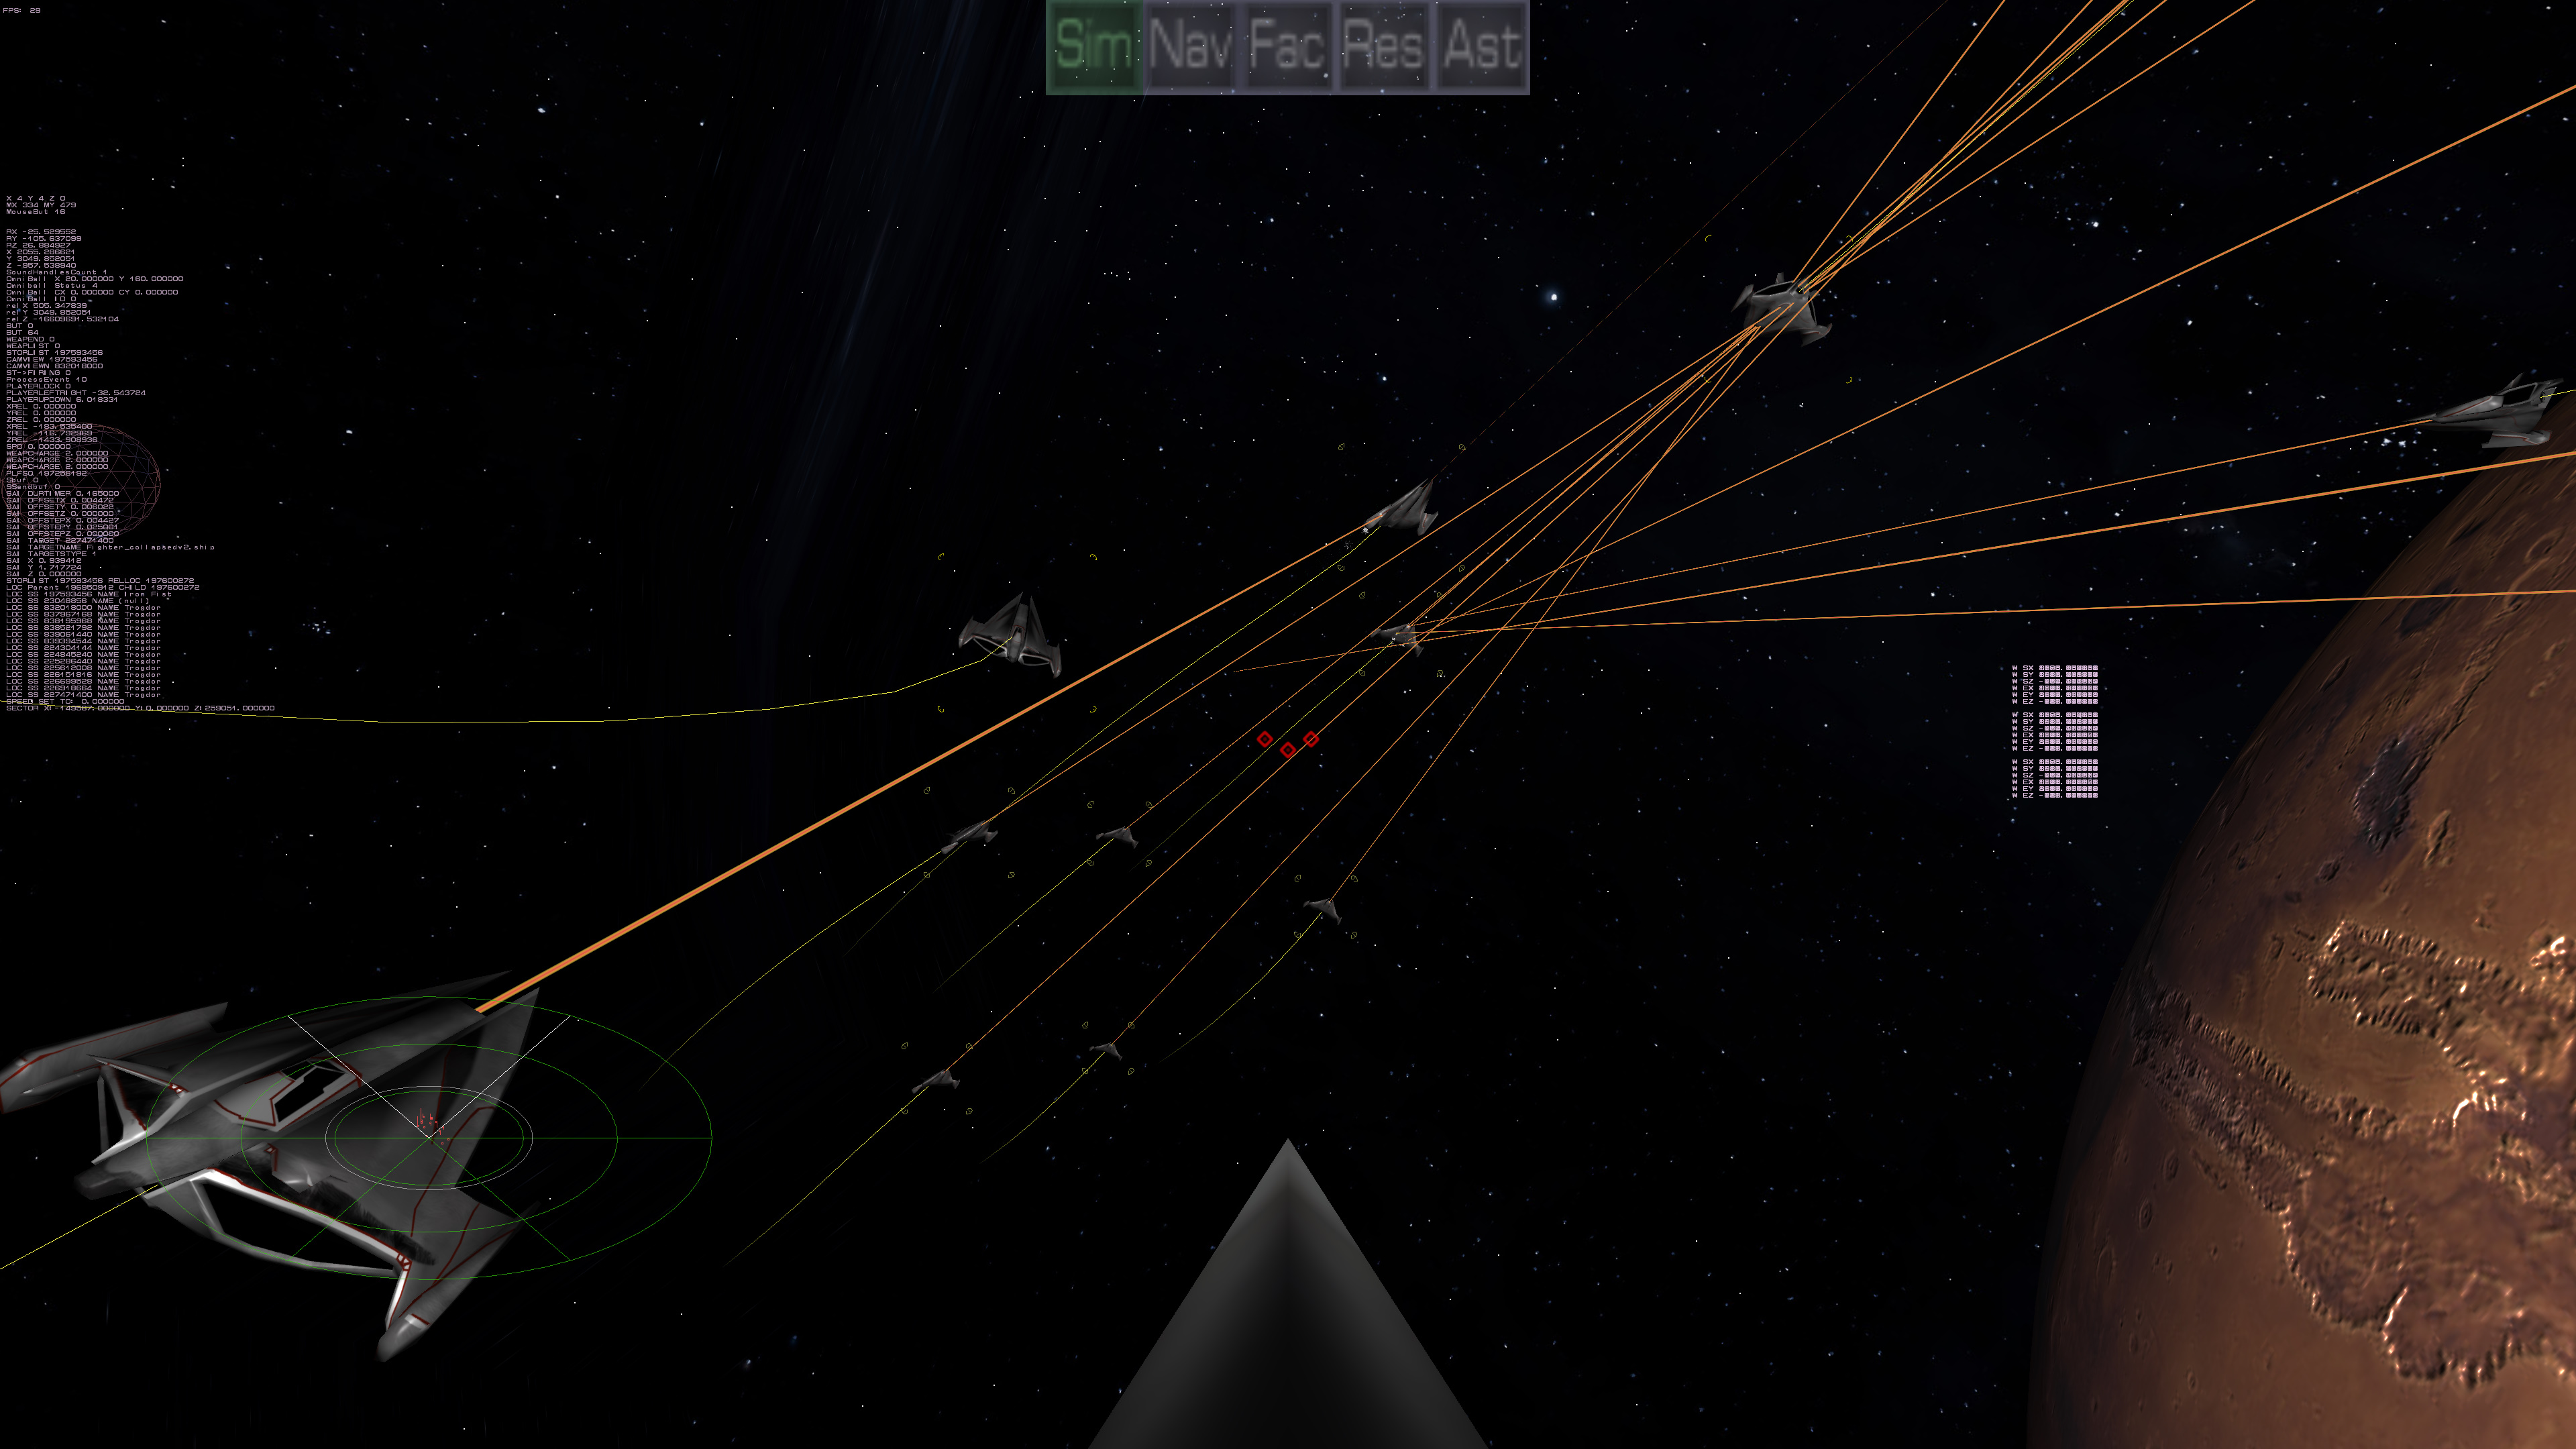
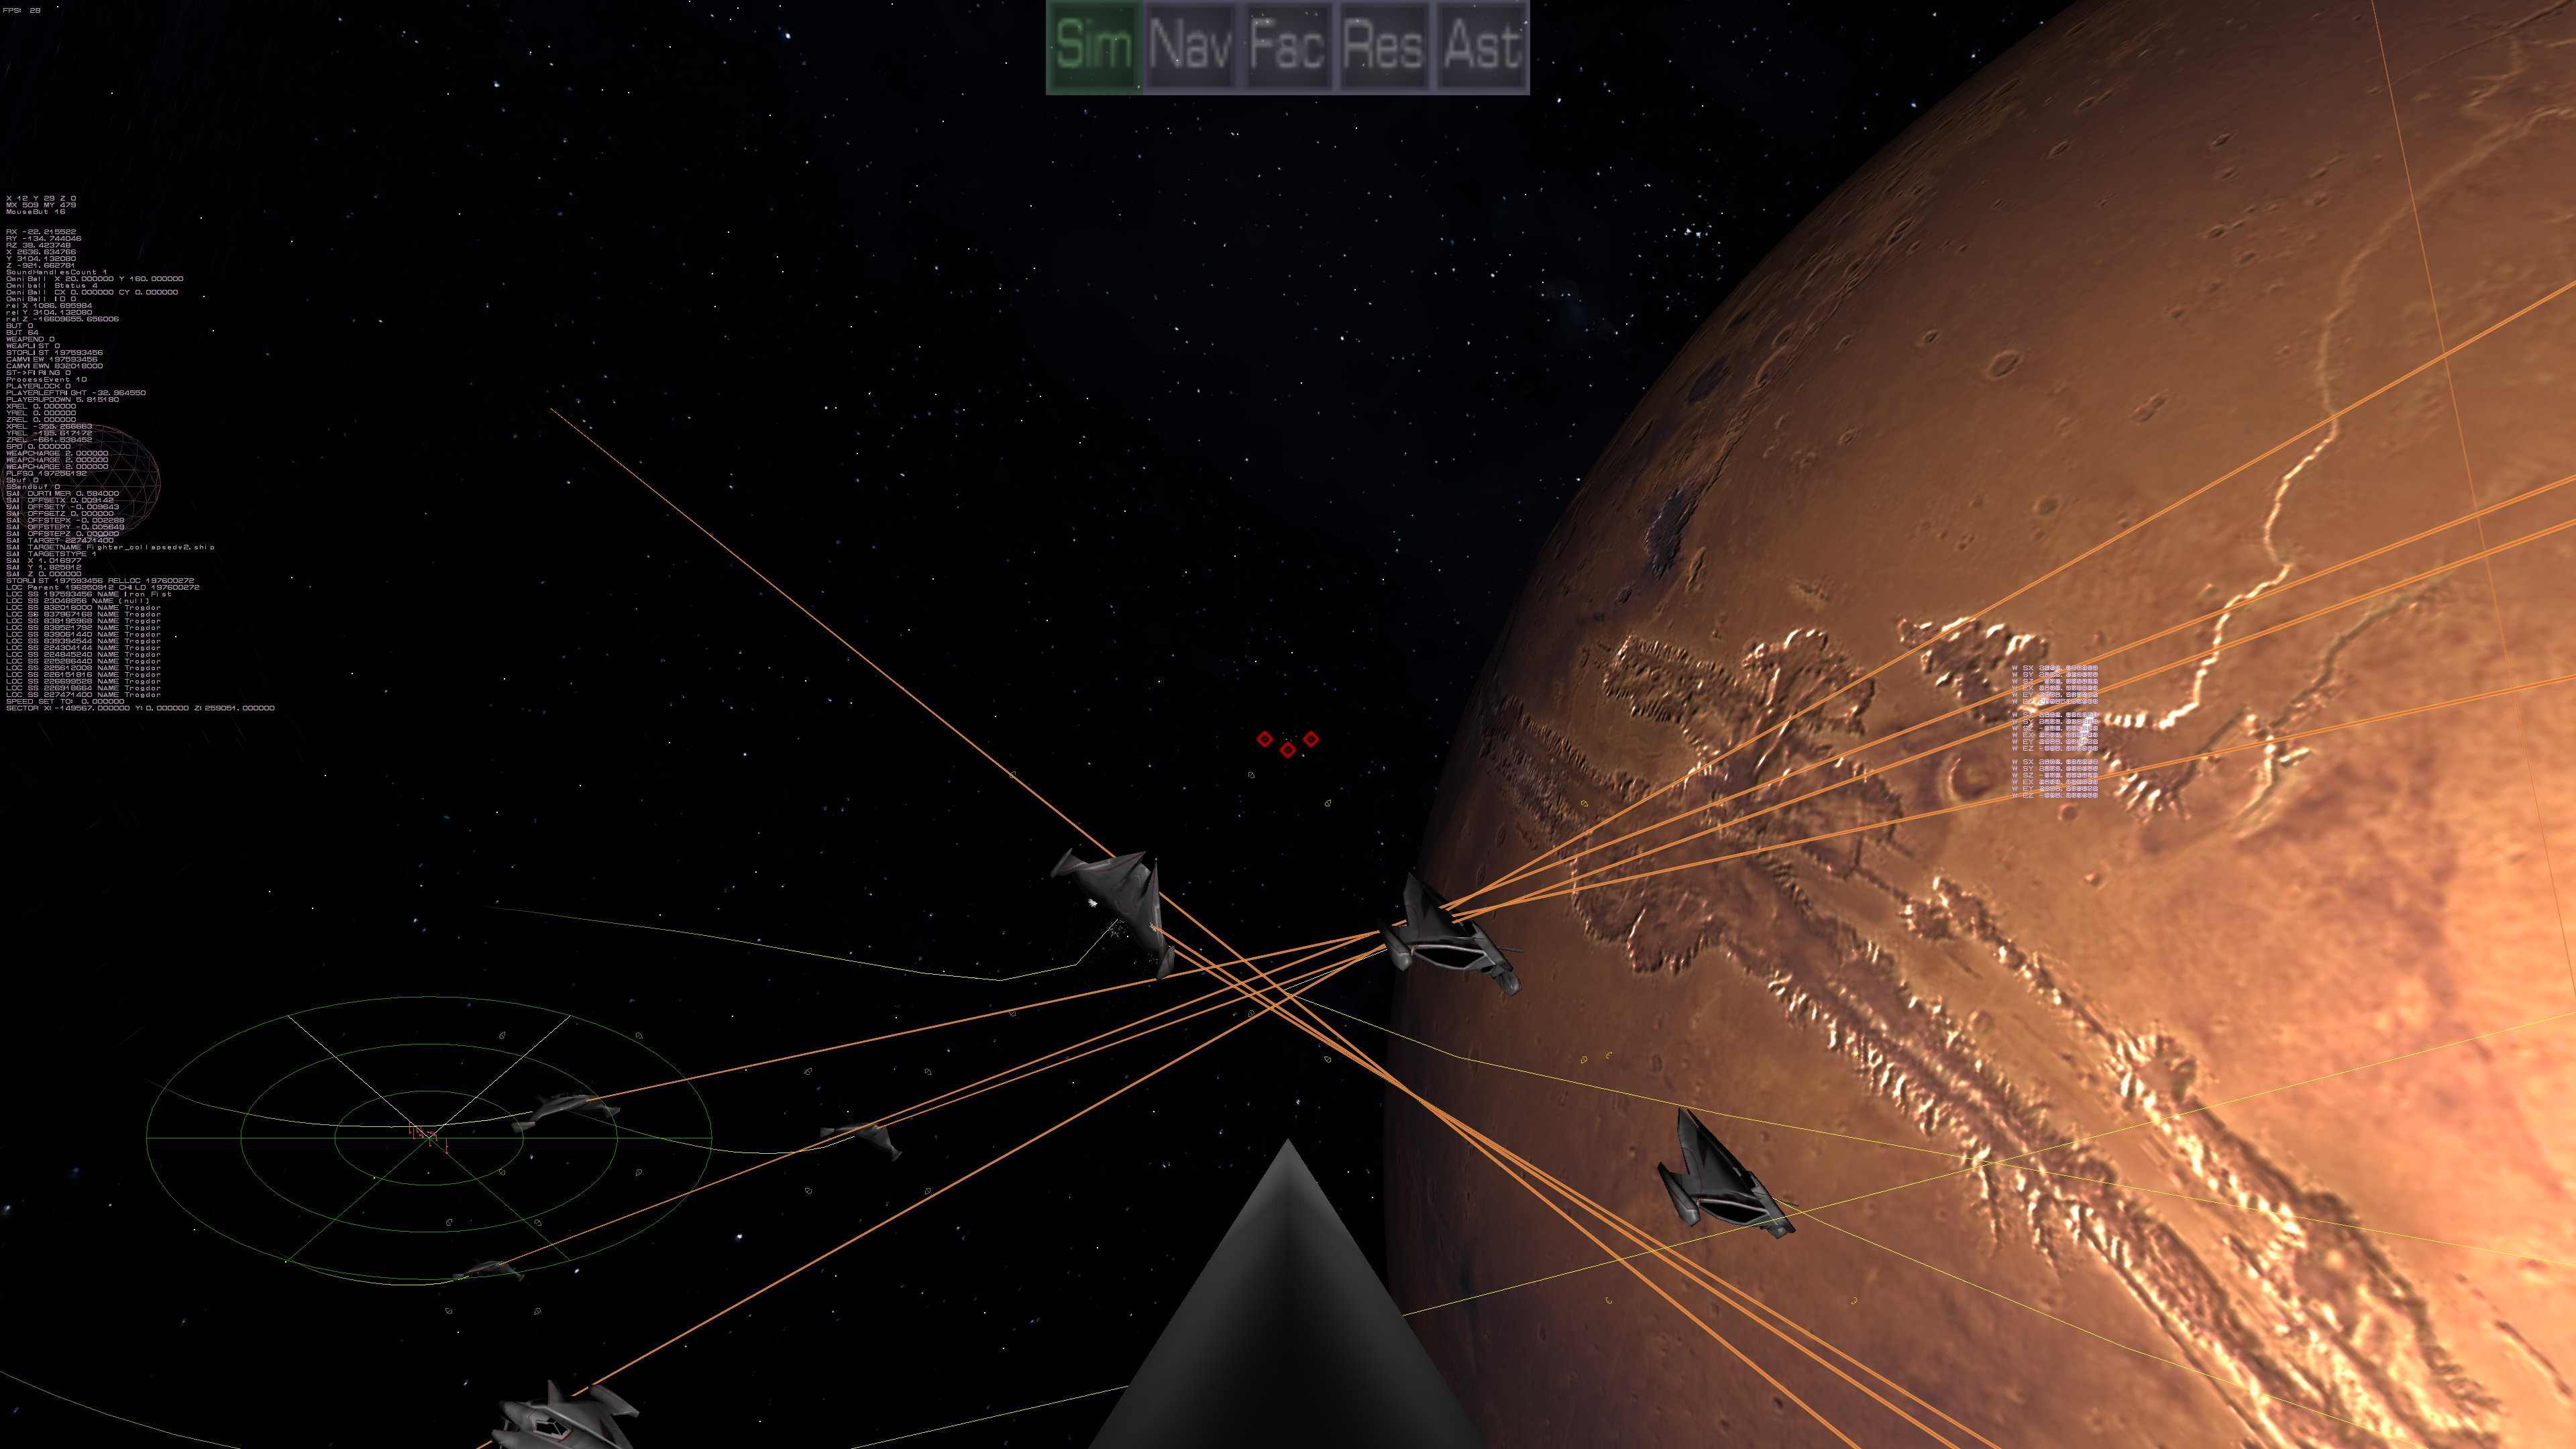
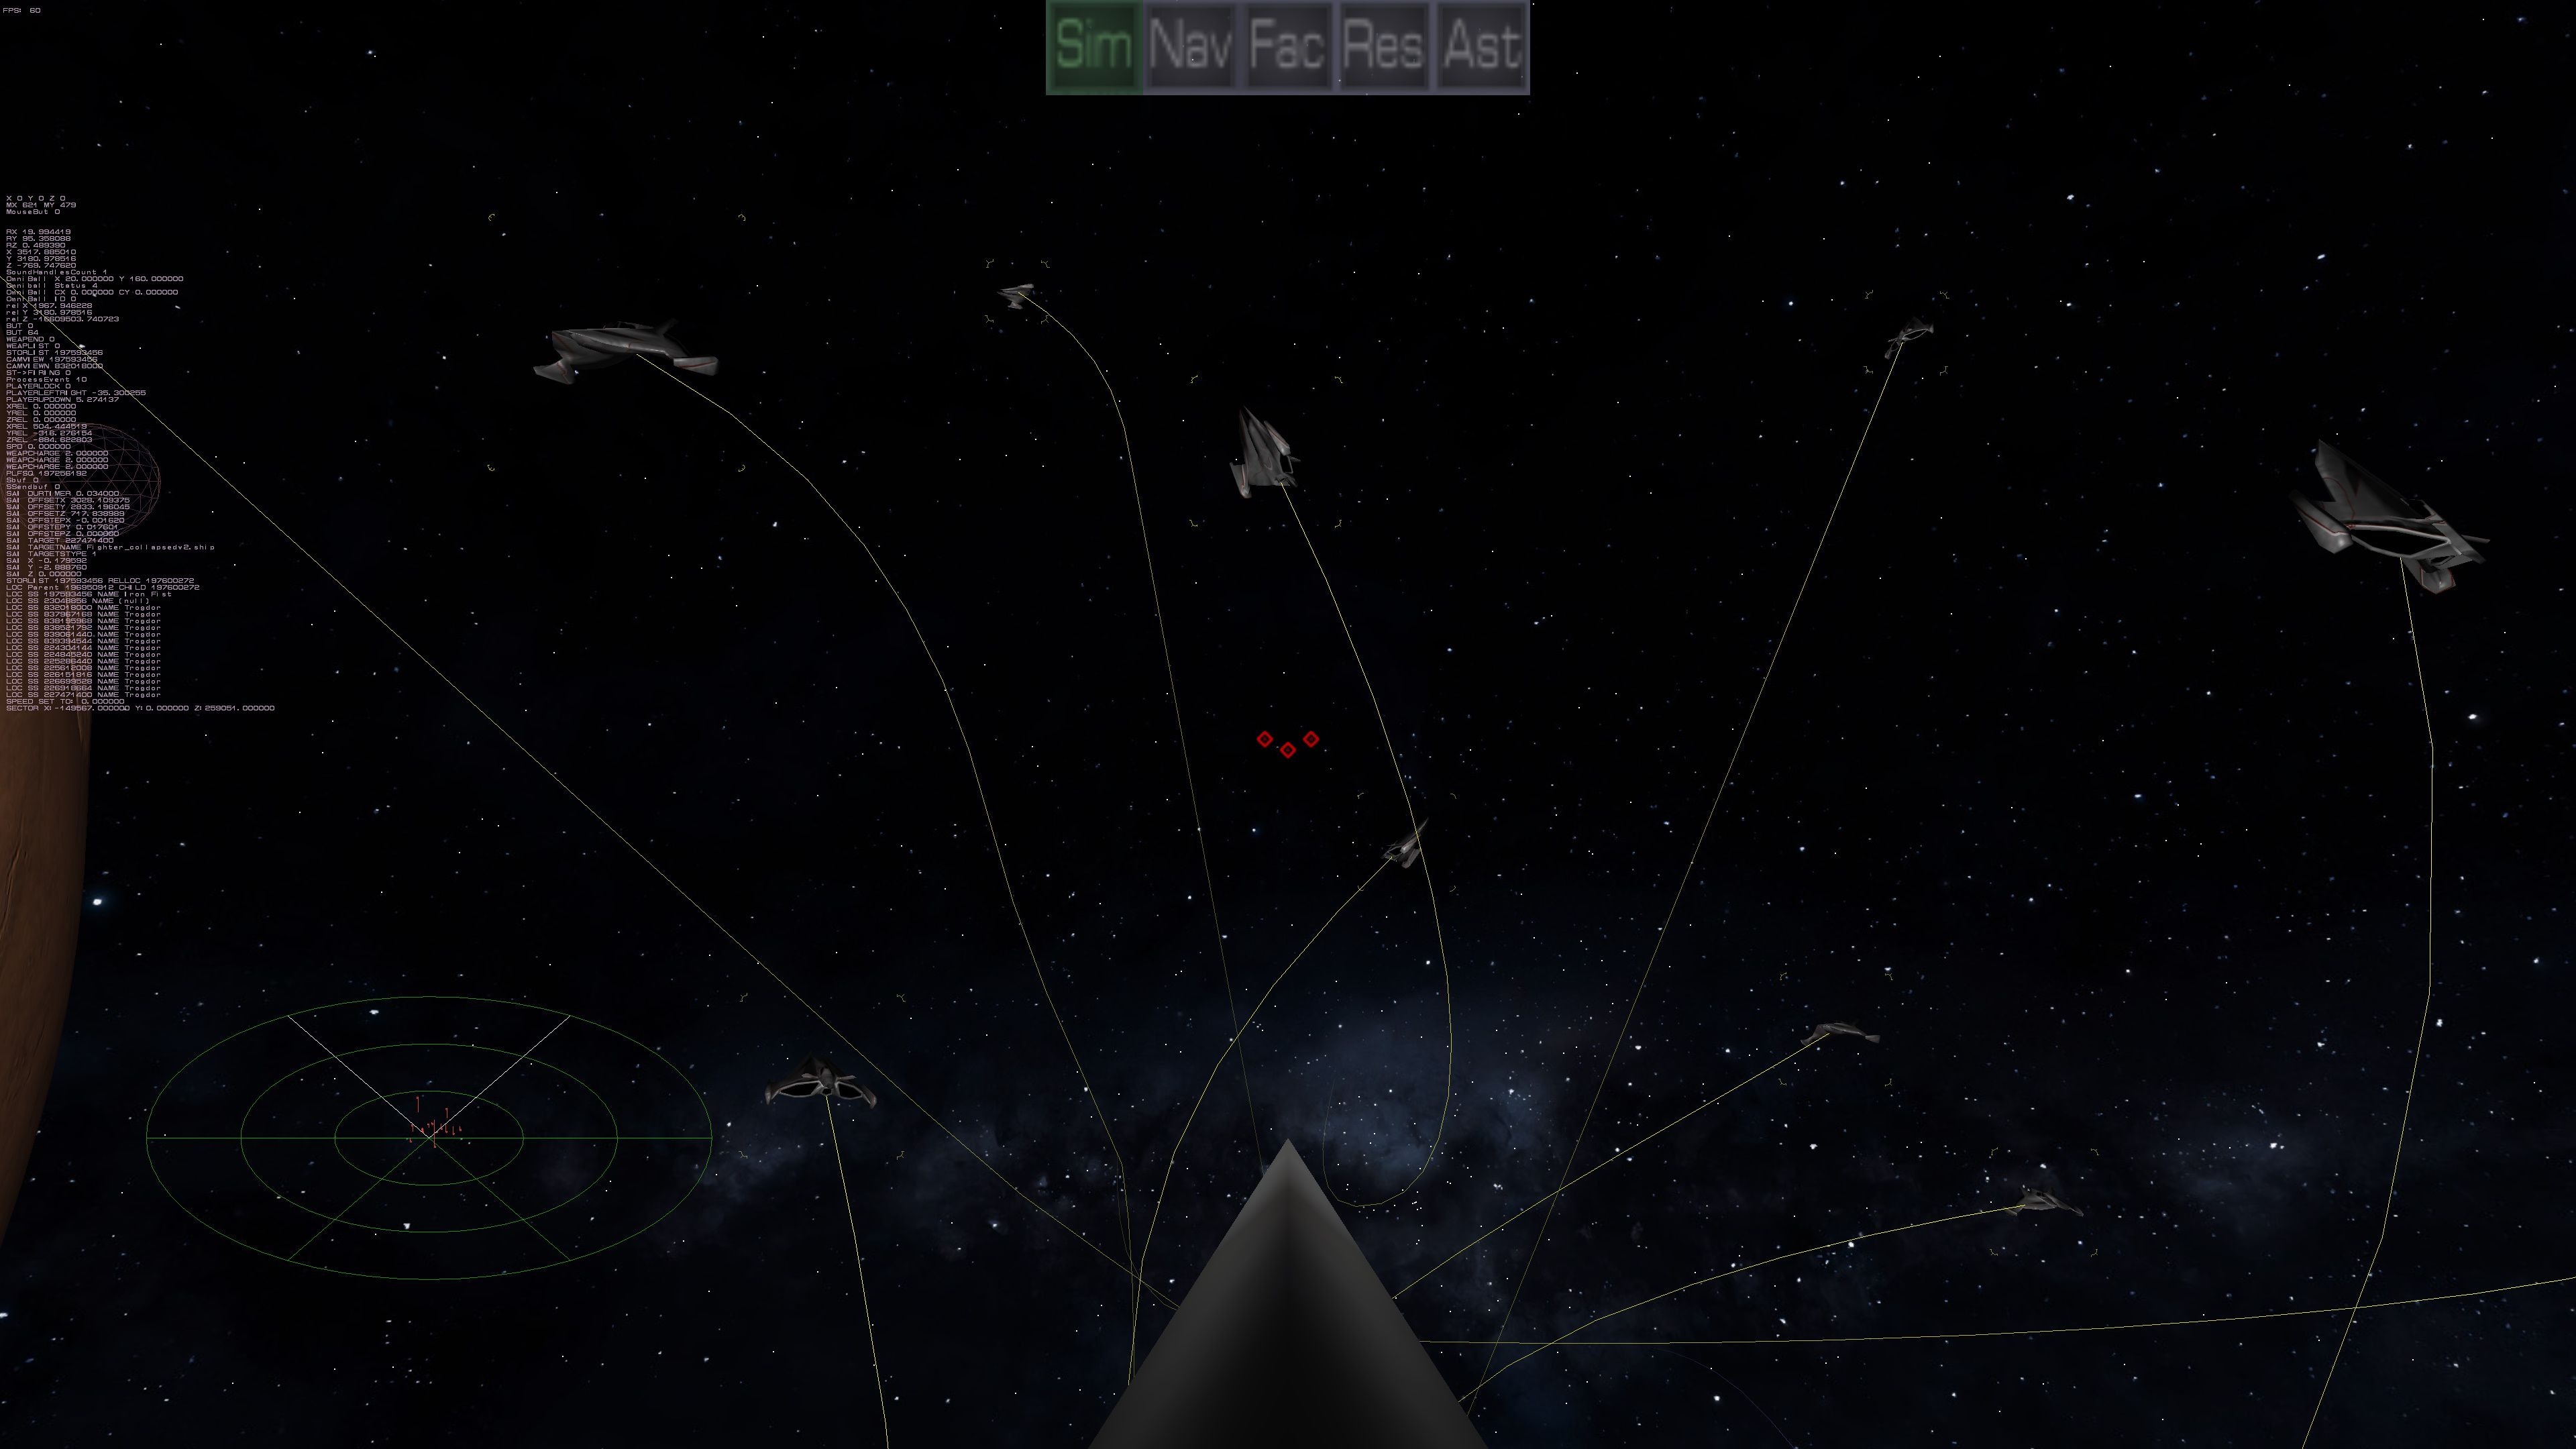
So for your viewing pleasure, I have the new capship model fighting a mix of a new design and an old design. These pictures are before I added shields on the Capitol ship. 14 fighters vs an unshields cap ship, the capship didn't last long. When it was shielded it actually still lost but it was a FAR more fair fight. I really have to add the bump mapping textures to the ship renderer. Everything is there, ready to do it, there is just a small disconnect in the pipeline that I have to bridge.
Old menus back up and hit point bars
Jun 4th
The old menu system is back up and running, along with the Hitpoint display bars. The Hitpoint display bars are broken up into sections and then sub sections. Blue for shields (not shown), Green for Armor, and yellow for internals. The subsections are for things like shields and armor which have individual armor ratings for each facet. The top part shows the lowest percentage of the worse facet. So if the top section of a bar is all black, the armor (or shield) has been breached. The bottom part of the subsection shows overall armor(or shielding). The yellow section isn't broken up into subsections since internals just have straight hitpoints. If all the internals reachs zero, the ship/building is destroyed. The hitpoint bars are used for other things too, like the targeting monitor and self-damage monitor, but those aren't running yet.
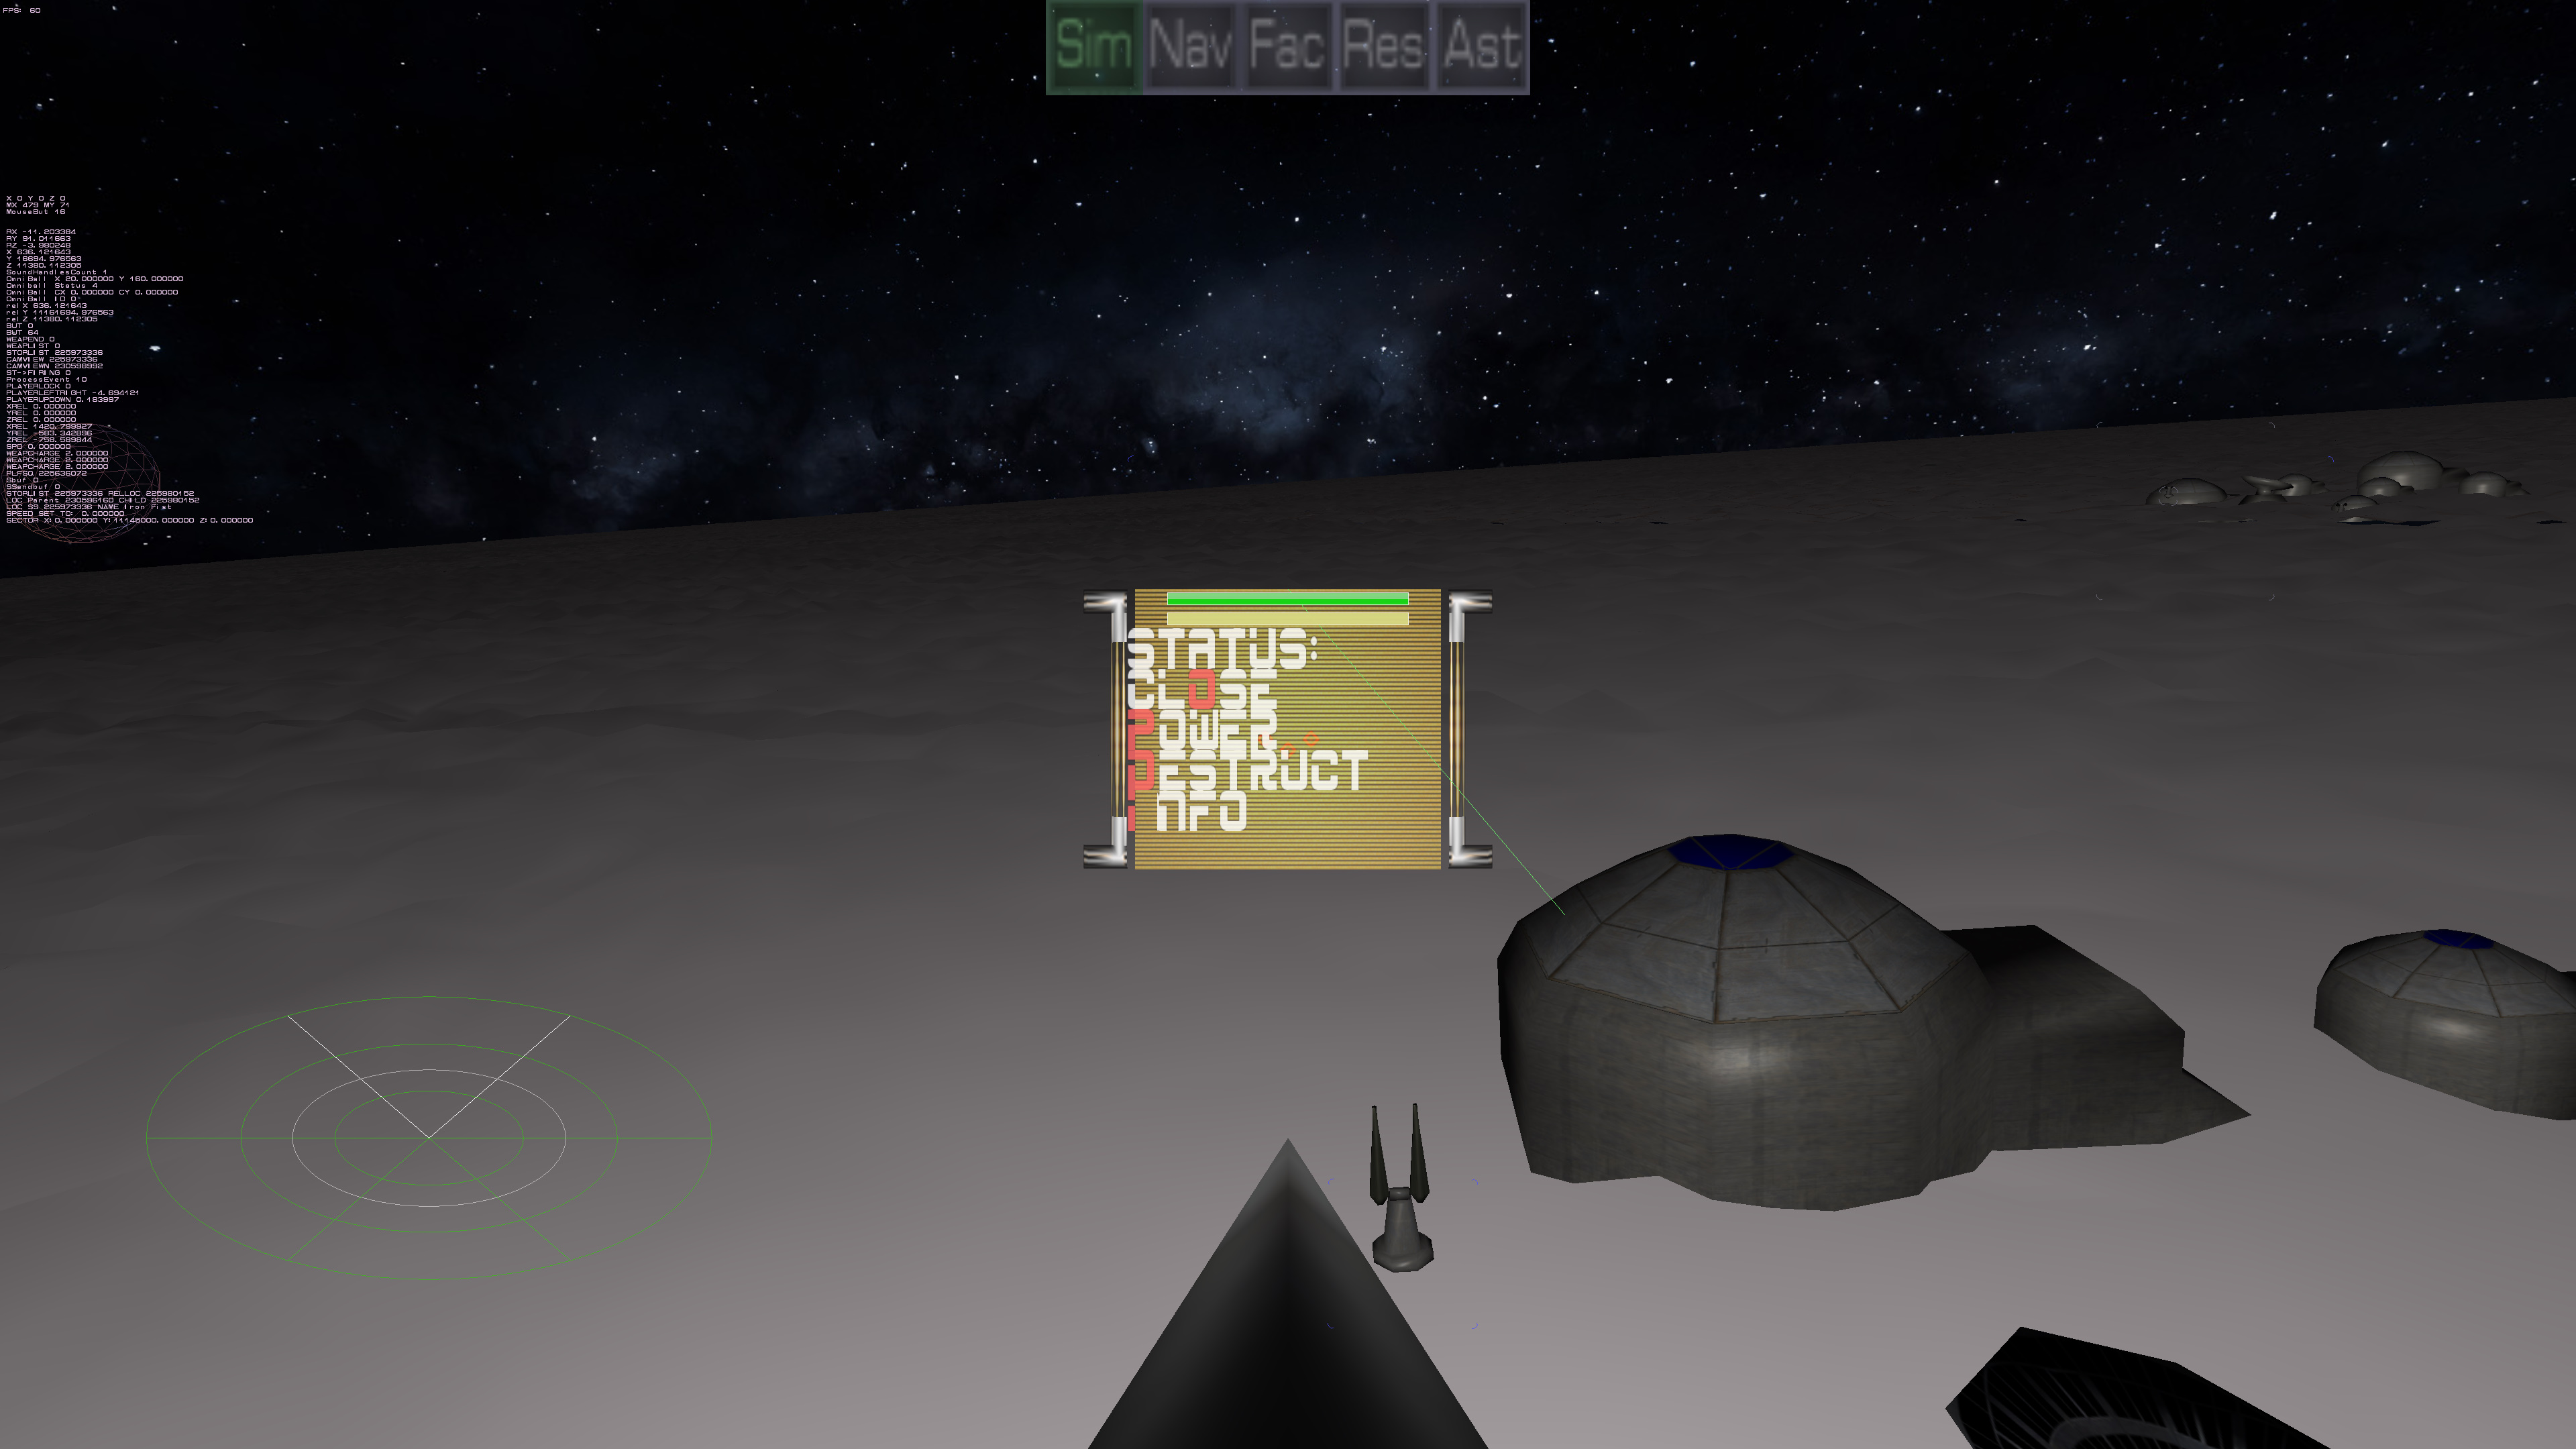
The point of the old menu is to do the RTS (Real Time Strategy) things without having to go to the RTS screen. Most of the time this is to command the builder bot to build a building, but can be used to get statuses and command buildings, including self-destruct and powering down/up.
Full story »
Look who came to dinner....
Jun 2nd

Another major milestone, the old shipbuilder is runnable enough to build new ships to run around and kill each other! So now the NEW ships are available to be built into something.
As with such things, it showed other problems, since the Warmaster AI was trying to design ships without sufficient tech to actually make a ship able to get off the ground. While the quick solve was to put their tech level super high and the problem went away, that isn’t the real answer, so I put something in there that it won’t let them try to design if they just don’t have the components yet. This matters for when you, as the player, start from scratch too.
There was a problem with the ship exporter that had to be fixed since it was creating too many points, which of course tripped the shipbuilding routines, since they assume a cohesive ship.
Interestingly enough, the newer ships didn’t cause a system tank in a furrball any more than it did originally. I suspect the issues are elsewhere, not in the to-hit calculations (not that they don’t need help) but it isn’t as terminal of a problem as I thought it would be. I guess the real test is to try with the much higher polygon count of the cap ship and see how much that makes a difference, but I suspect it won’t make too much of one.
Ok, why no screen shots of the shipbuilder? Because it’s still in the old ancient style. I’m not going to fix the cosmetics of it, since the idea is to design a brand new interface. However, this certainly shows the old autobuilder and auto-helper still work well. Those automatically design a ship from scratch or finish filling in the missing pieces, respectively. It is so players who don’t want to be anal about designing a ship can let the computer do it. The auto-helper is for those that like to put in certain things, but then want the computer to do the heavy lifting for balancing thrusters and power! I used the auto-helper to design what you see in the screen shots. (And yes, I forgot to assign the weapon first points so they are firing from the center, oh well. There is an auto-assigner, but I forgot to use it)
Now to build the far nicer interface!